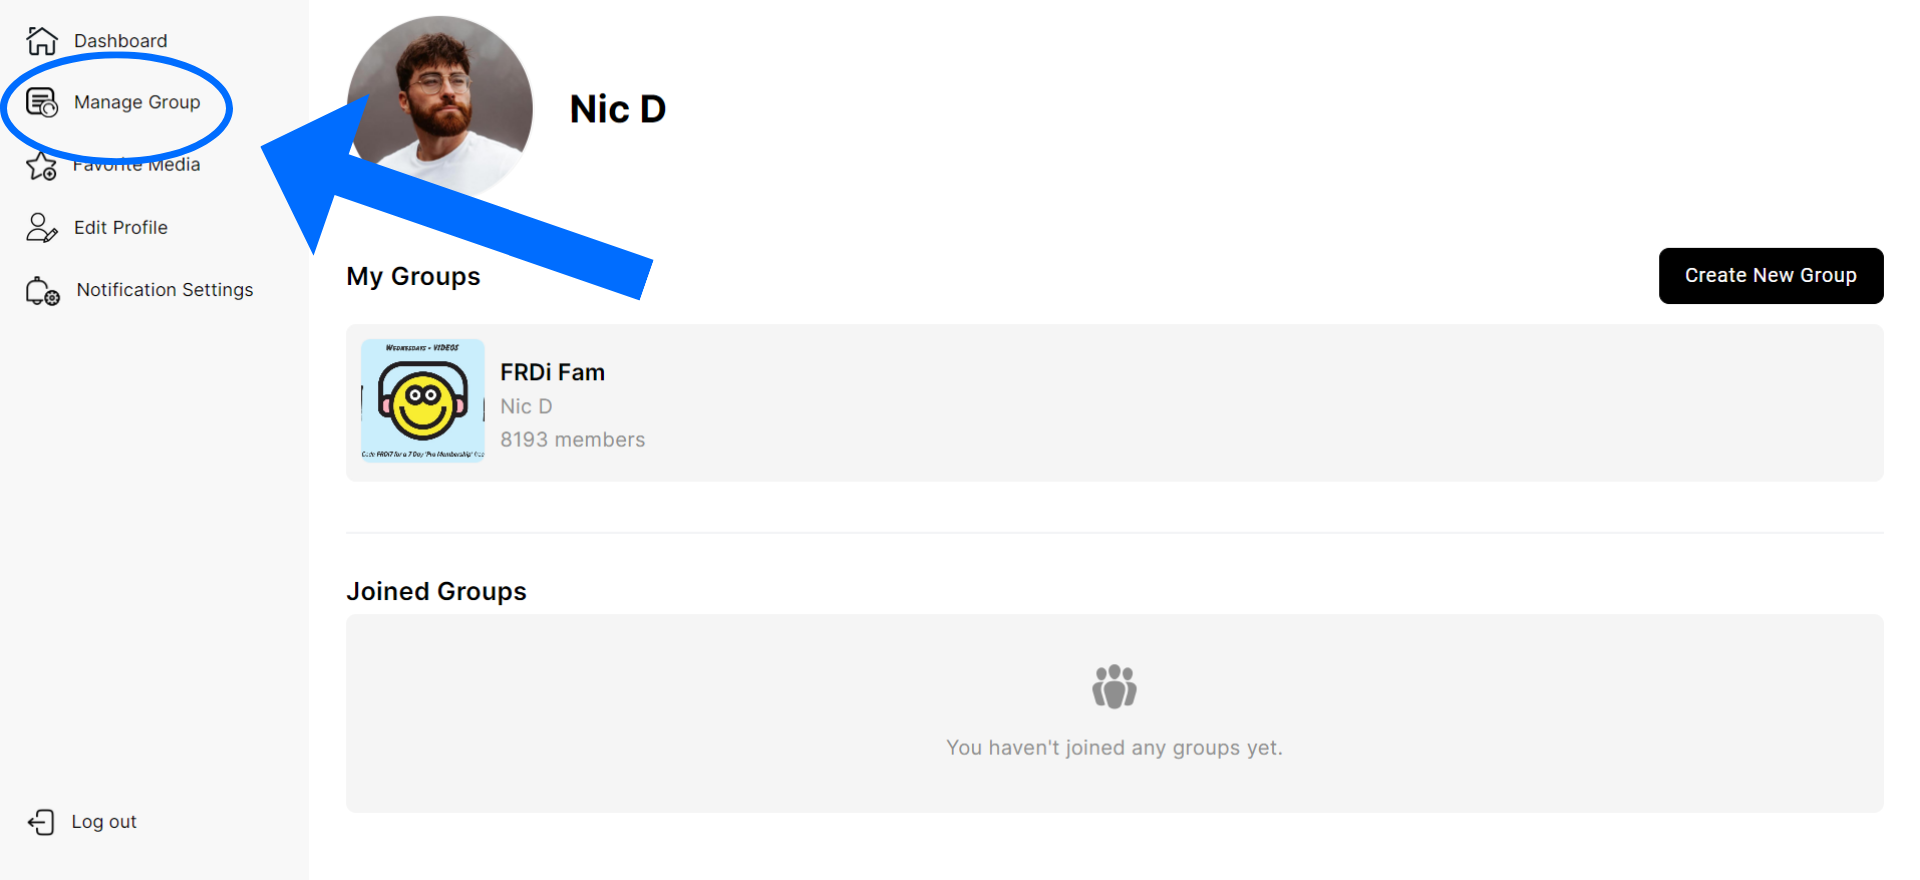
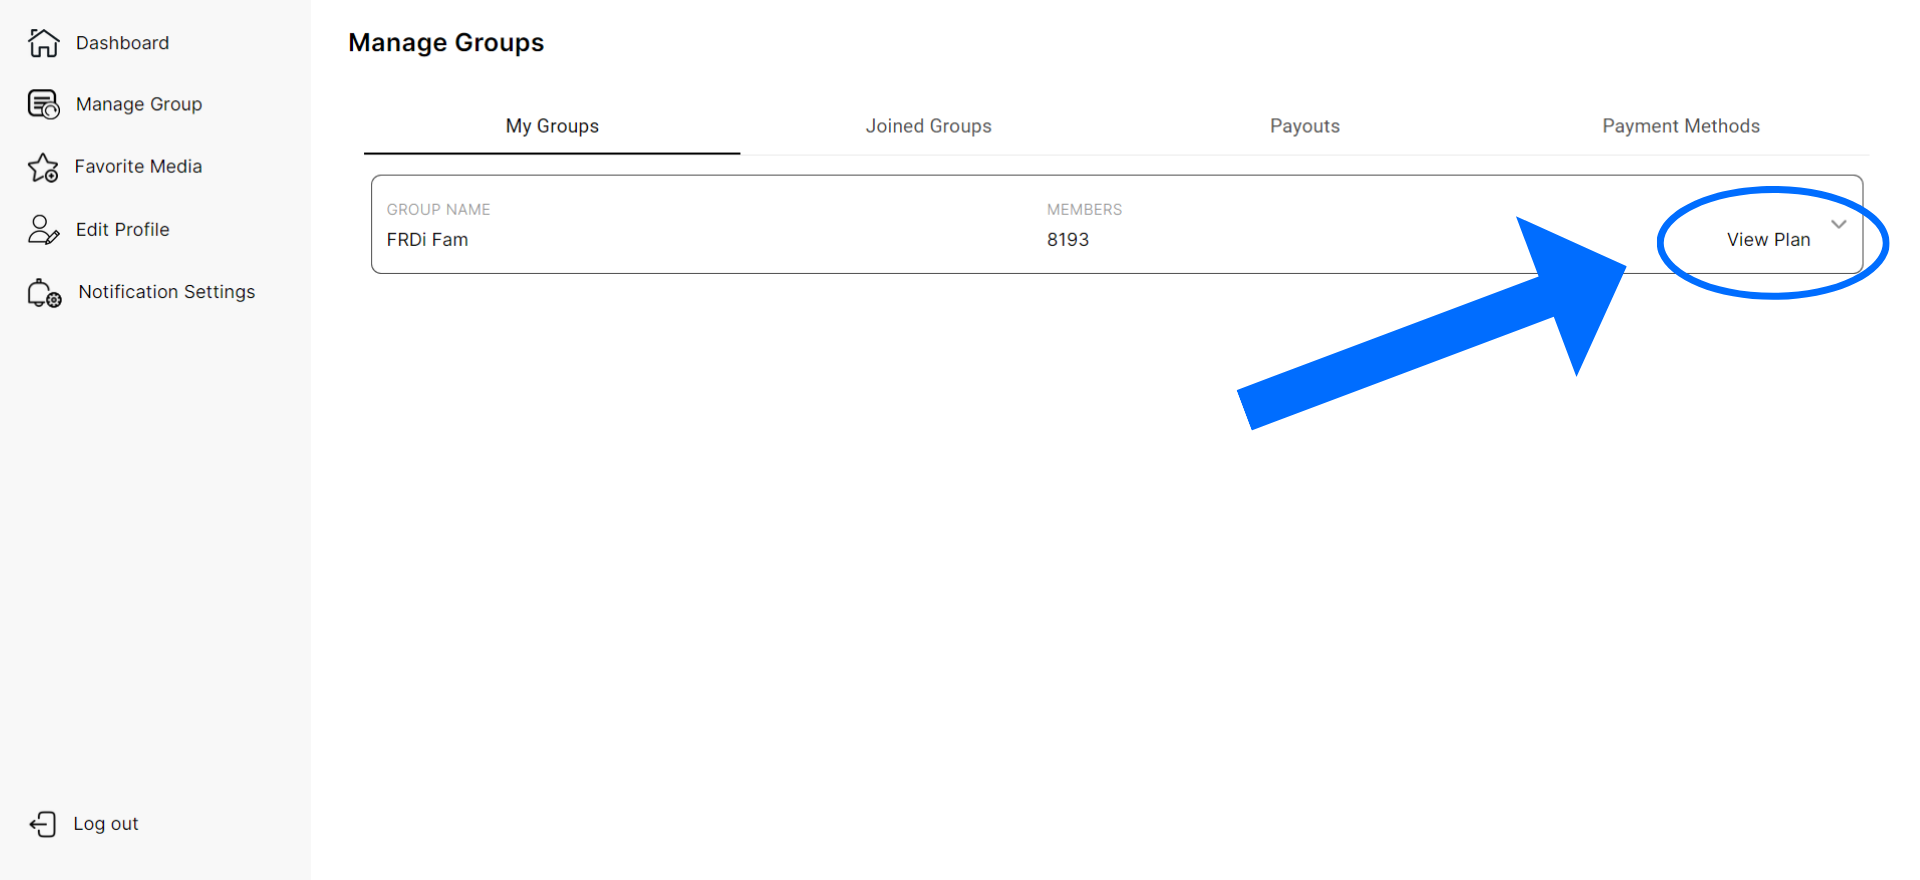
Go to your dashboard, click “Manage Group” on the left menu bar, and on the main “My Groups” tab you will see your “Group Name” and on the far right you will click on “View Plan”.
1. Click “Manage Group”
2. Click “View Plan”
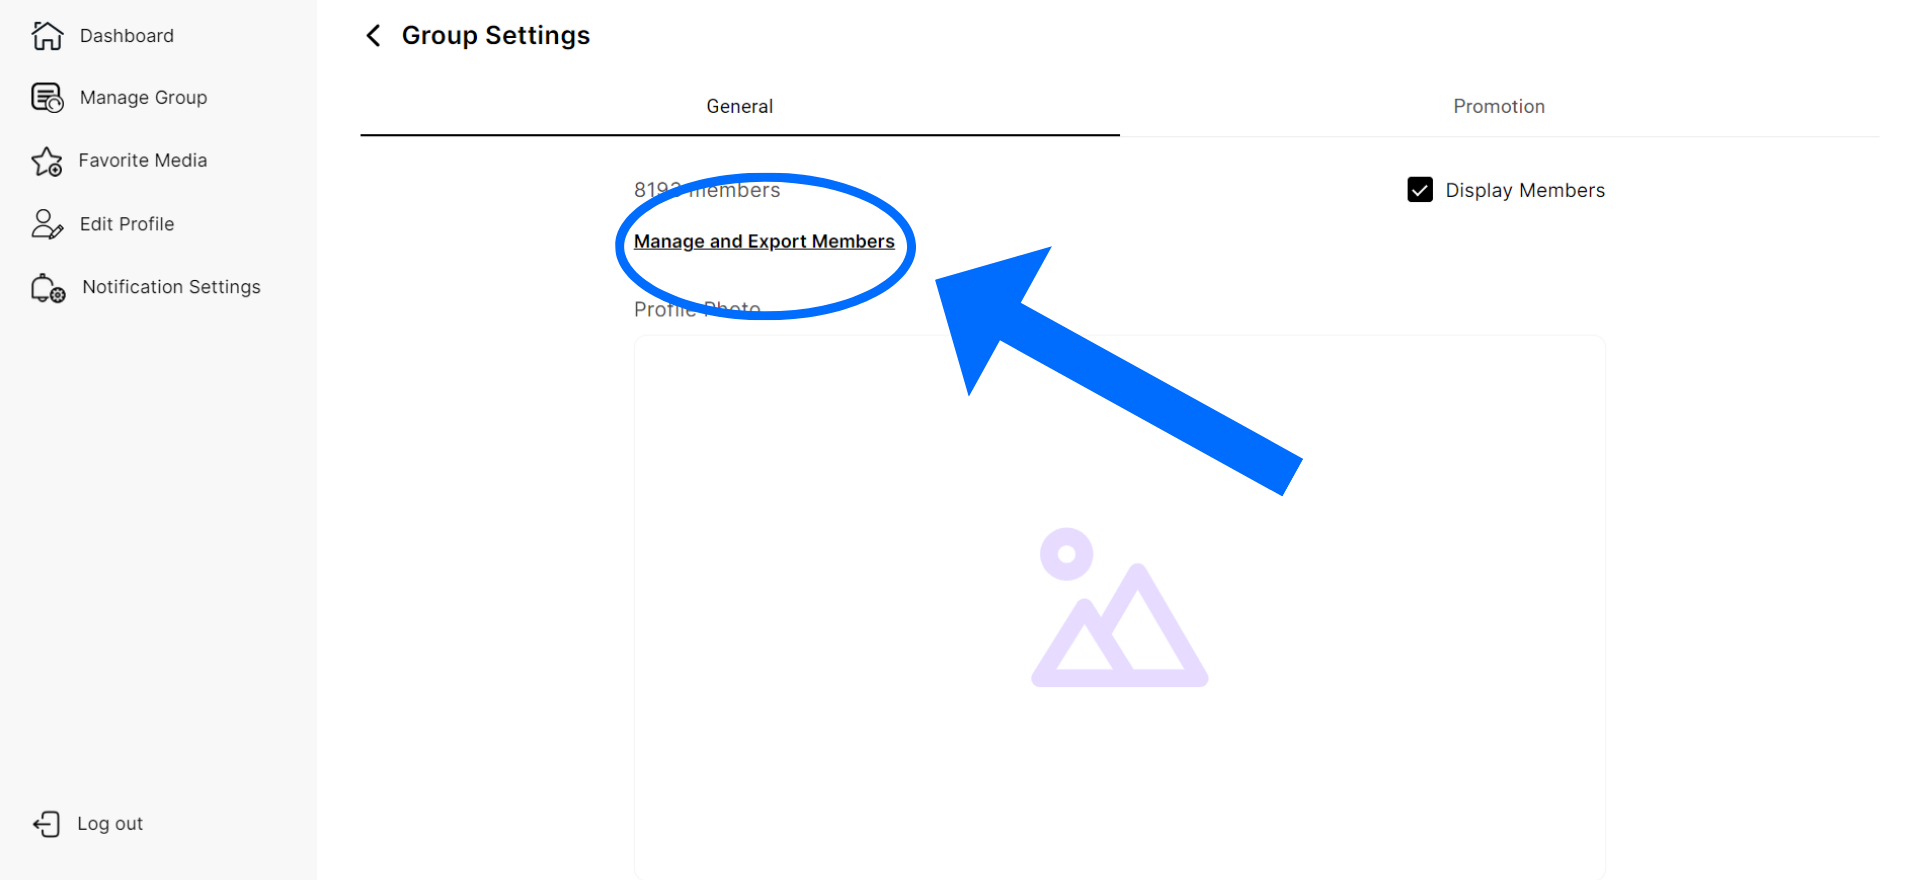
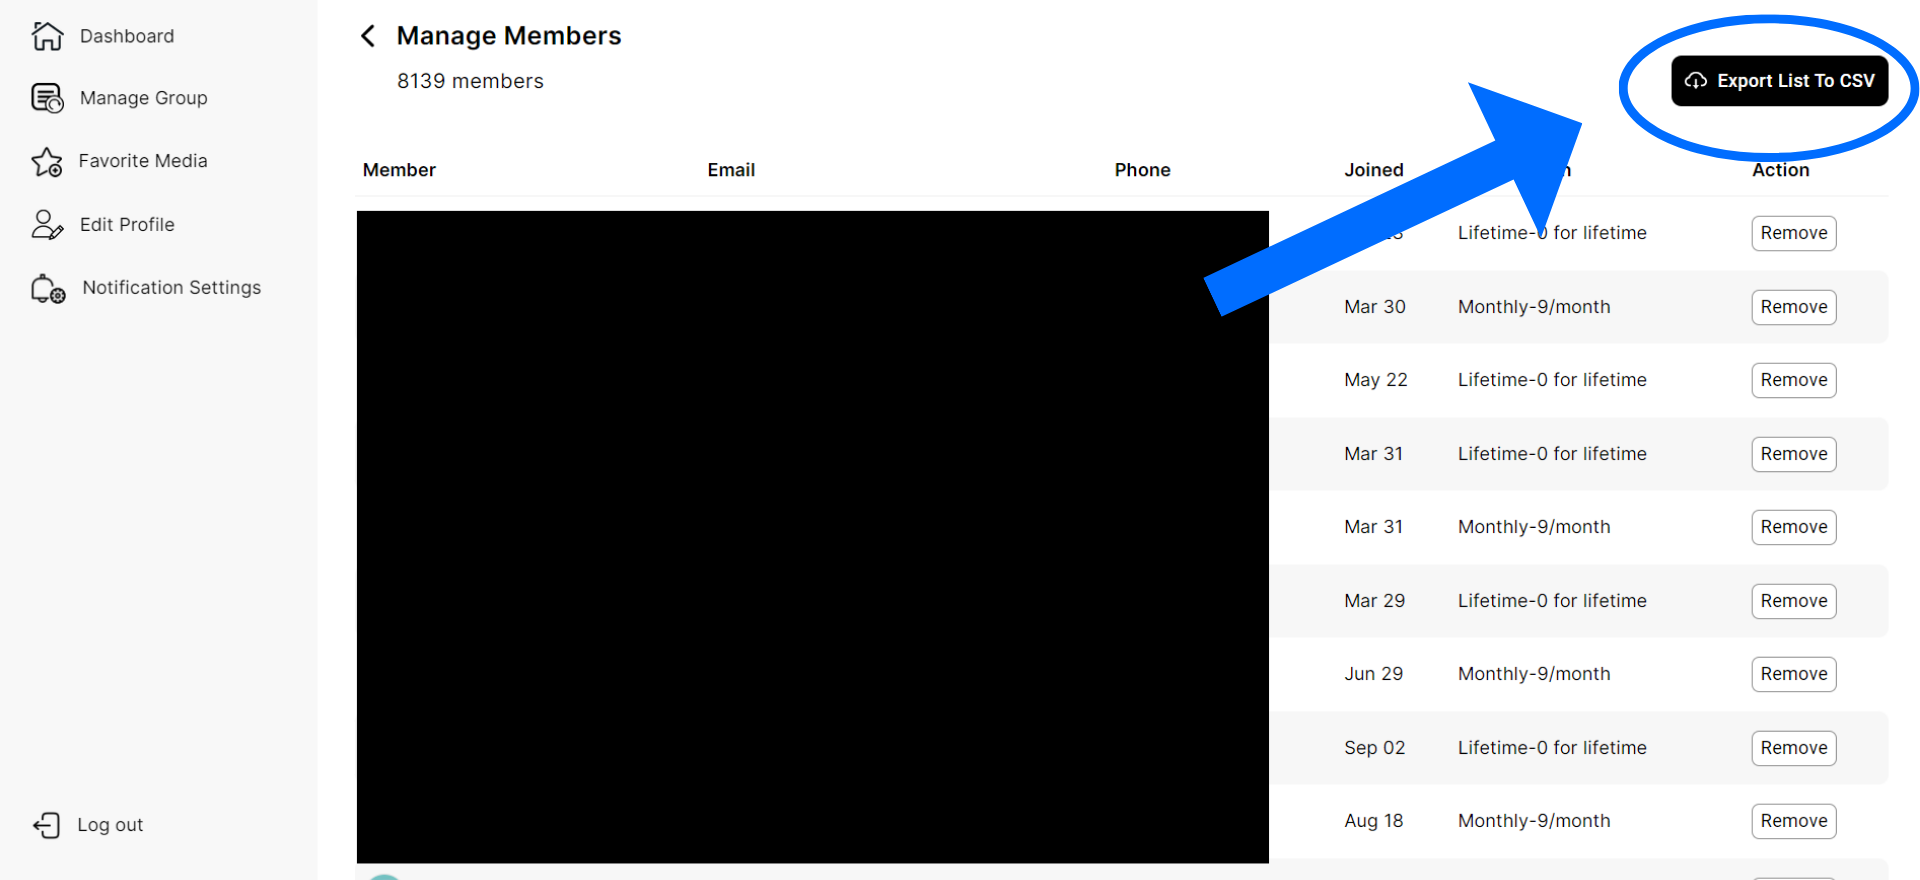
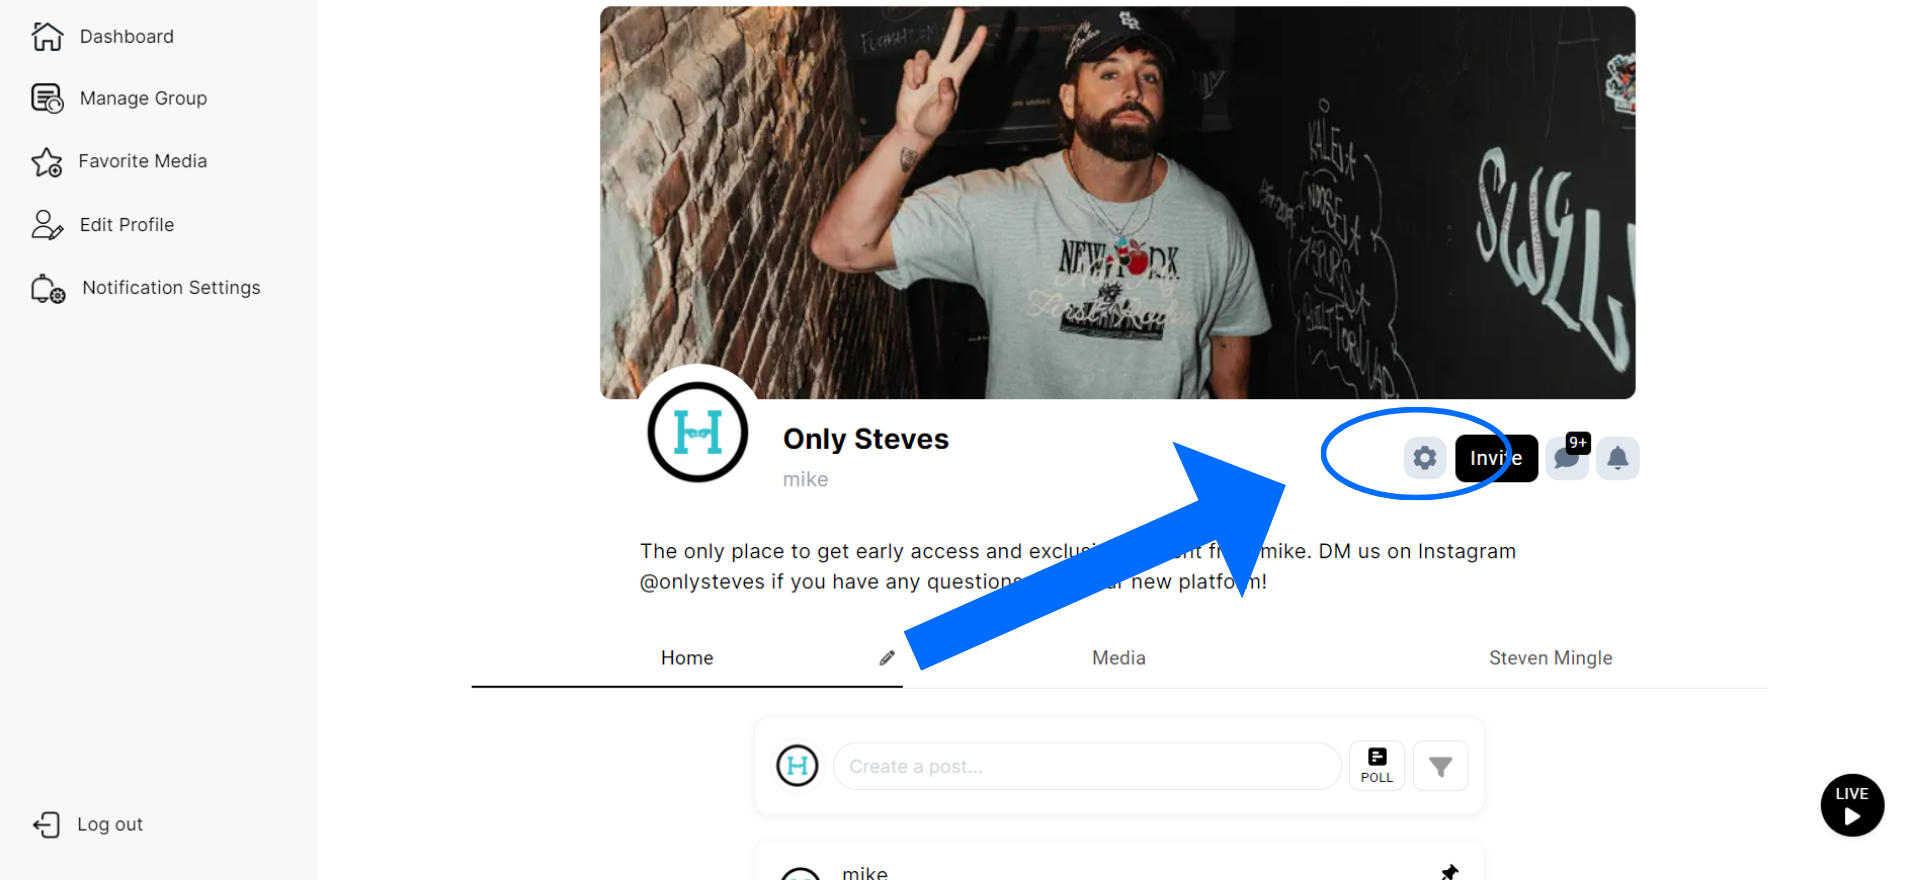
Go inside your Grouped and click on the “Settings” gear icon at the top under the header image, at the top under the Total Members count click on “Manage and Export Members” and then click on the button in the top right that says “Export List to CSV”.
1. Click the “Settings” gear

2. Click “Manage and Export Members”
3. Click “Export To CSV”
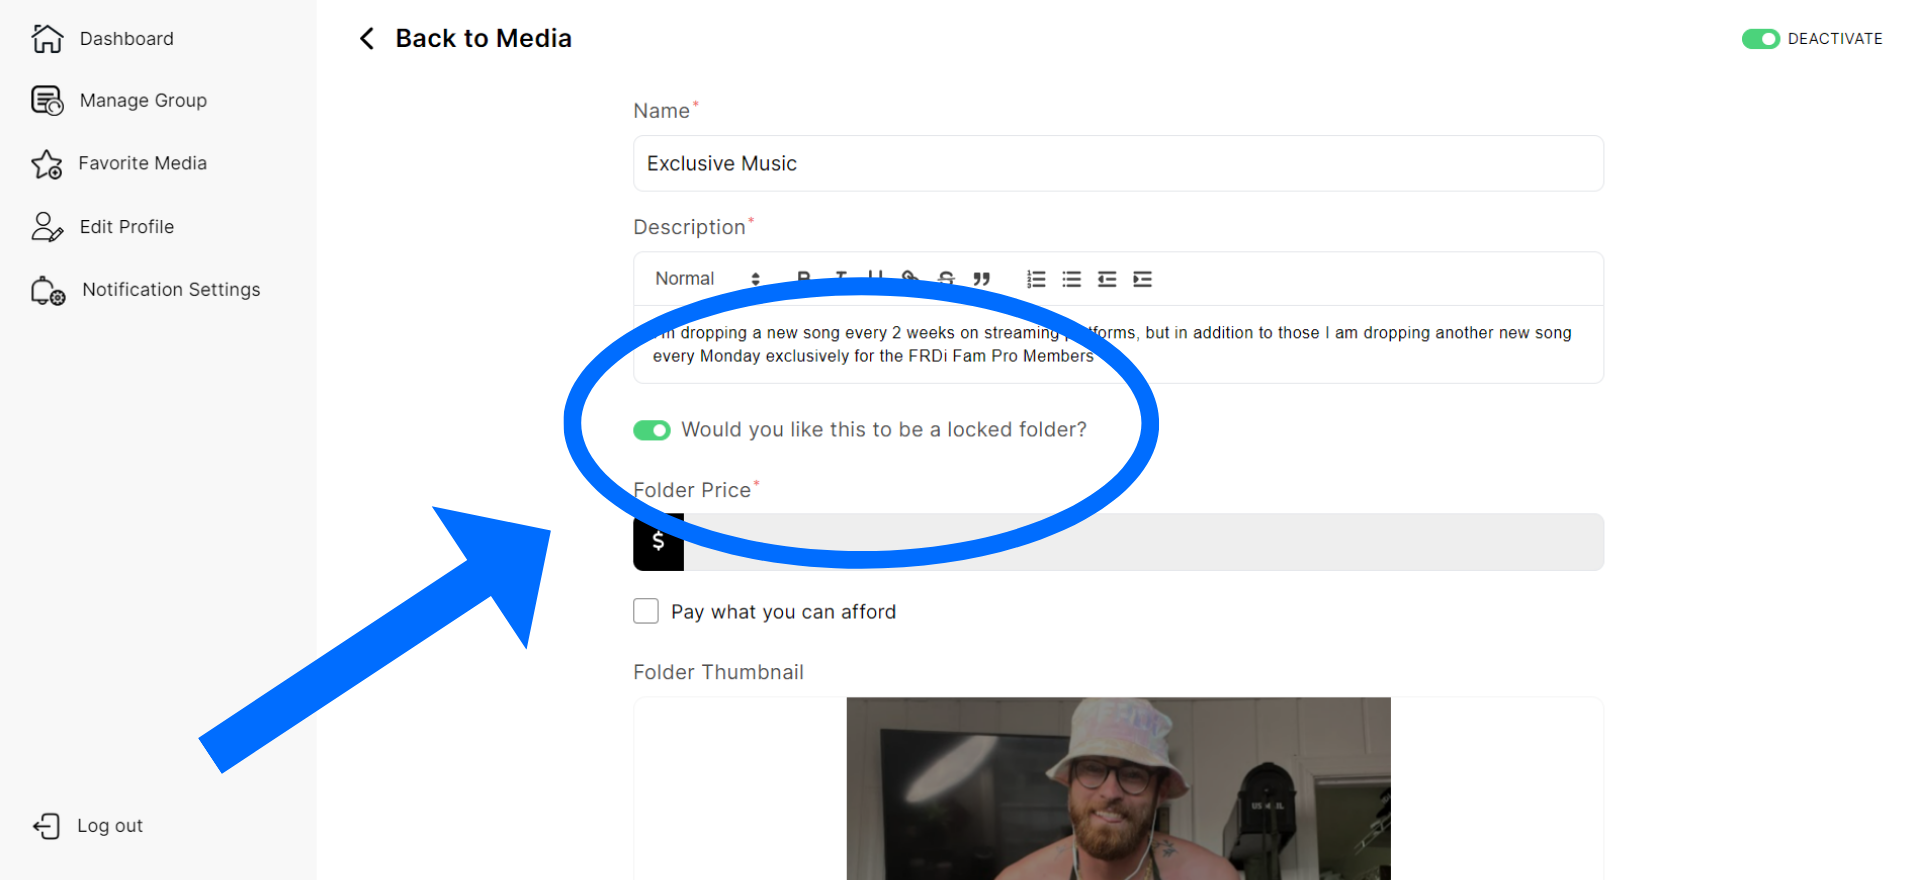
You can give your paid fans access to certain Media folders by locking them! When you create a media folder you will have an option to “Lock” the folder by clicking to toggle to make it a locked folder. But who has access to this locked media? When you set up your tiers, only the tiers that you toggled green for Media will have access to this folder. Anyone who doesn’t have access with have to upgrade to see the folder!
1. Click the “Settings” gear
2. Scroll down to the tiers and toggle the desired tier so the “Media” is green
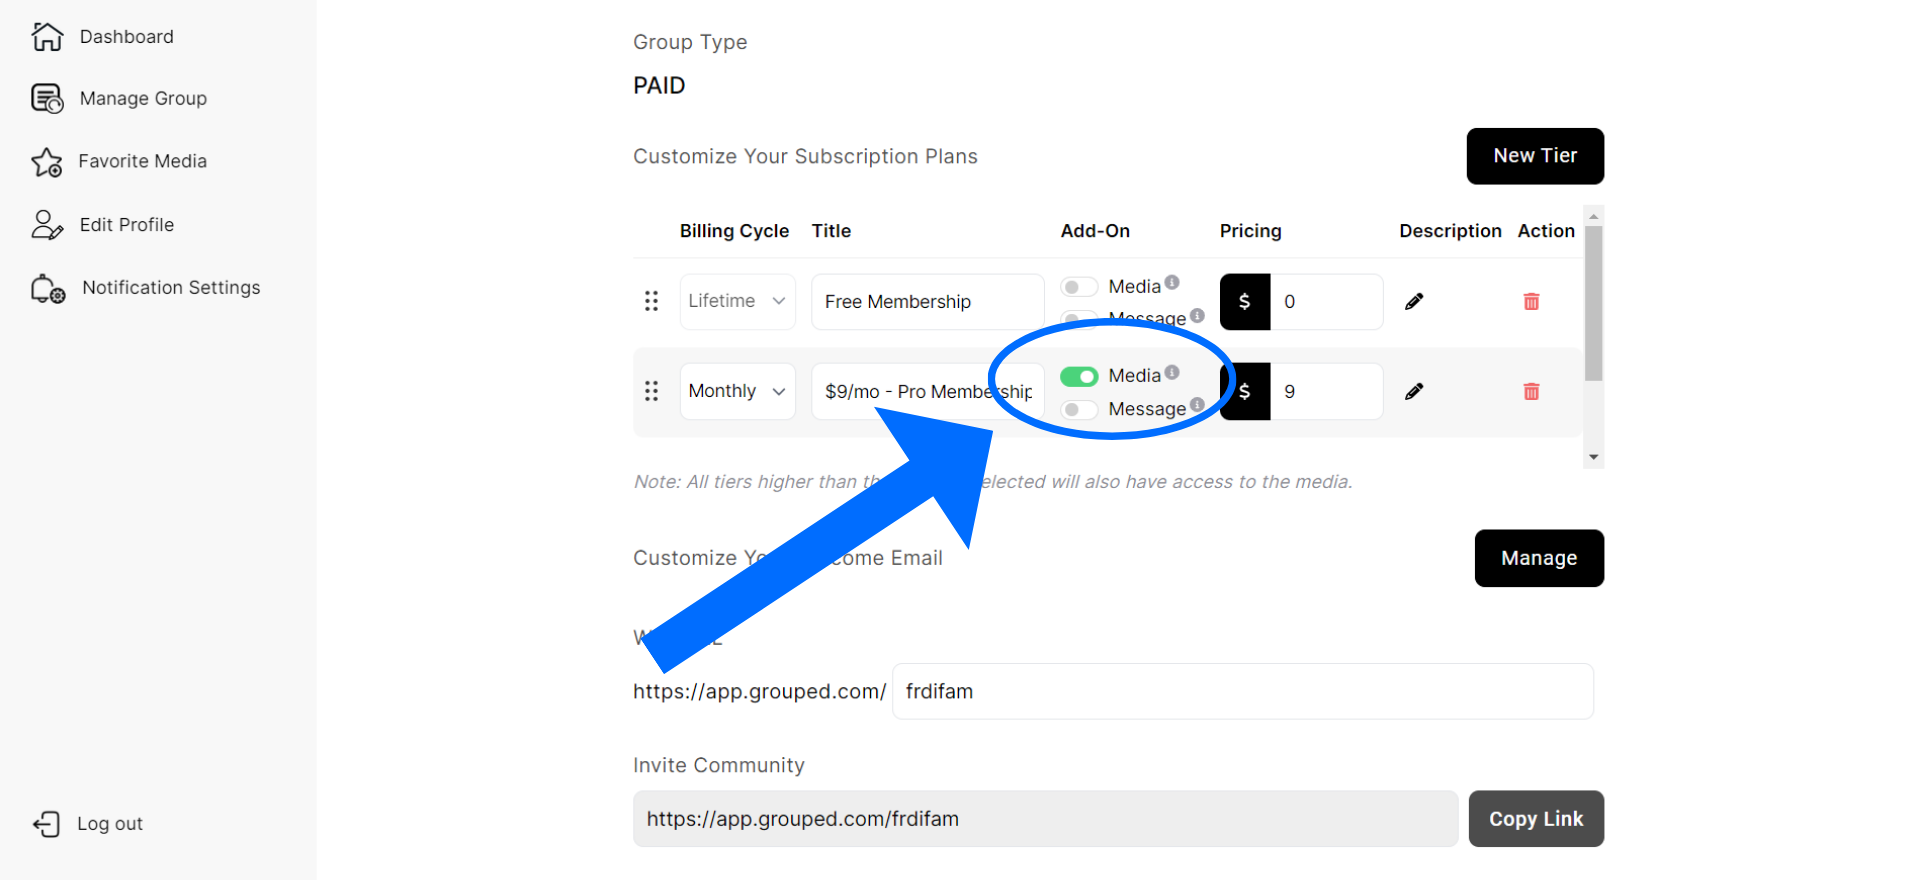
3. Go the desired Media folder and toggle the “Would you like this to be a locked folder” so it’s green
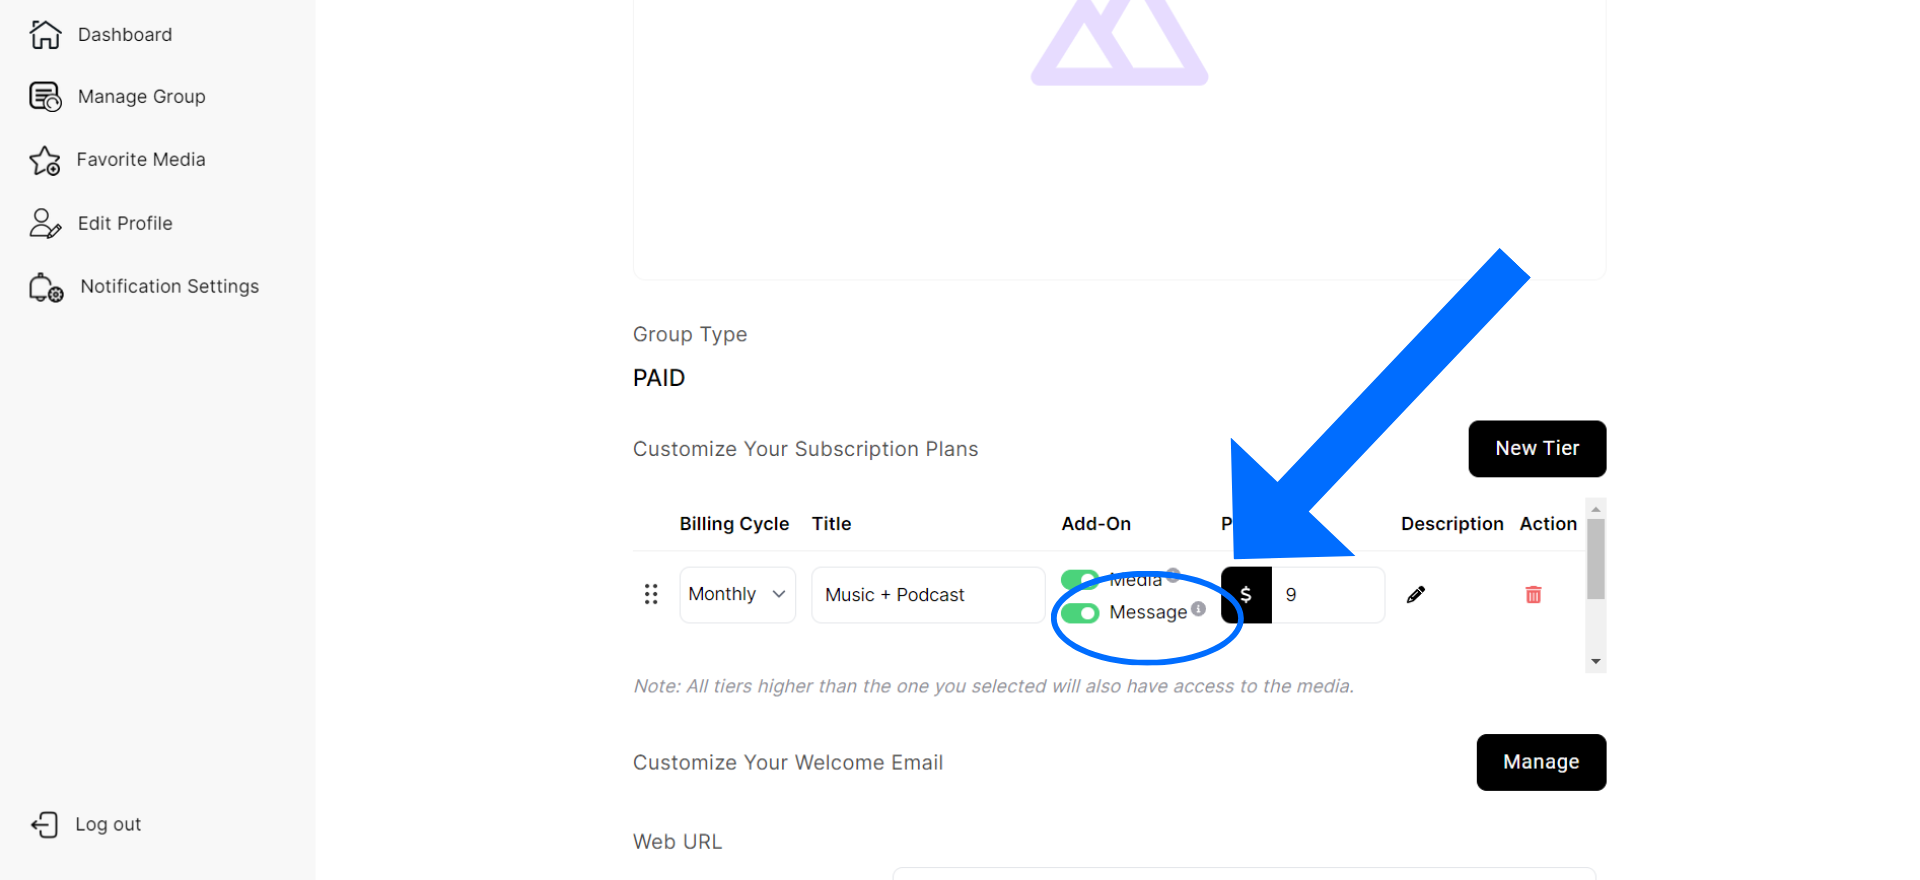
You can DM within our platform – as a creator you can customize who has access to this feature and what kind of access that they have. If you allow a tier to have Direct Messaging access (see below), that tier will have access to individually DM you and you will have access to individually DM them. You will also have access to set up a Group Chat with that entire tier. If you do choose to have a Group Chat for that tier, you can choose whether only you can send messages to them (like an Instagram Broadcast Channel) OR if fans can send messages back so everyone can talk (like a Discord Channel or Group Text Thread).
1. Click the “Settings” gear
2. Scroll down to theirs and toggle the “Messaging” for the tiers you want to have access
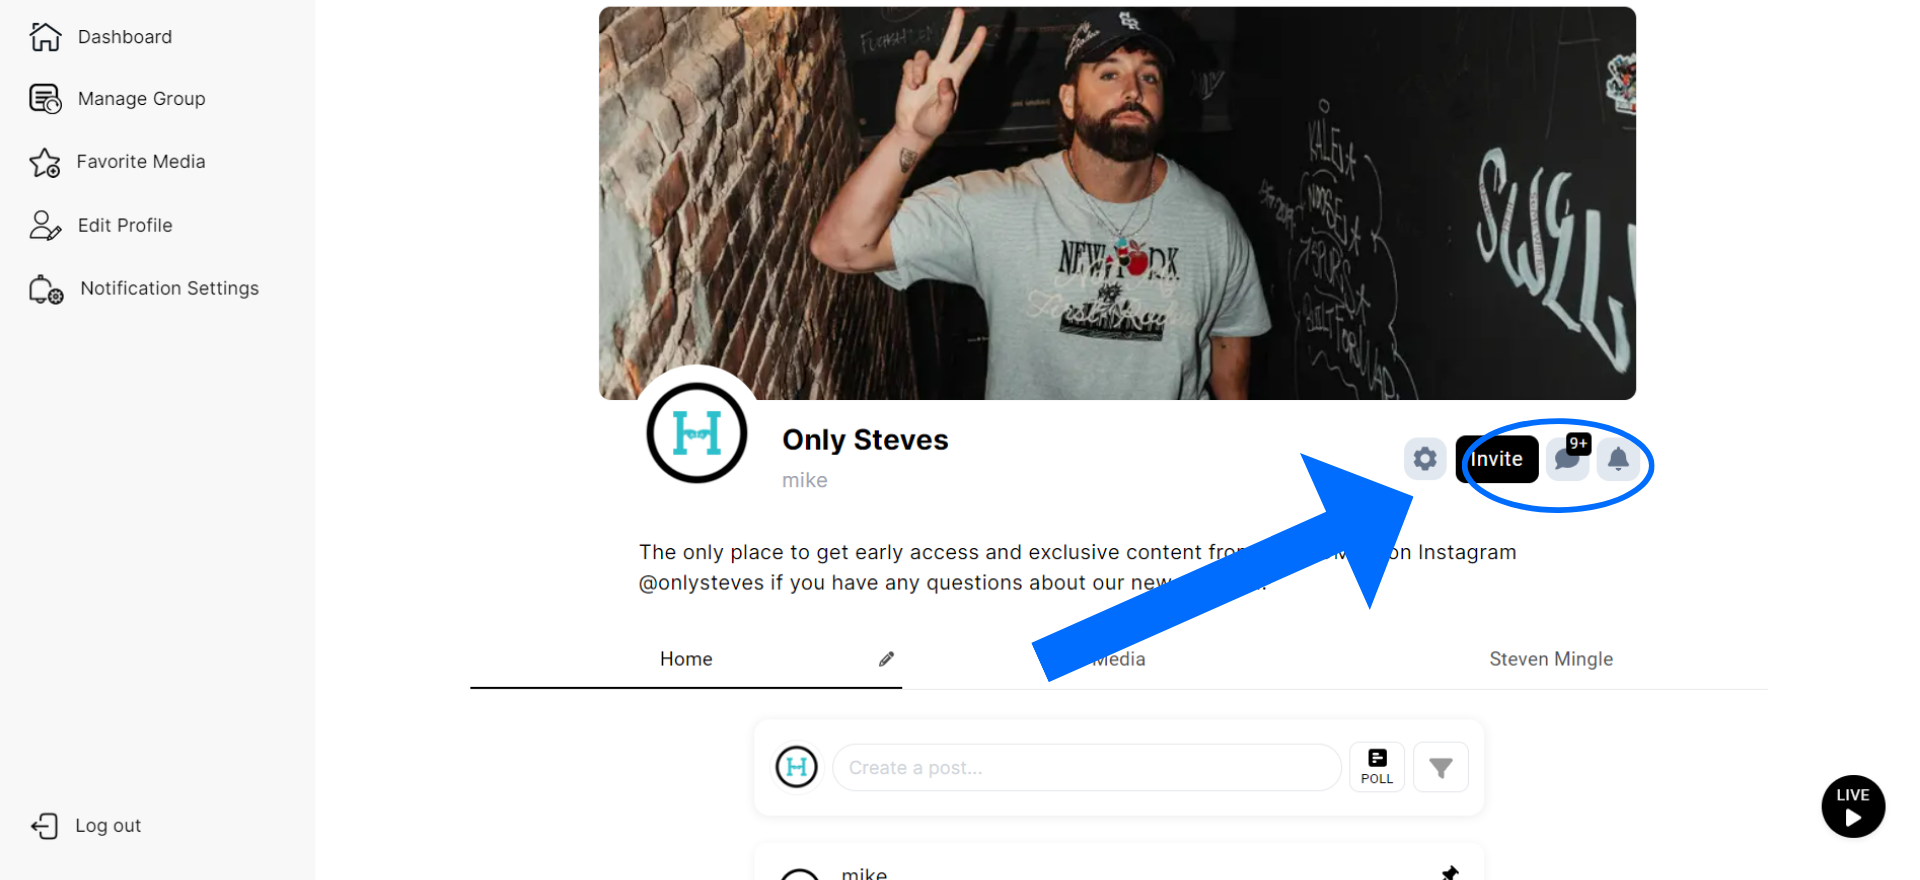
3. Click on the “Messaging” icon bubble at the top of your Grouped
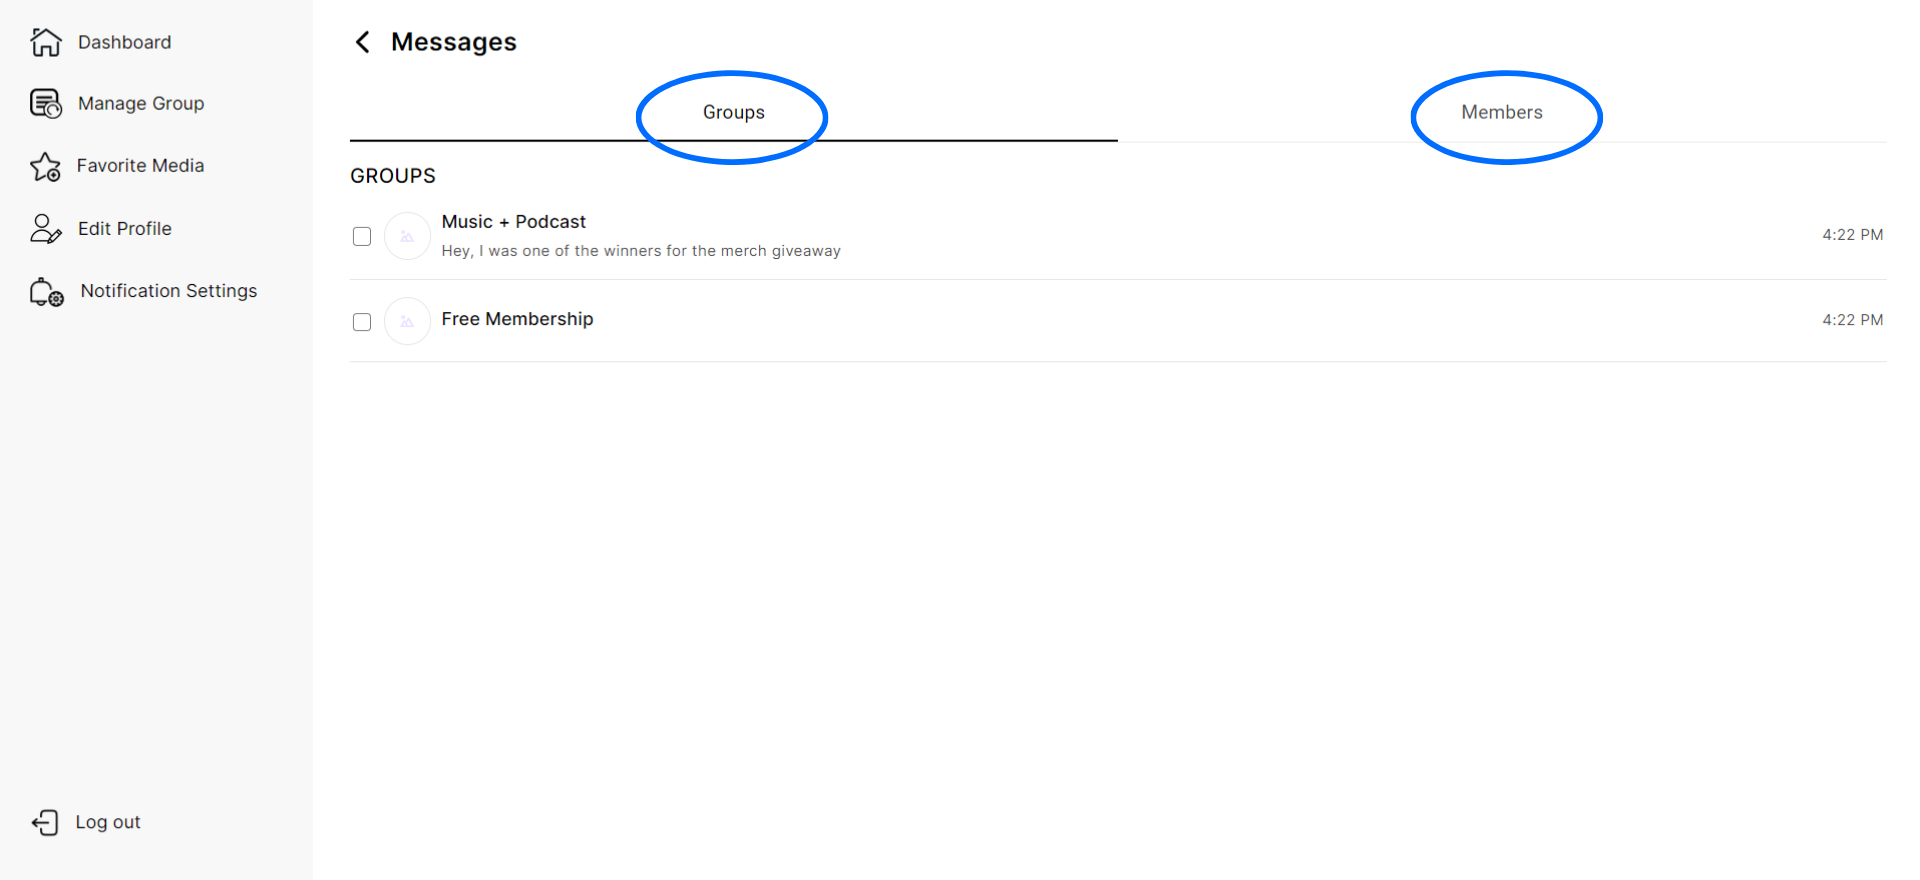
4. You will see the tiers (Group chats) and the ability to 1-1 DM at the top.
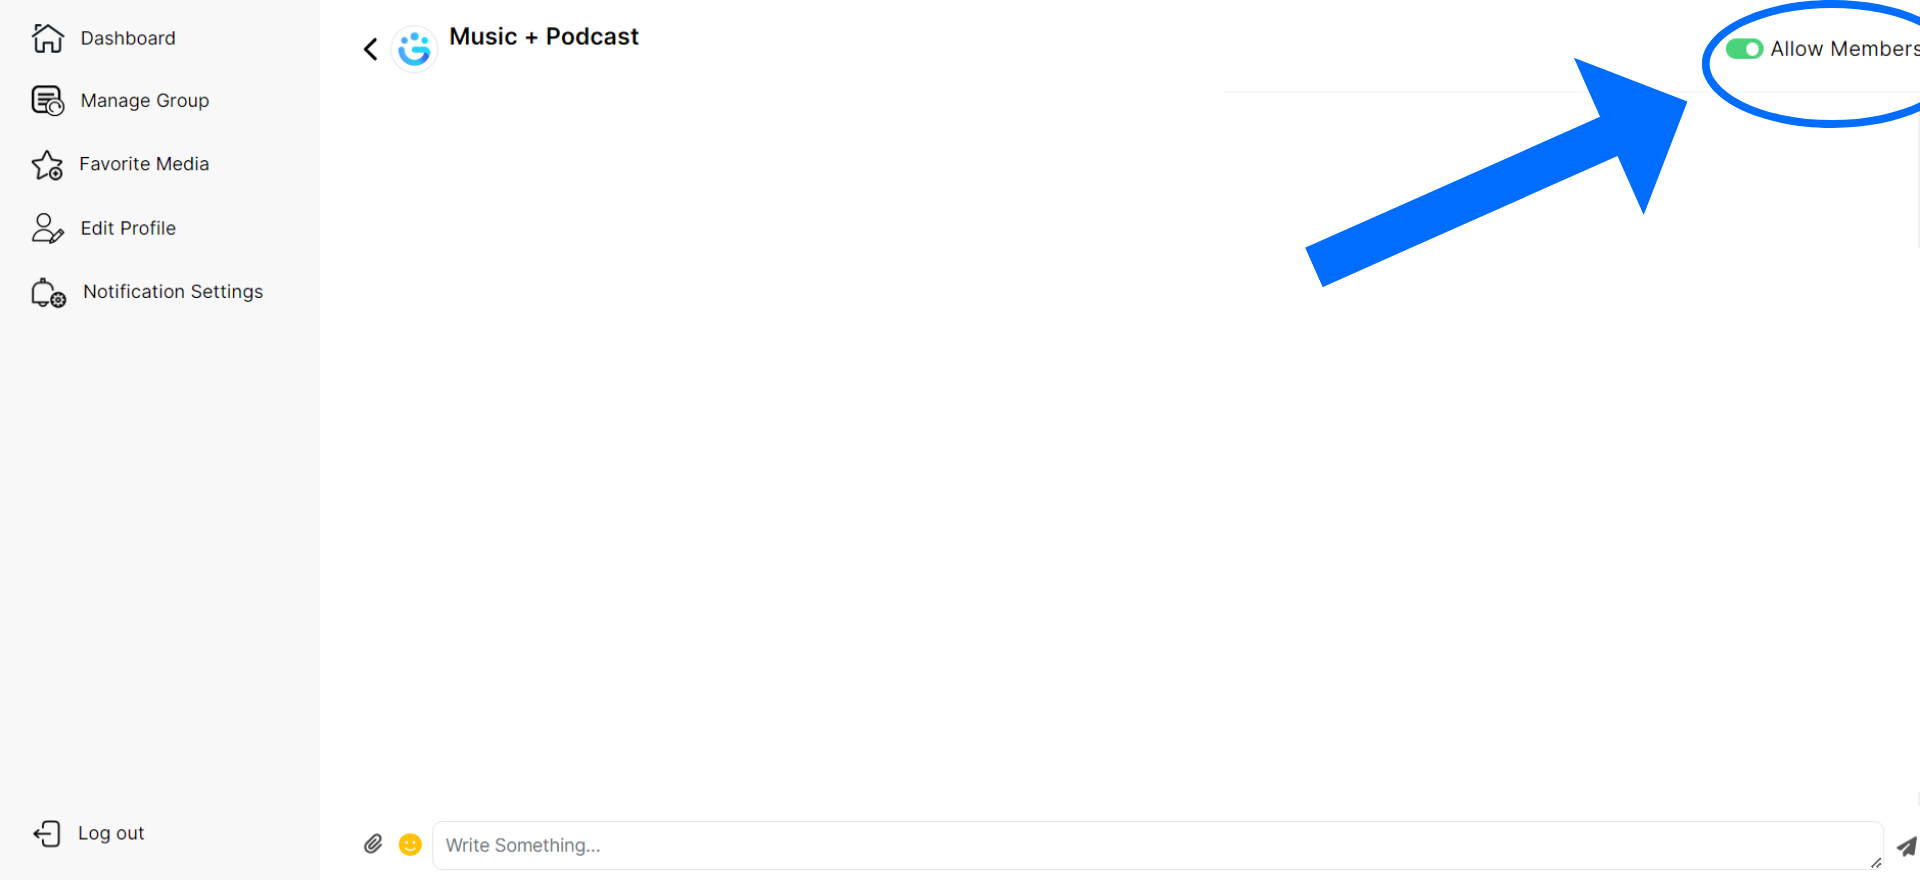
5. Click on a tiers Group Chat and toggle the “Allow Members” in the top right if you want fans to be able to send messages in the Group chat (leaving it untoggled means it acts like an Instagram Broadcast channel where only you can message the tier)
If you set a date range for a code to be available for and that date has passed, you can not reactivate it.
If you want to have a code that you can turn on and off and back on again – just leave the date range blank when you set it up. Then on the Promotions Tab you can toggle the code to be active or inactive whenever you want.
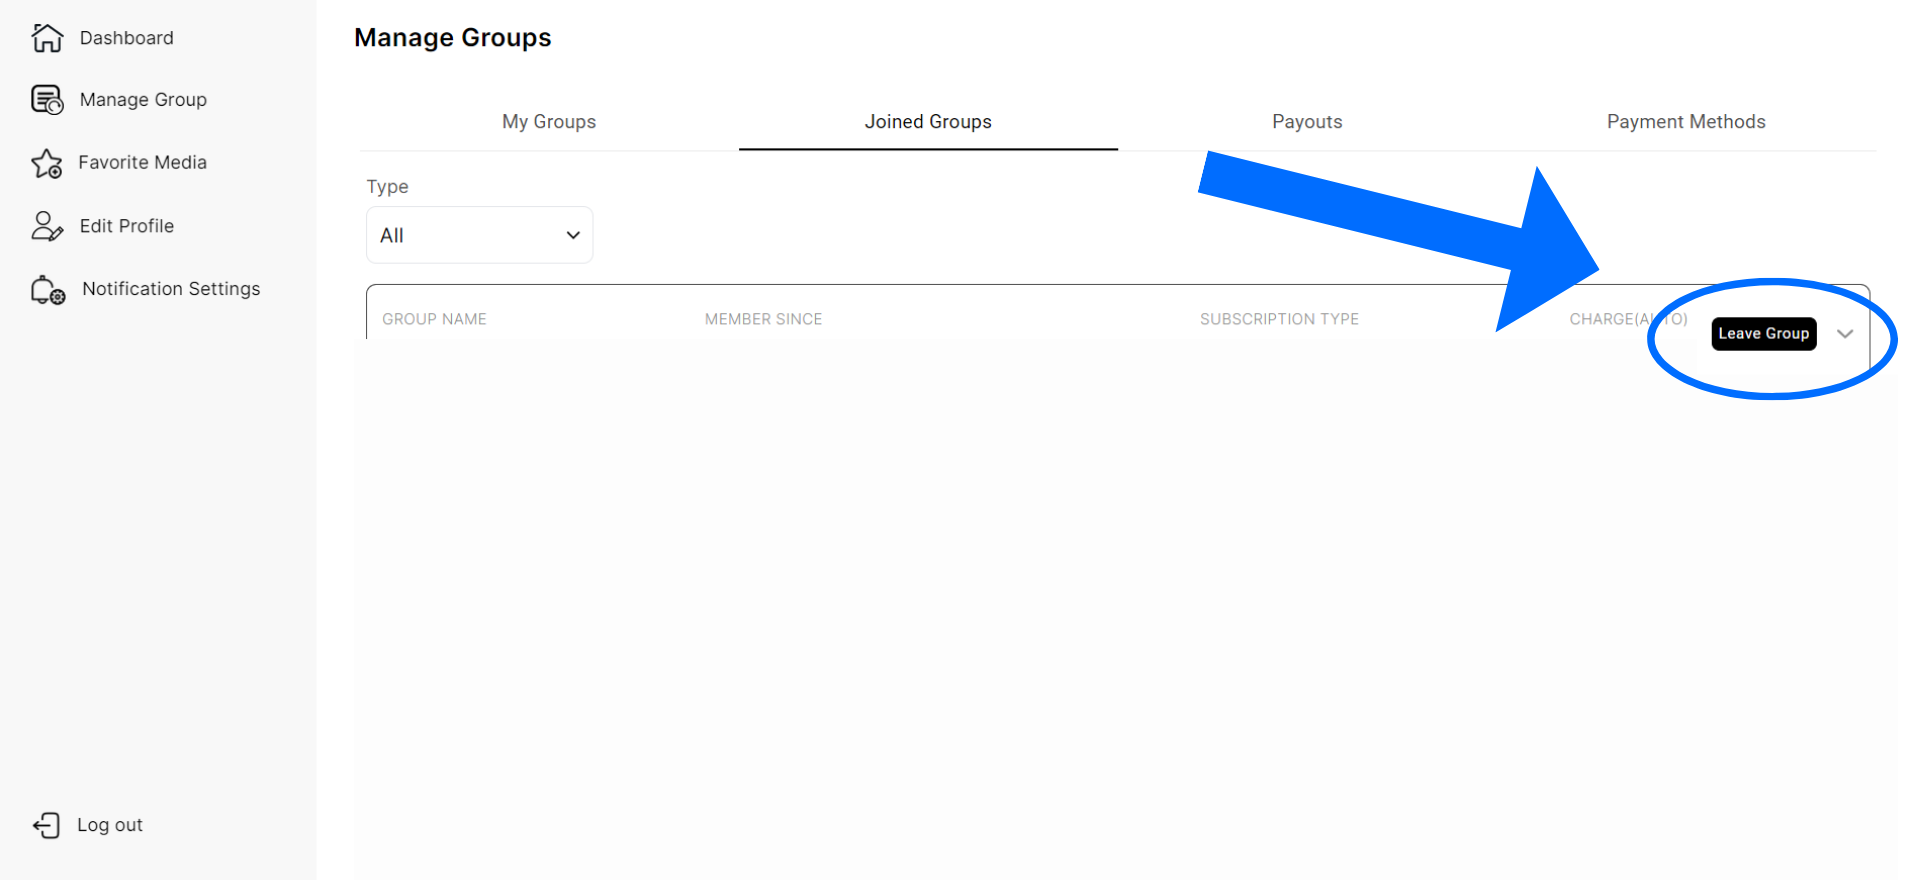
Go to your dashboard, click on “Manage Groups” in the left menu bar, click the “Joined Groups” tab in the top menu bar, and then you can find the Grouped you want to leave and click the button on the far right that says “Leave Group”.
1. Click “Manage Groups”
2. Click “Joined Groups”
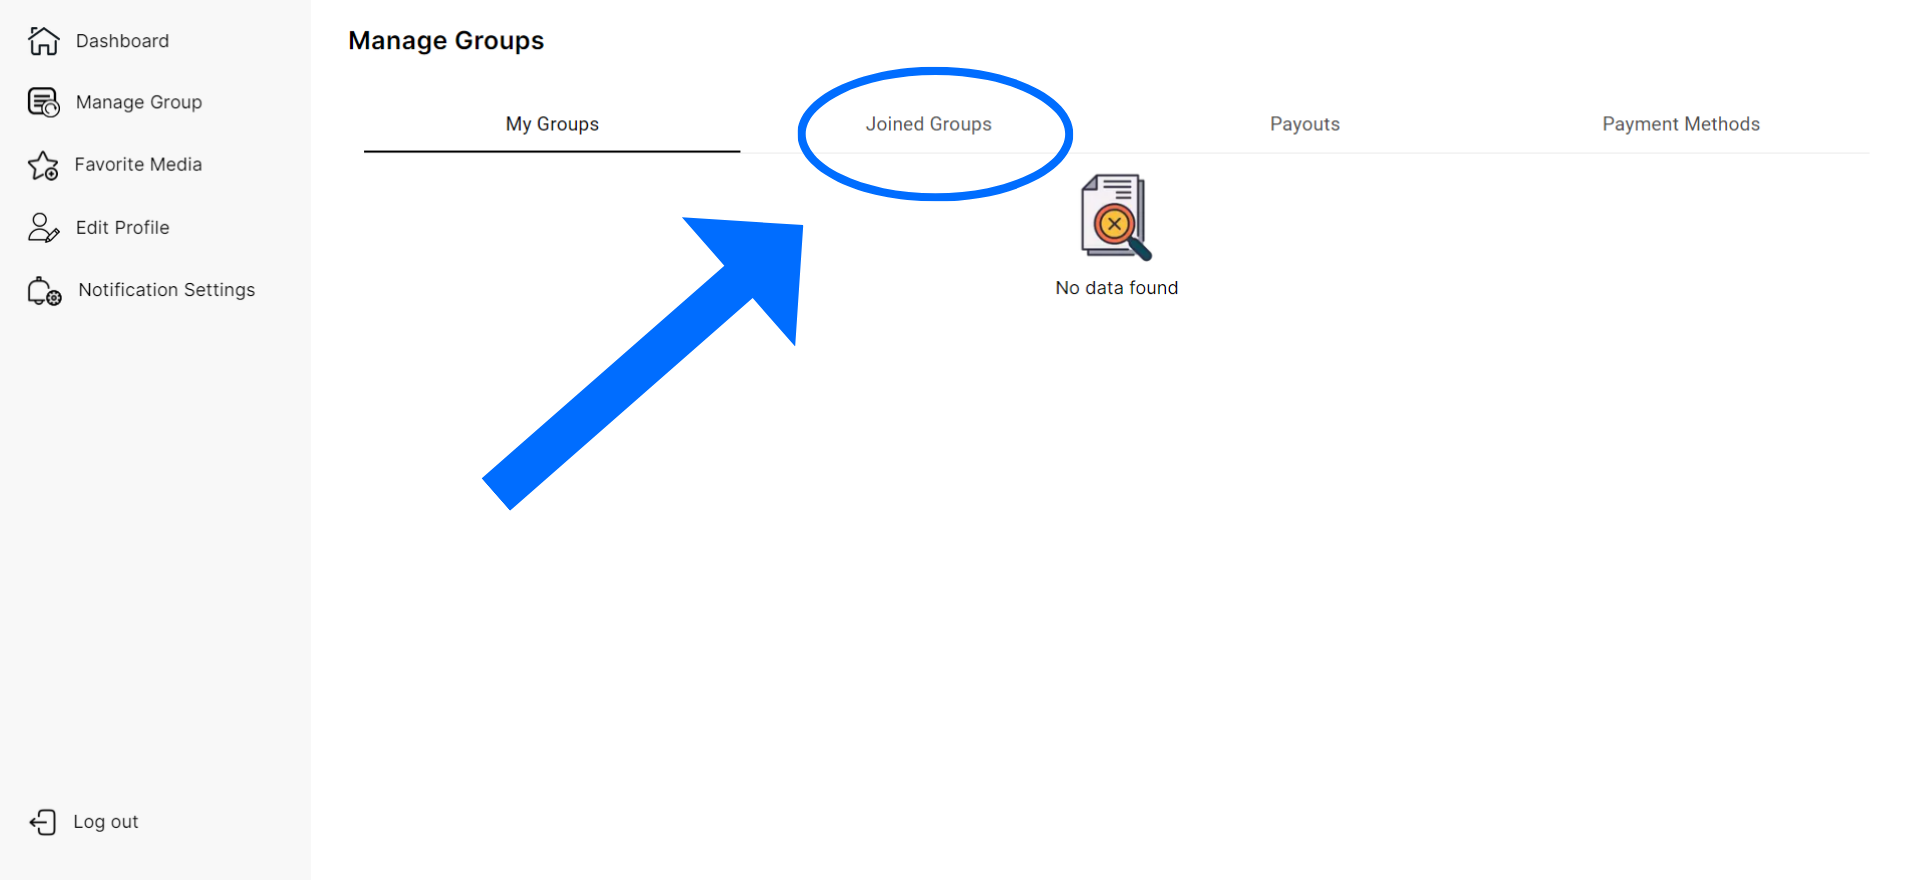
3. Click “Leave Group”
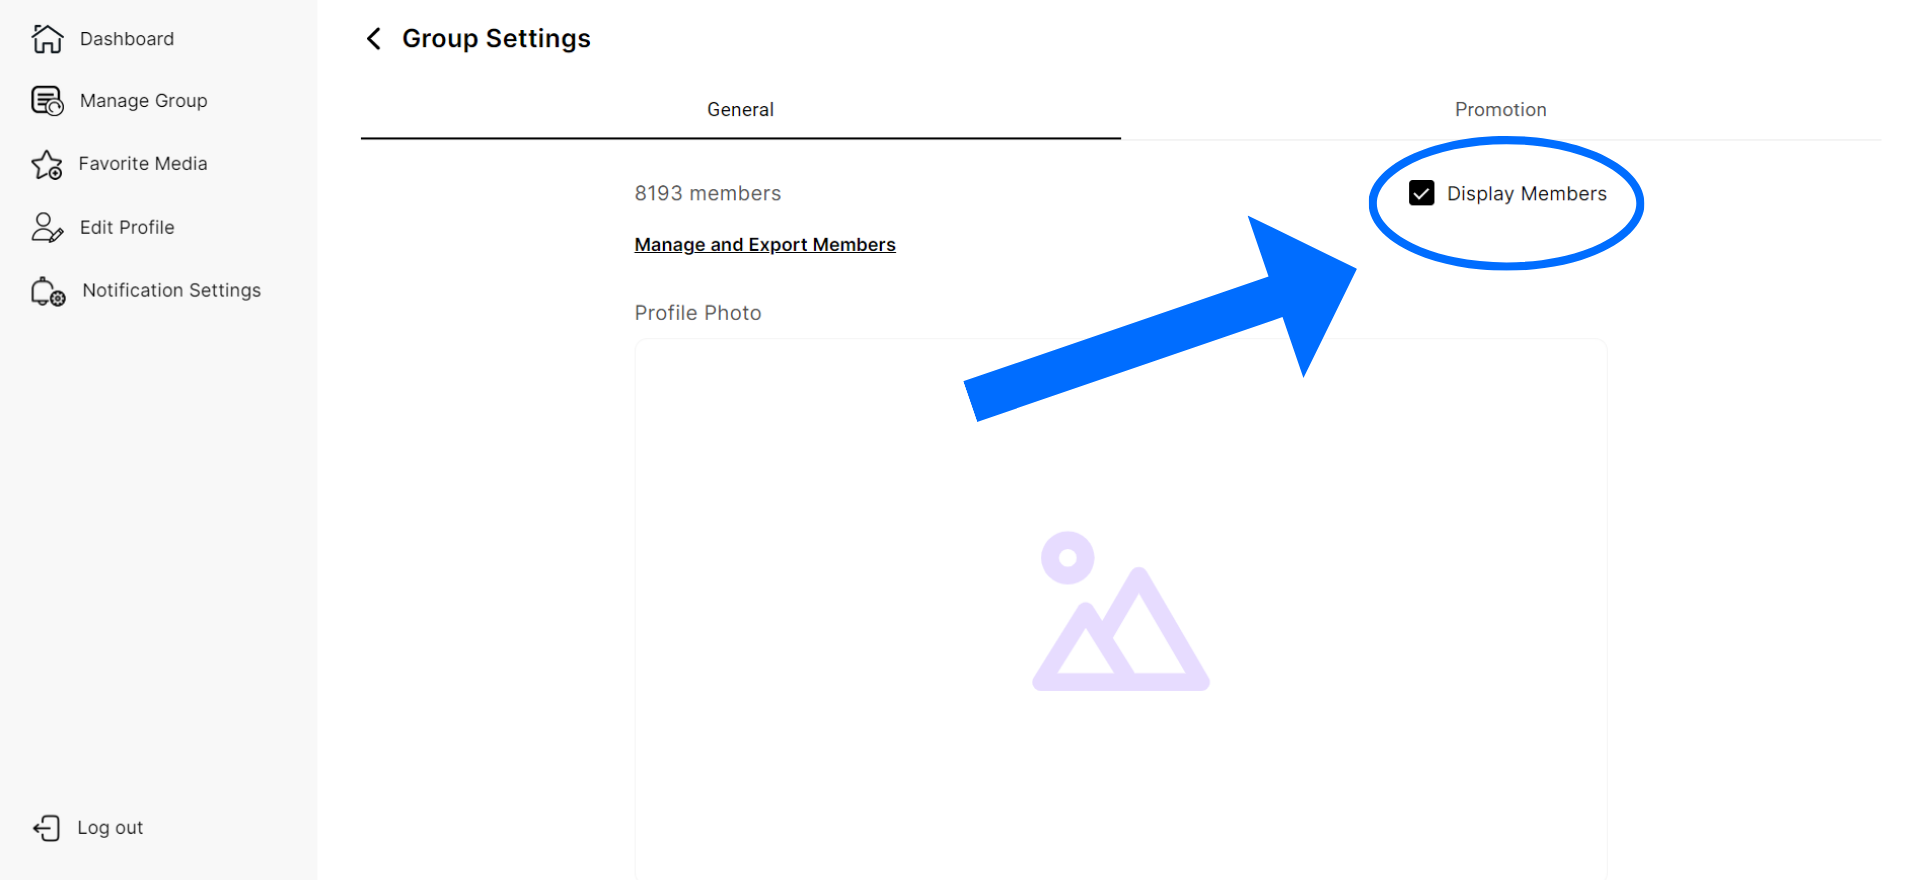
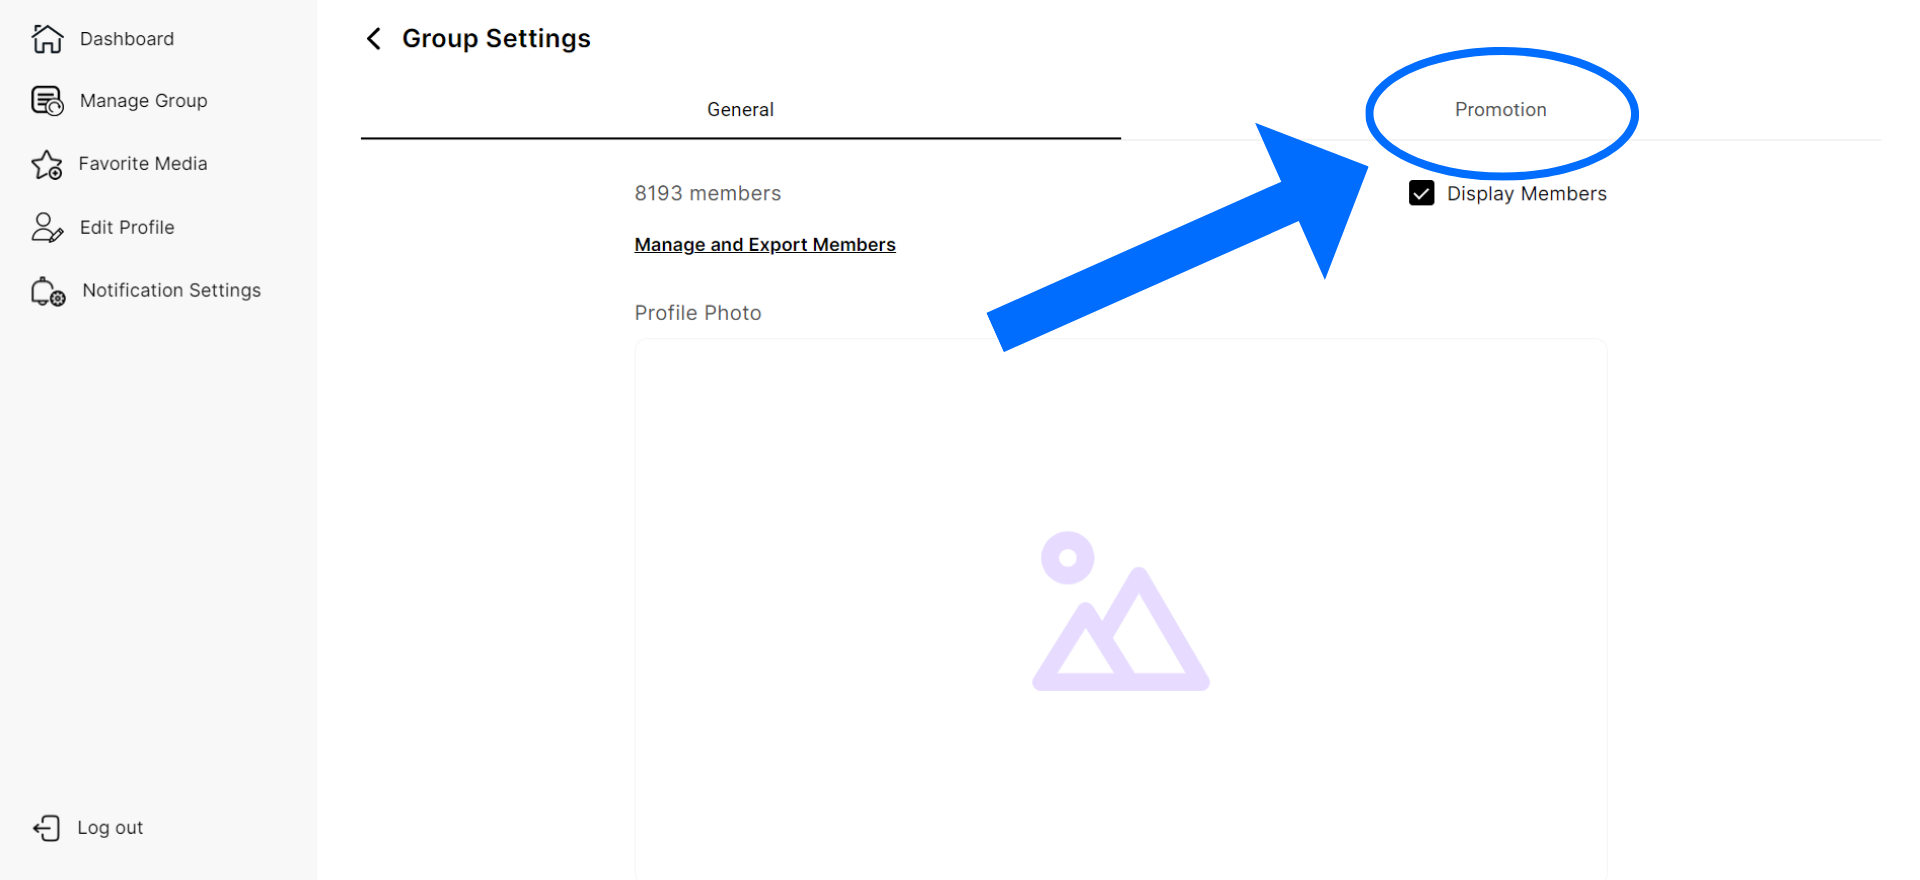
You can choose whether or not to show the total member count of your community to the public by going into your Grouped, clicking the “Settings” gear icon in the top right, and clicking the “Display Members” checkbox in the top right.
1. Click the “Settings” gear
2. Click the box next to “Display Members” to publicly show your members
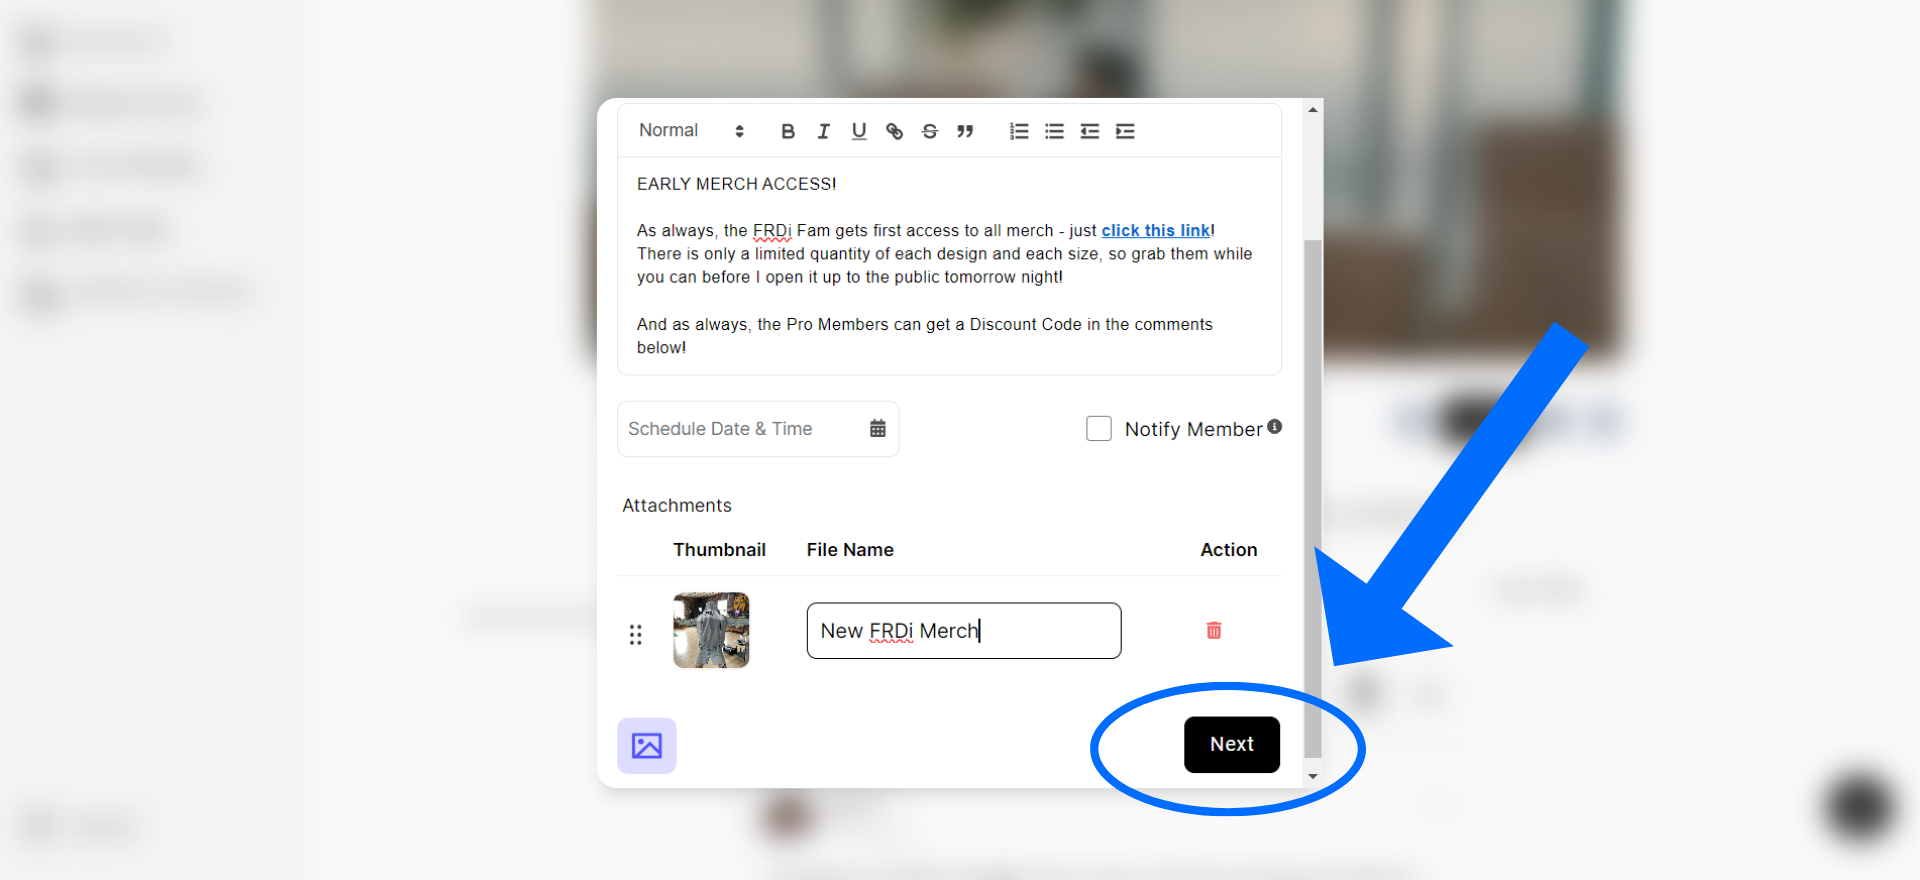
Locking the comments is a great way to give your paid members a Discount Code, a link to a Zoom or something, or encourage people to upgrade when running a giveaway. In order to lock the comments, there will be 3 steps when you create a post:
- The first is drafting the post that includes the text, the media, and whether or not you want to notify your community via email. Then click “Next”.
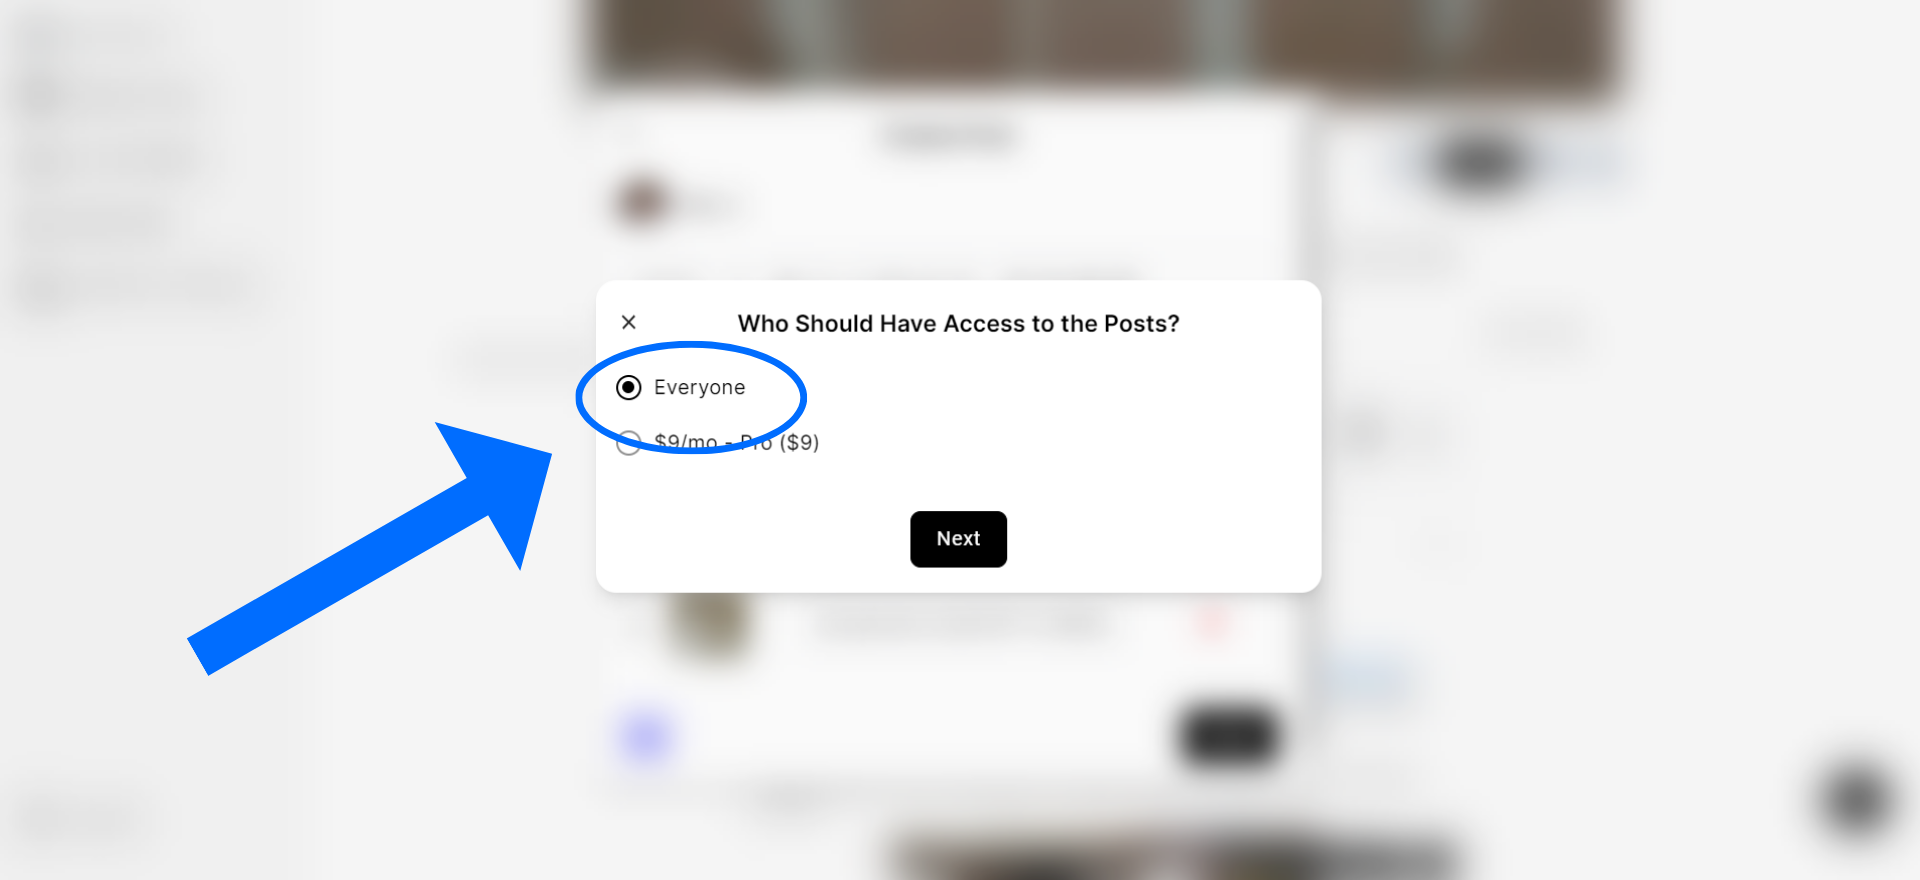
- The second step is to pick who should have access to the media (if you choose that only paid members can see the media, you will be able to add a preview for free members to see).
- If you chose that everyone (free members included) should be able to see your post and media, then a third step shows up. The third step is who should have access to the comments. This allows you to lock links/codes/etc in the comments just for your Paid Members!
1. Create a post and click “Next”
2. Click “Everyone” for who should have access to the post (this will allow ALL fans to see the text and media attachments)
3. Click the paid tier you want to have access to the comments (if you have multiple paid tiers, any tier higher than the one you selected will also have access)

4. Free members will see the post with the “Comment” option blurred out (if they click it, it will ask them to Upgrade)
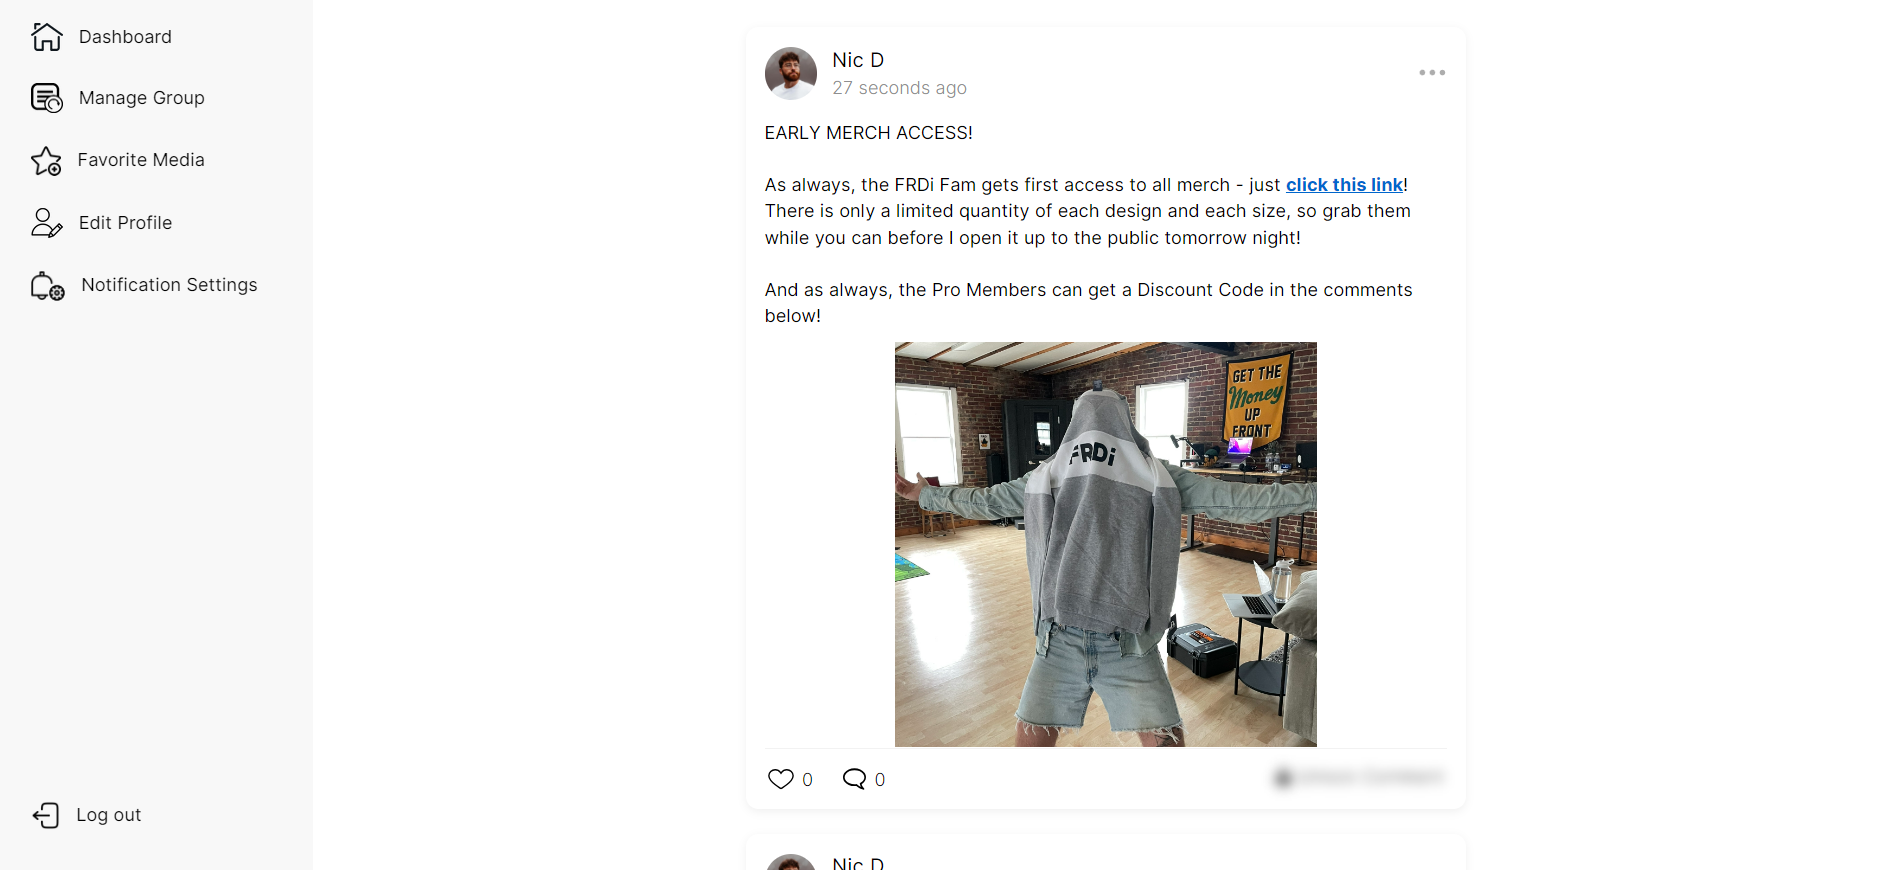
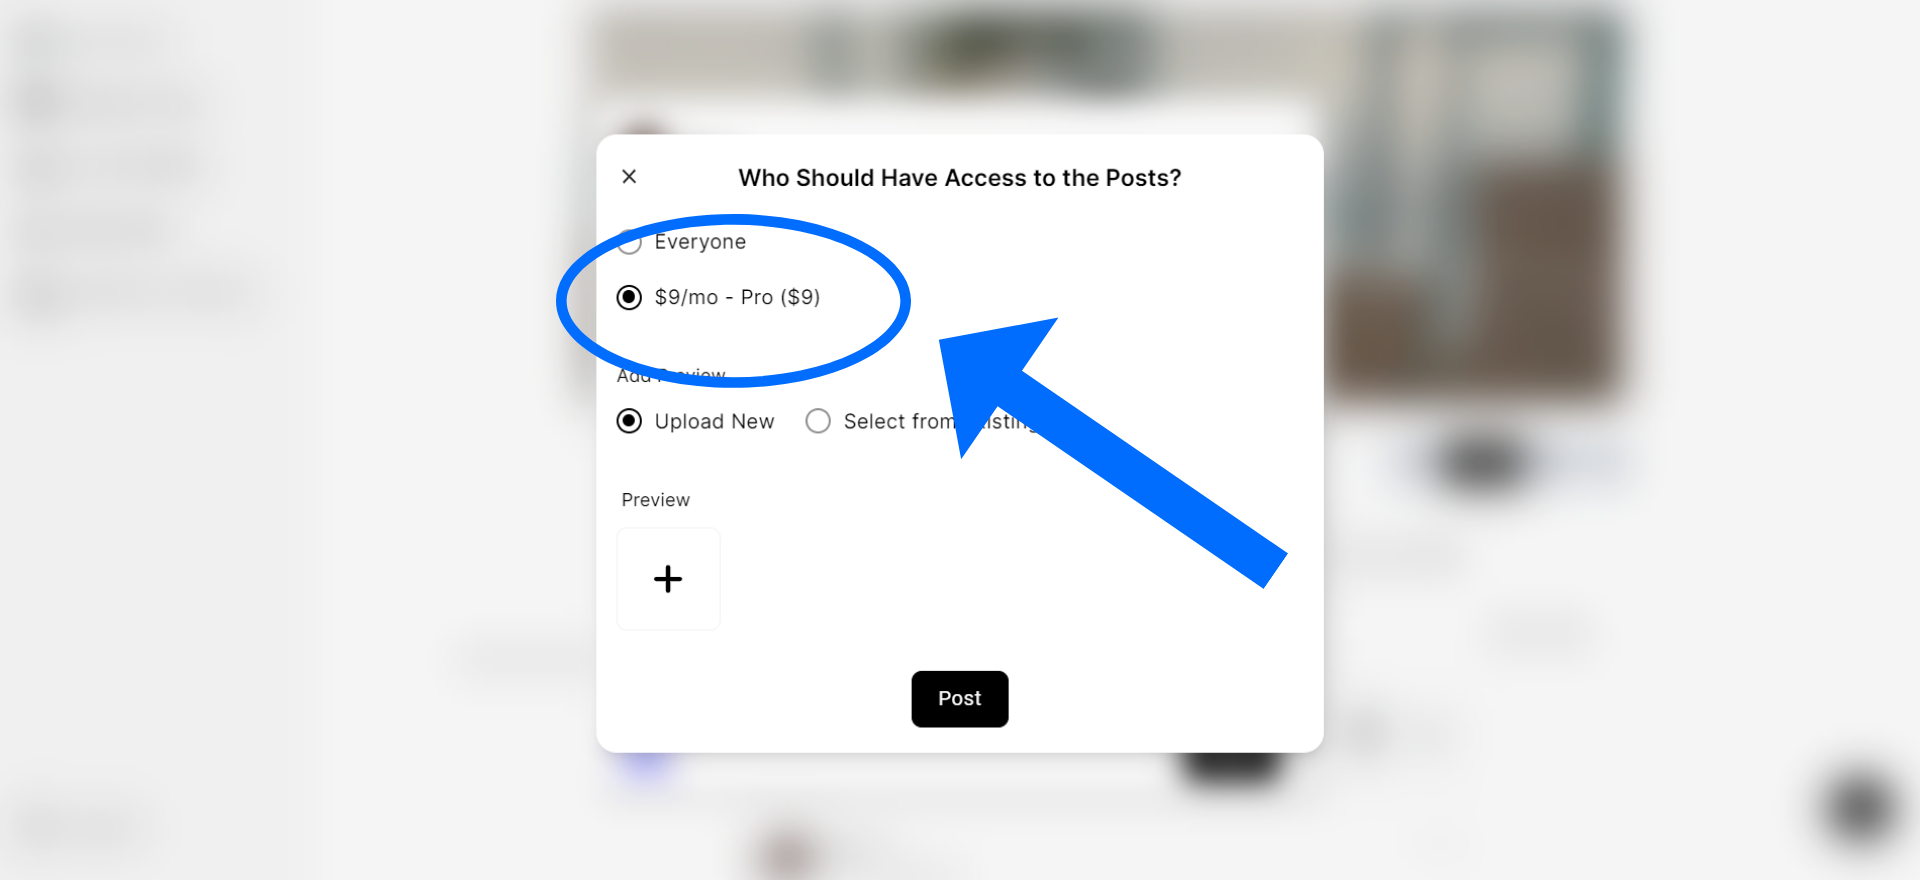
If you upload media to a post that you only want paid members to see, you can add a preview for free members to see what they are missing out on!
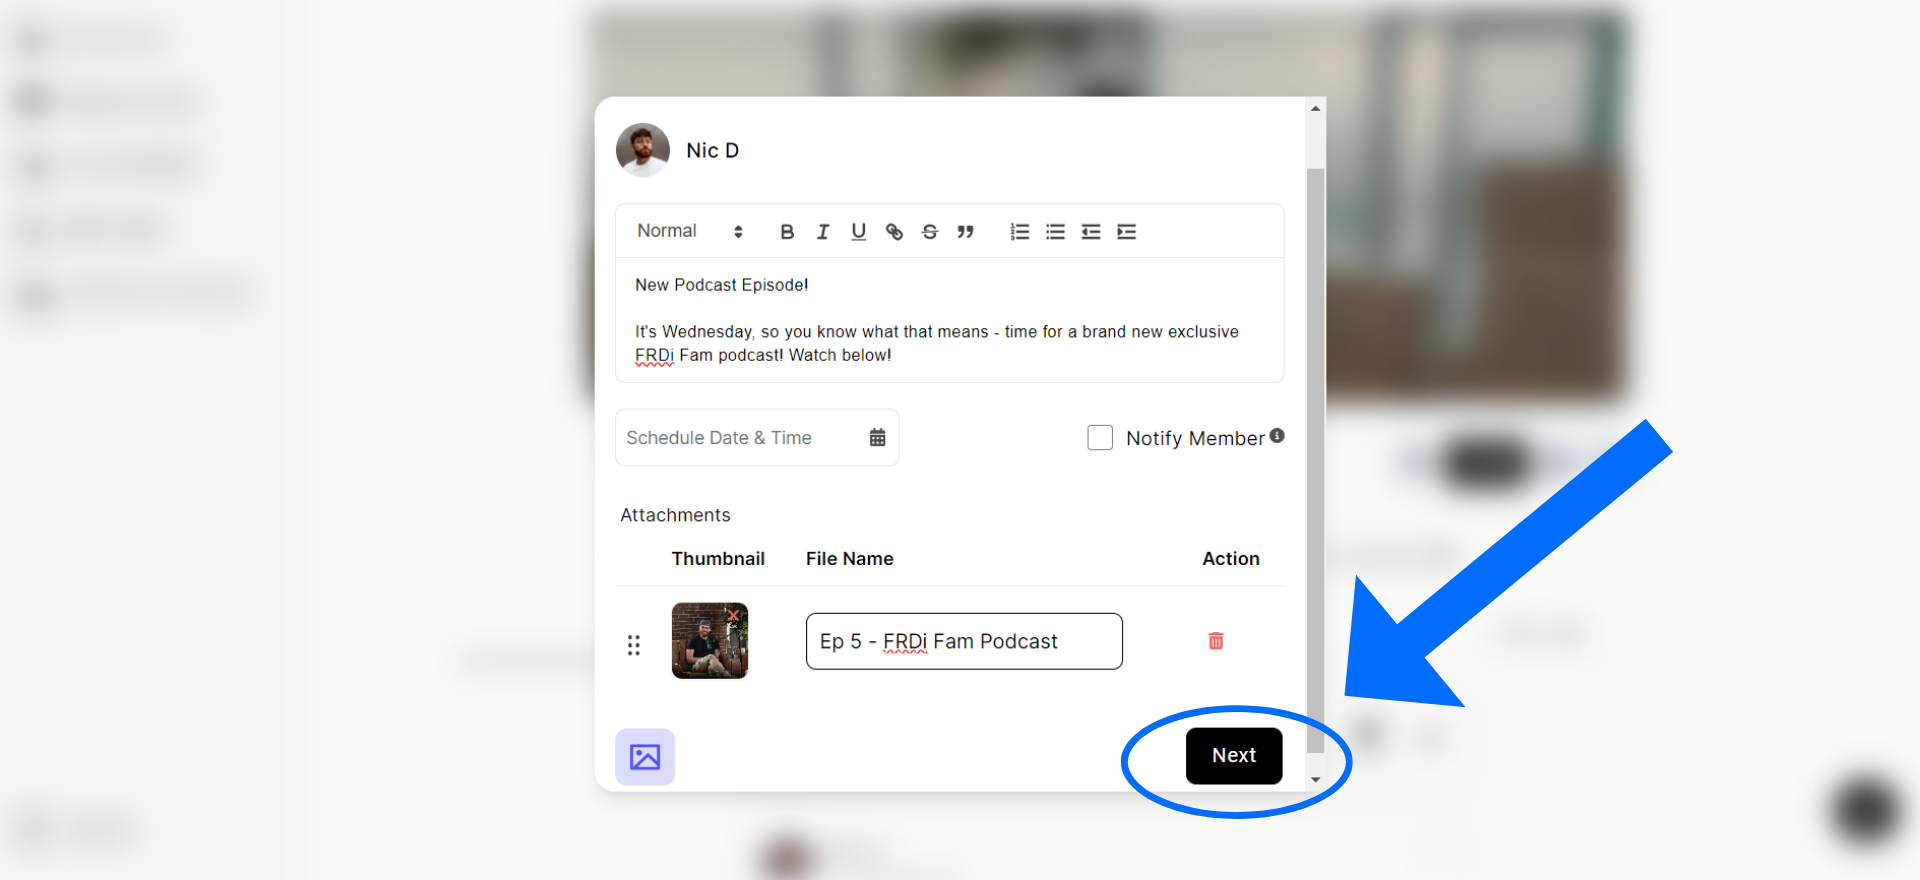
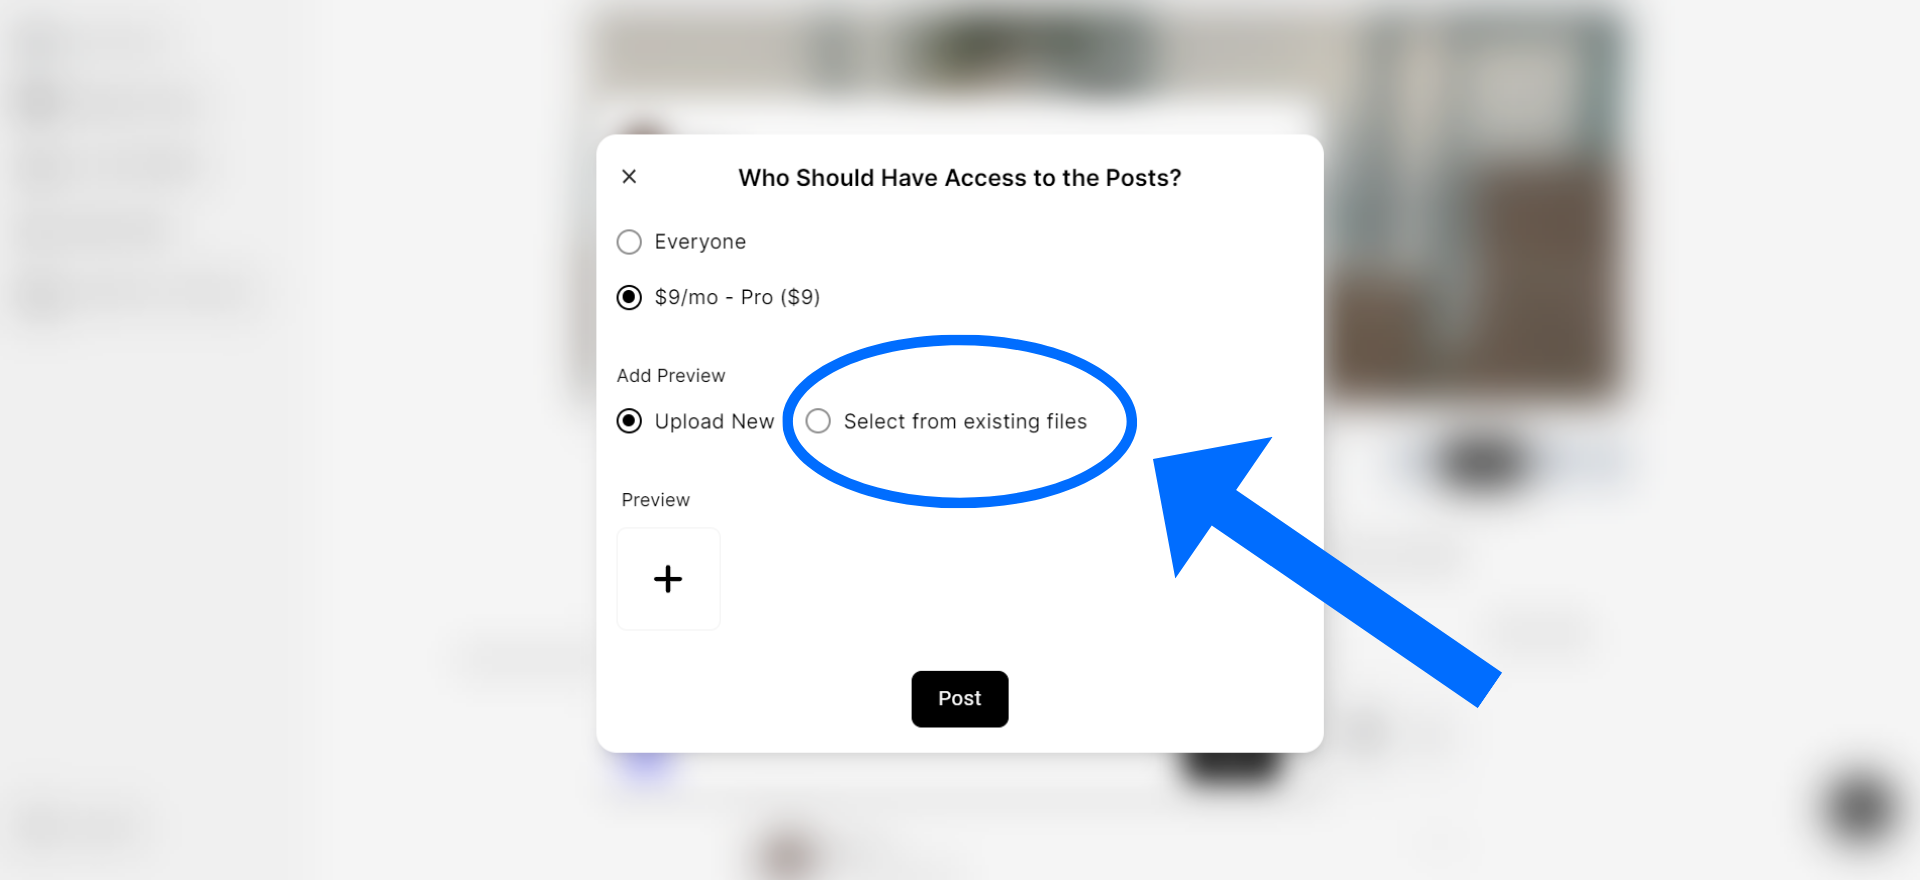
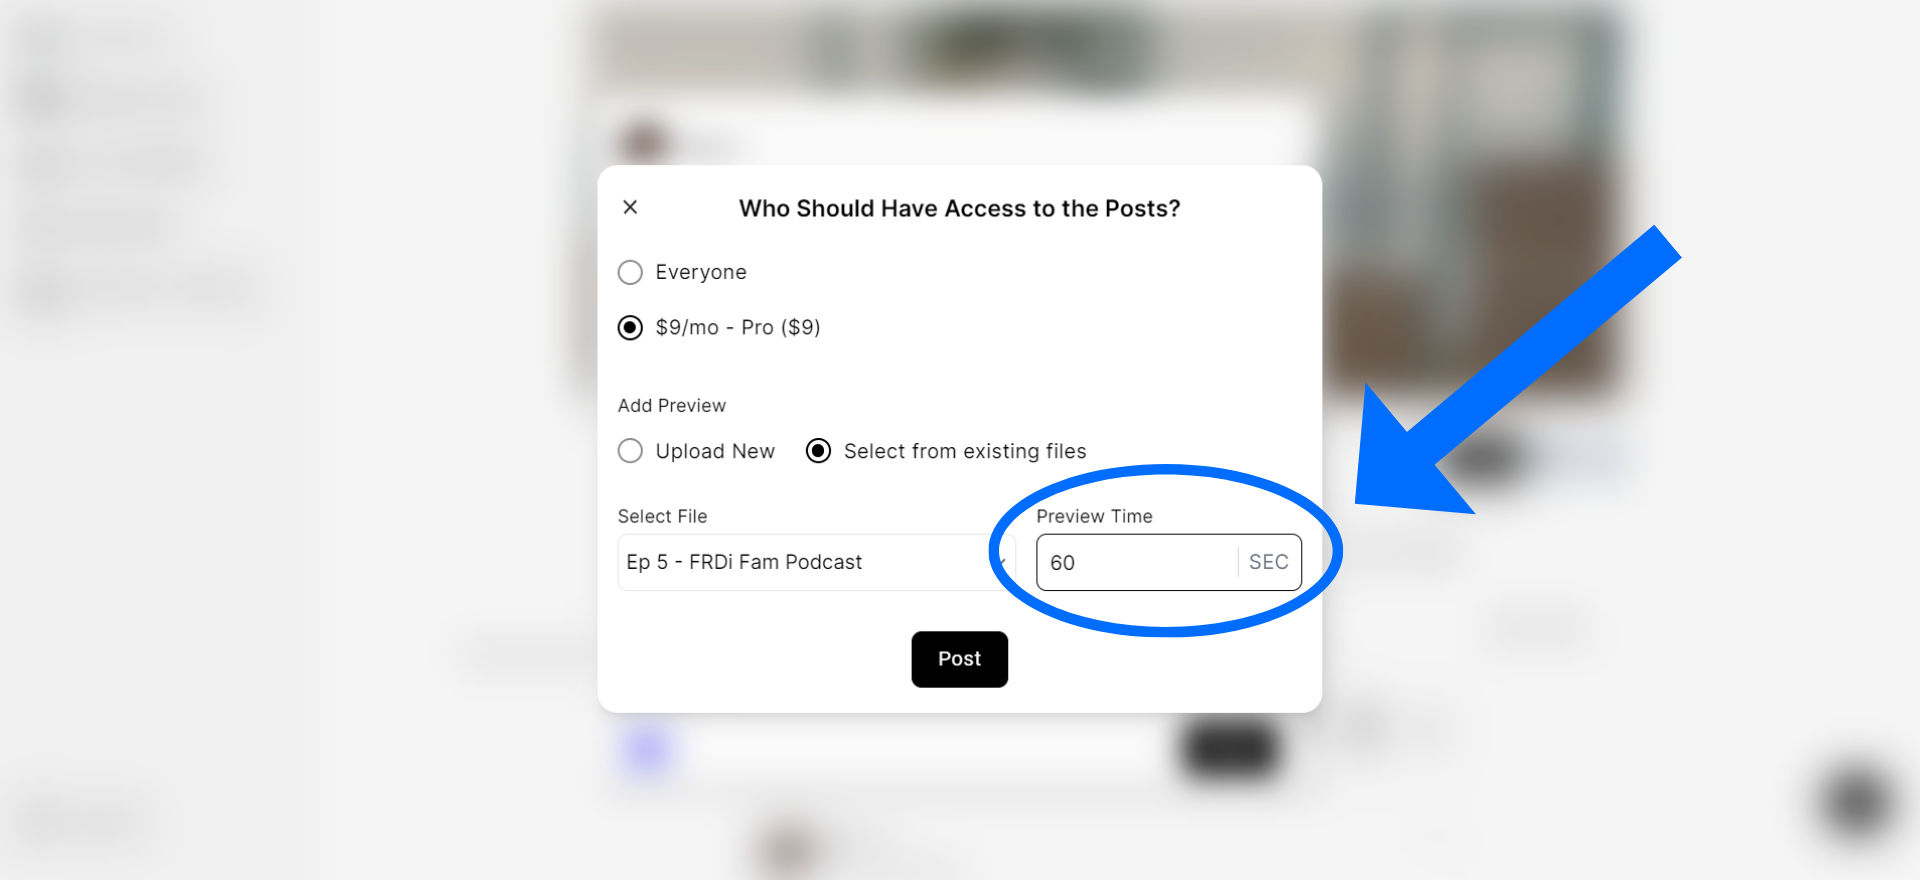
When you upload media to a post, you will click “Next” and then choose a paid tier who should have access (remember that anyone in a higher tier than the one you selected will automatically have access too). After you choose the tier, a preview icon will appear. You will have two options (1) you can manually upload a new file to be the preview or (2) you can enter how many seconds of the file the free members should see (it will start at zero and go until the second count you enter).
1. Make a post on the Home Feed, attach the Media, and click “Next”
2. Select the Paid Tier who should have access to the Media (which will enable the “Add Preview” section)
3. You can upload a new file as the preview (such as a custom time stamp or trailer), OR you can use the media you already attached
4. Select how many seconds the preview should be (it automatically starts at 0 and the longest it can be is 60 seconds aka 1 minute)
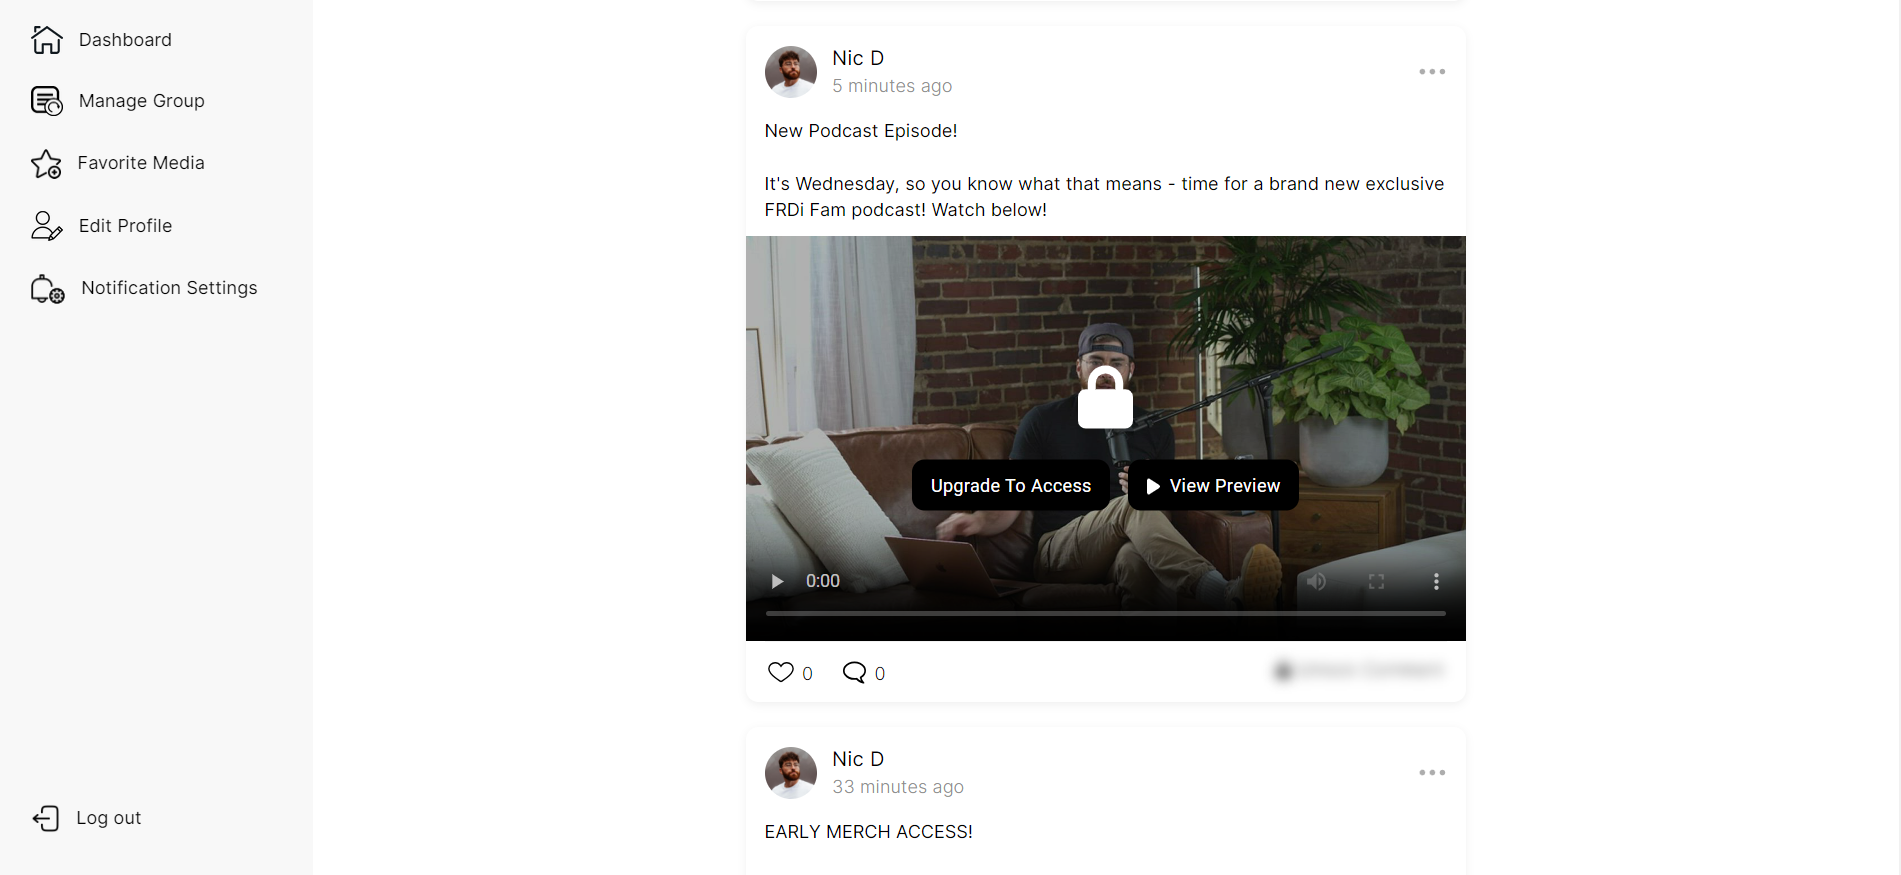
5. Free members will see this view (paid members will be able to play the media directly from the home feed)
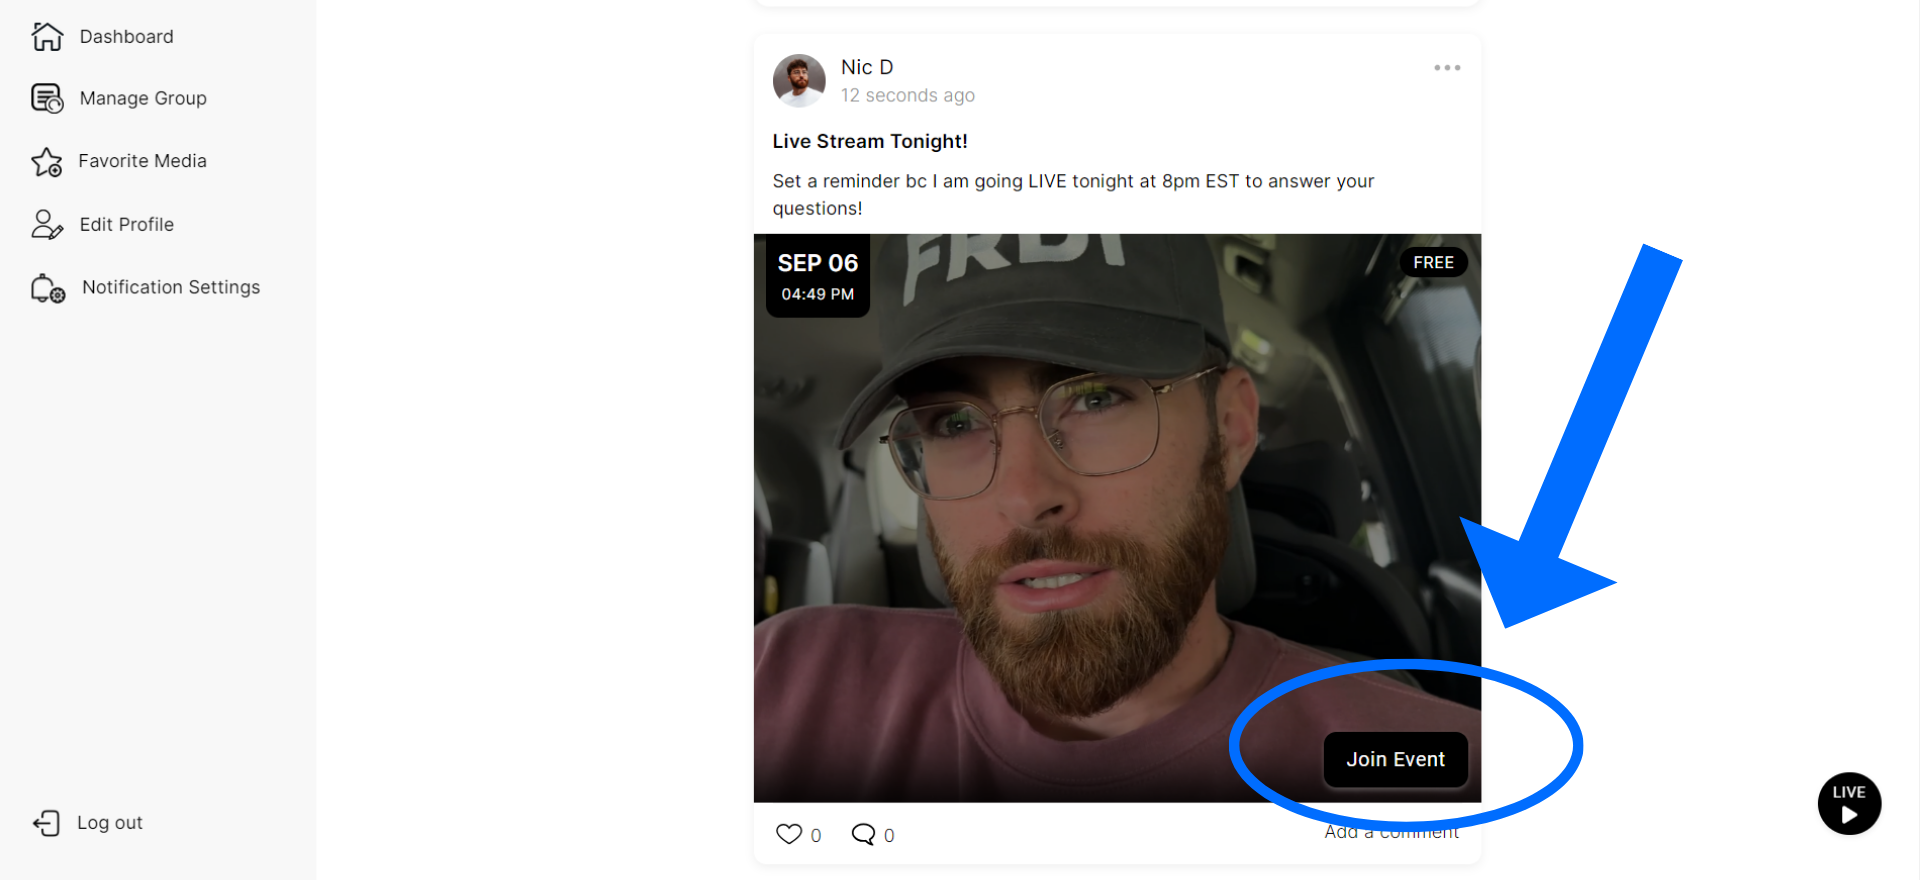
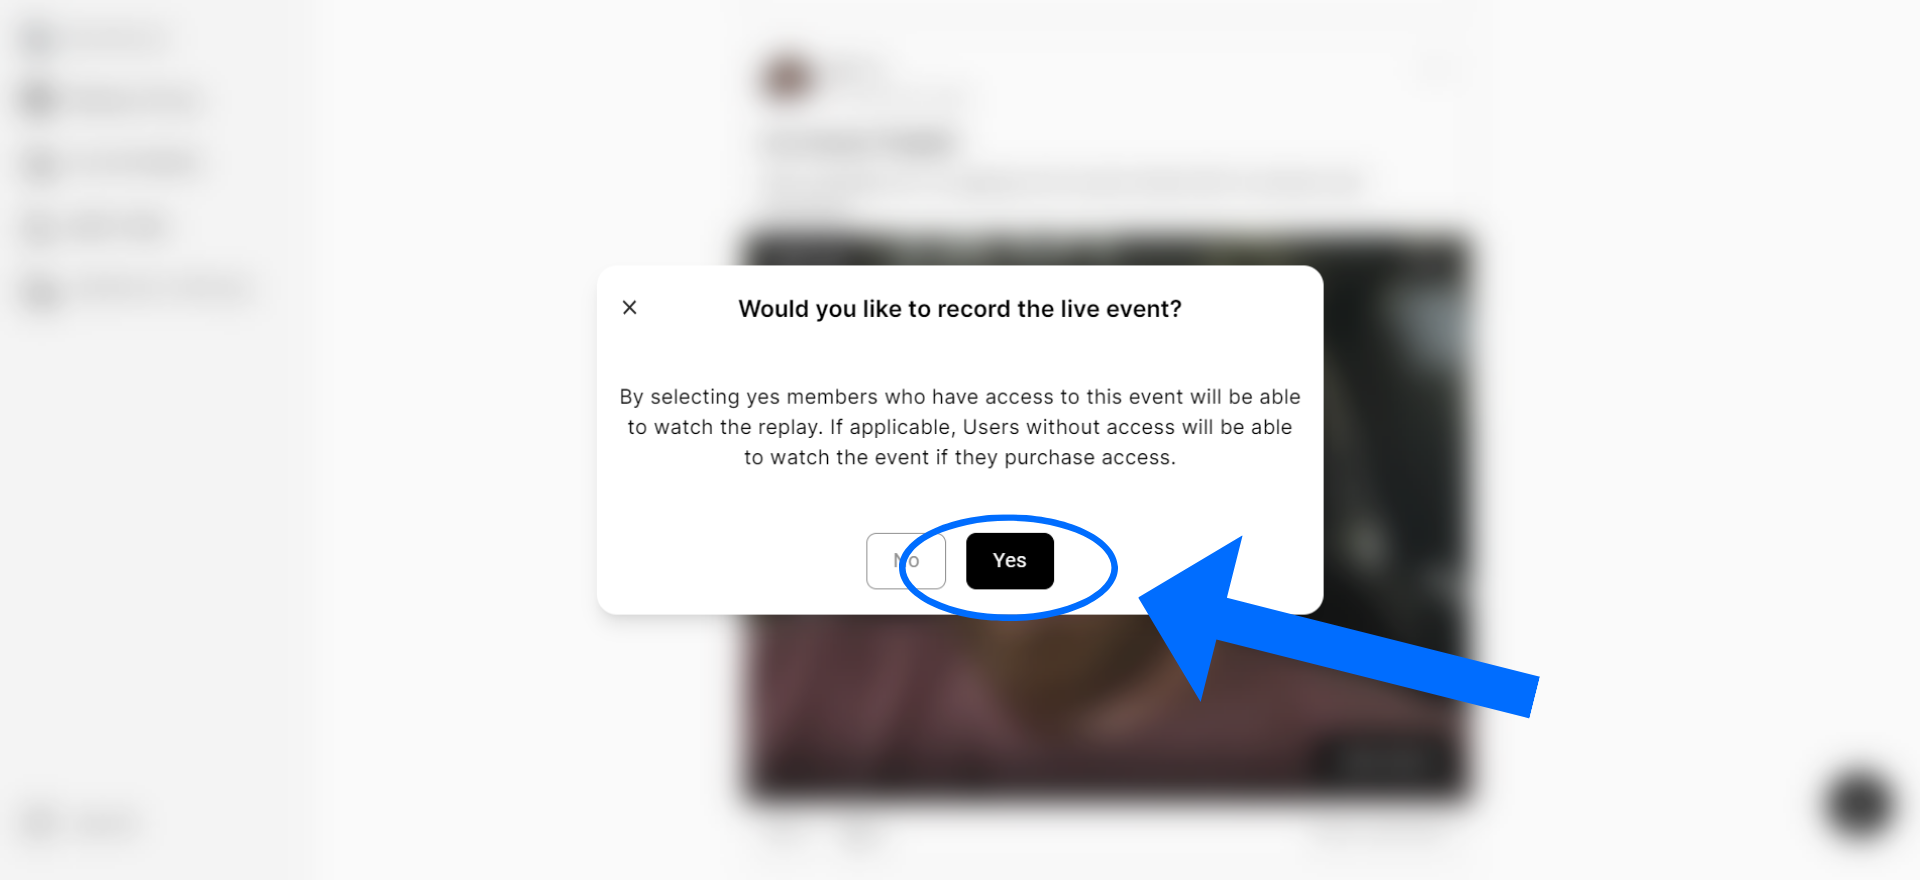
Yes you can! When you start a livestream, you will be prompted asking if you want to record the livestream. If you say “Yes”, then anyone who would have had access to the livestream will be able to rewatch the stream on the home feed at any time. If you click “No”, then your post will show your Livestream cover photo with a text overlay that says “Livestream” has ended.
For example: If you went Live for paid members only and clicked “Yes” to record, then any paid member can rewatch the livestream on the homefeed after you finished (which is useful because everyone has different availability). If you clicked “No” on record, then no one – free or paid – would be able to rewatch the live stream.
1. Create a Live Stream and click “Join Event” to start it
2. Click “Yes” when asked if you want to record
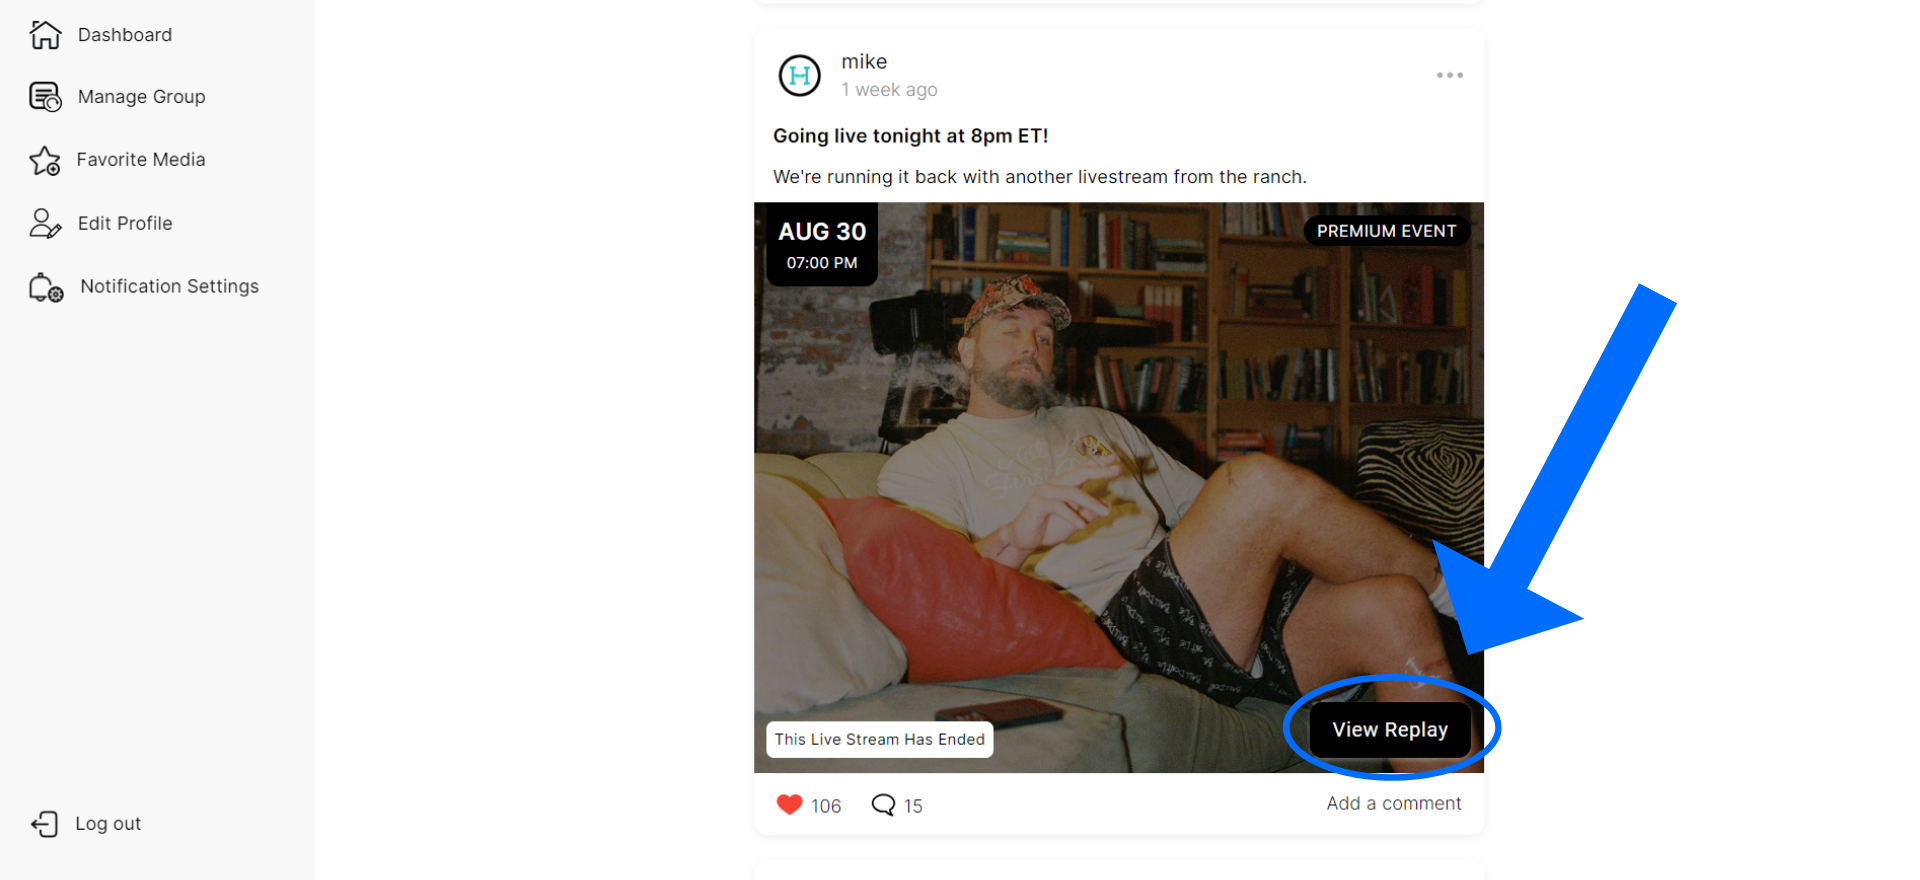
3. After you end the Live Stream, a “Replay” button will show up instead of the “Join” button
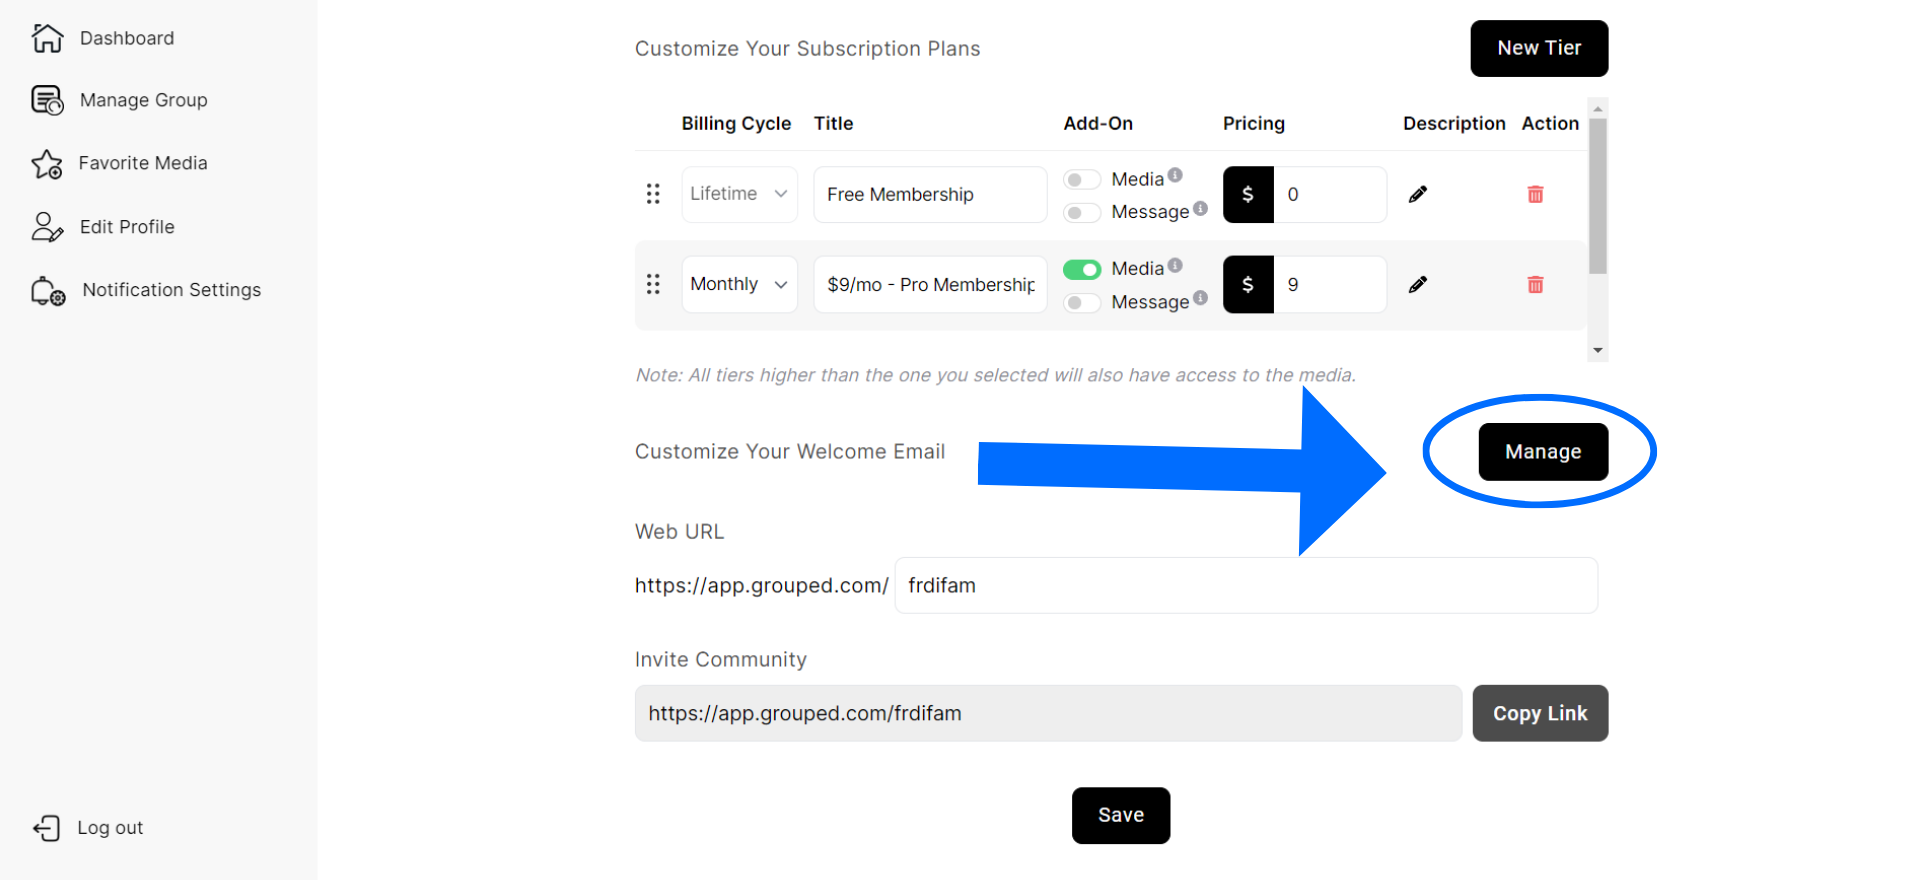
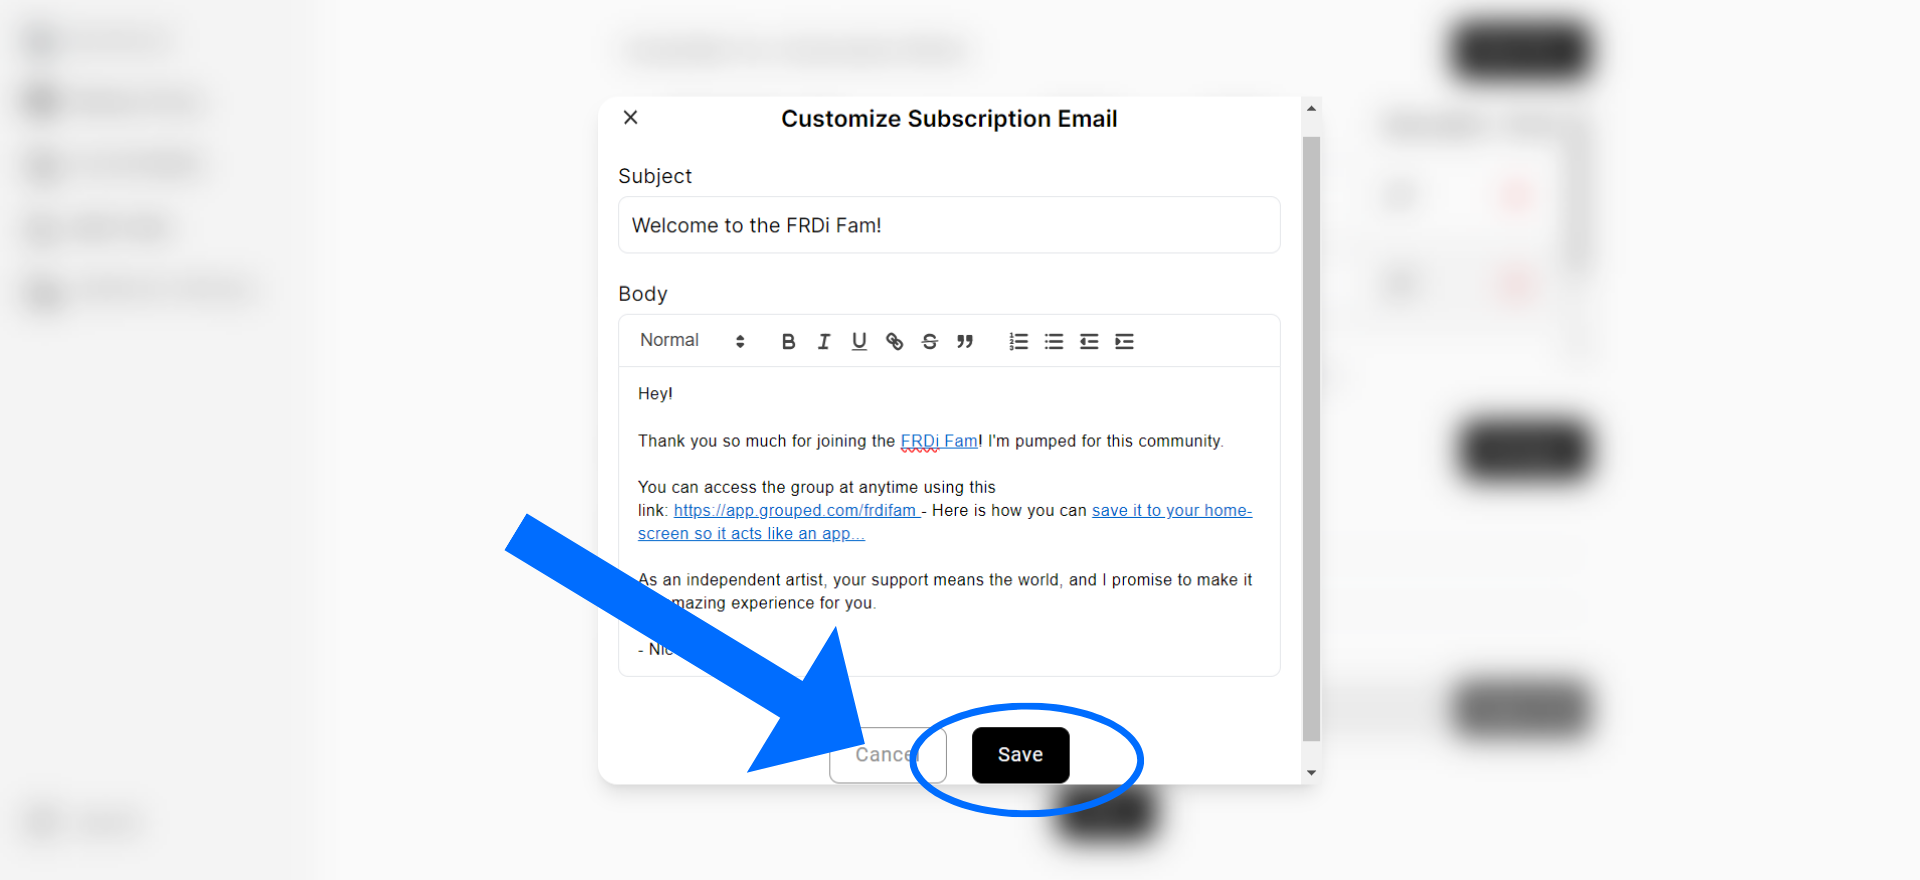
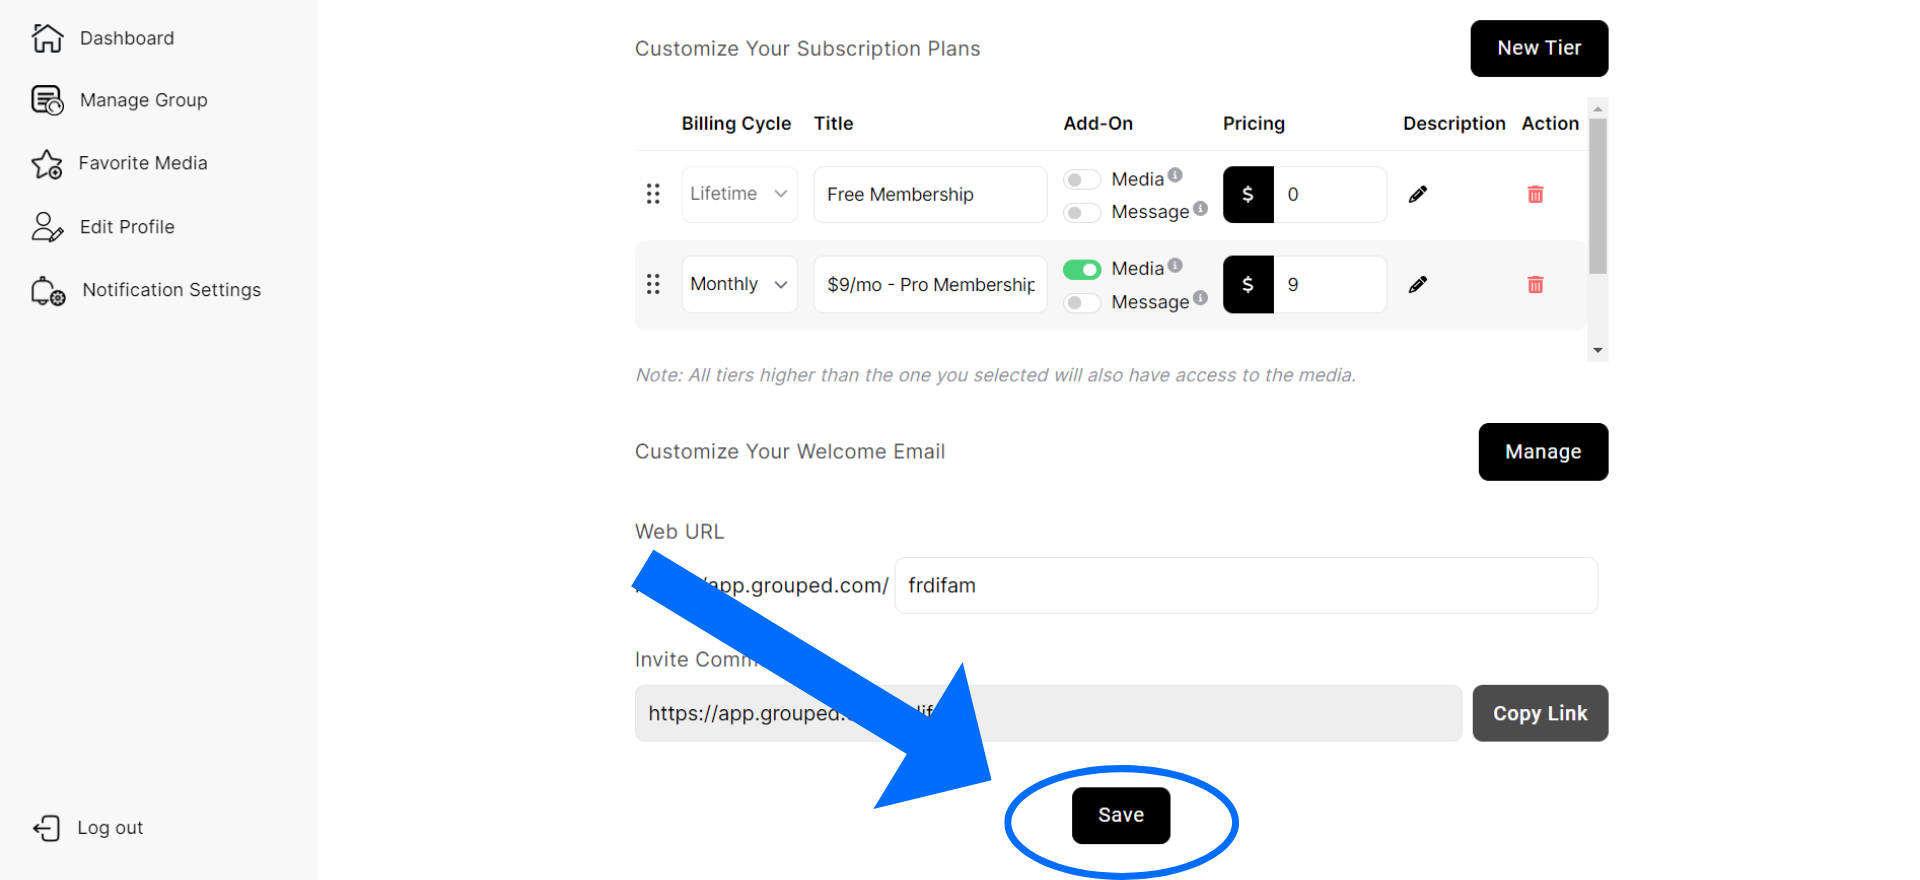
When a fan signs up to your Grouped (whether free or paid), they will get a confirmation email welcoming them to your community – and you can customize this email! All you have to do is go into your Grouped, click the Settings Icon (the ‘gear wheel’ under the header image), and scroll down below where your tiers are. Directly under your tiers you’ll see the text “Customize Your Welcome Email” with a black button that says “Manage” next to it. Click the black “Manage” button and customize the email to make it feel more personal and to thank your fans for signing up!
1. Click the “Settings” gear
2. Scroll down under the tiers and click “Manage” next to Customize Welcome Email
3. Edit and click “Save”
4. Scroll to the bottom and click “Save”
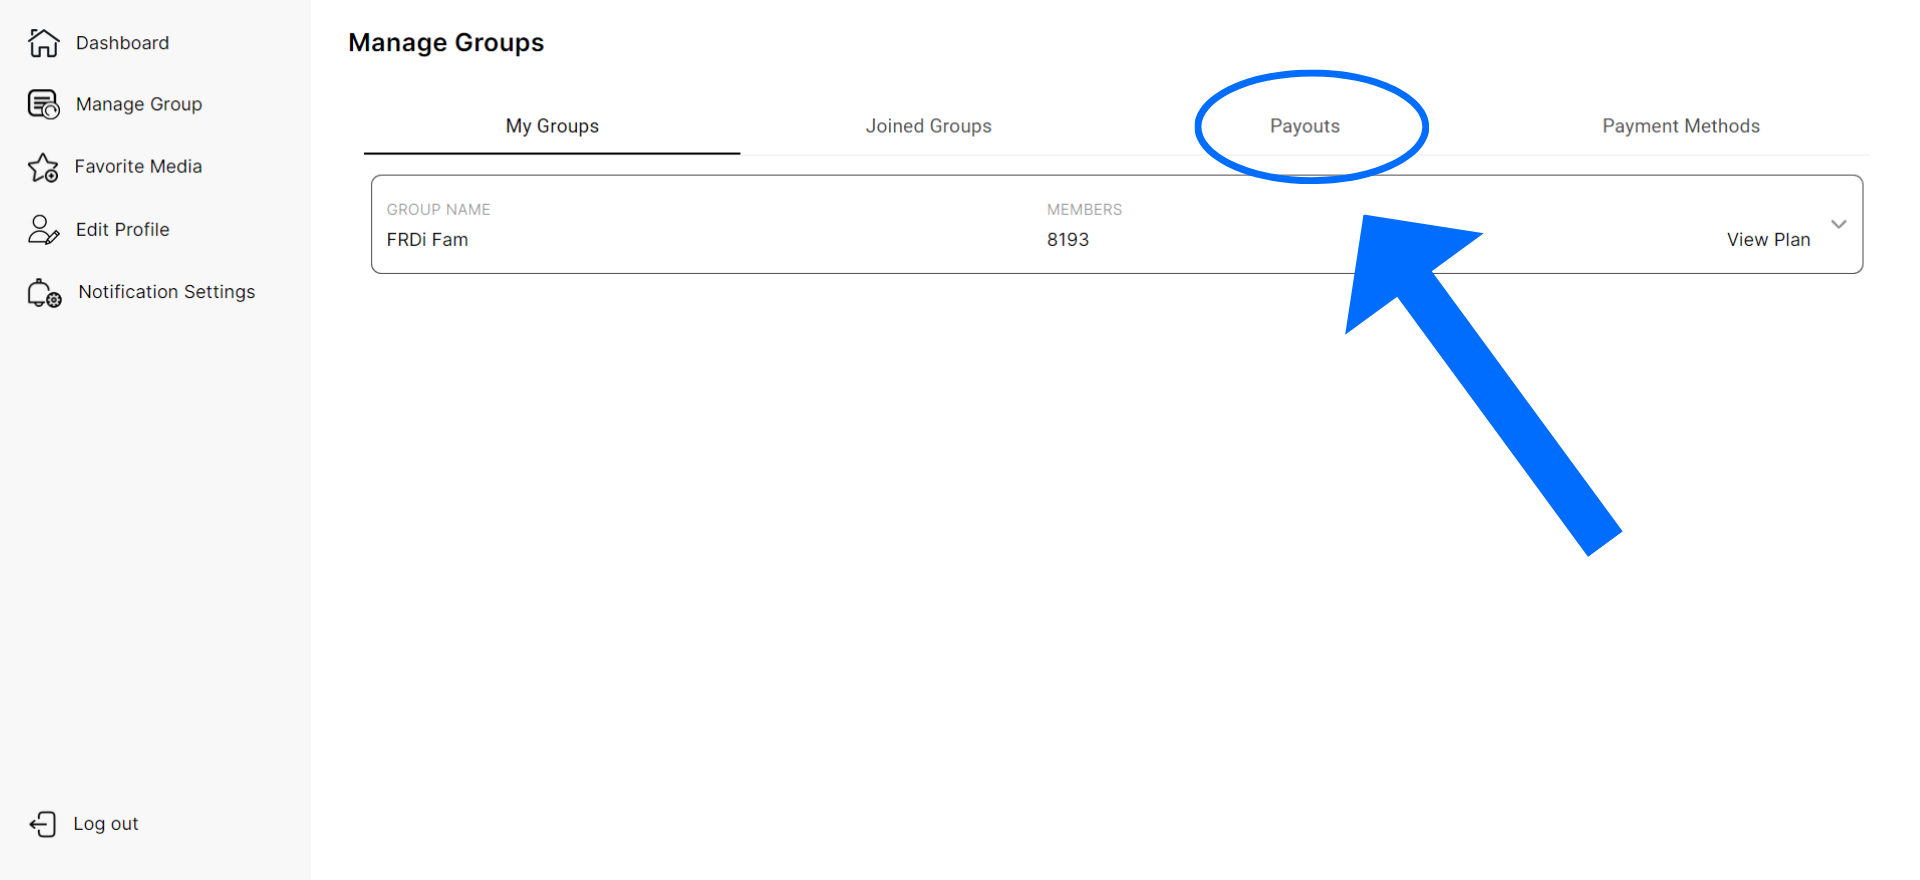
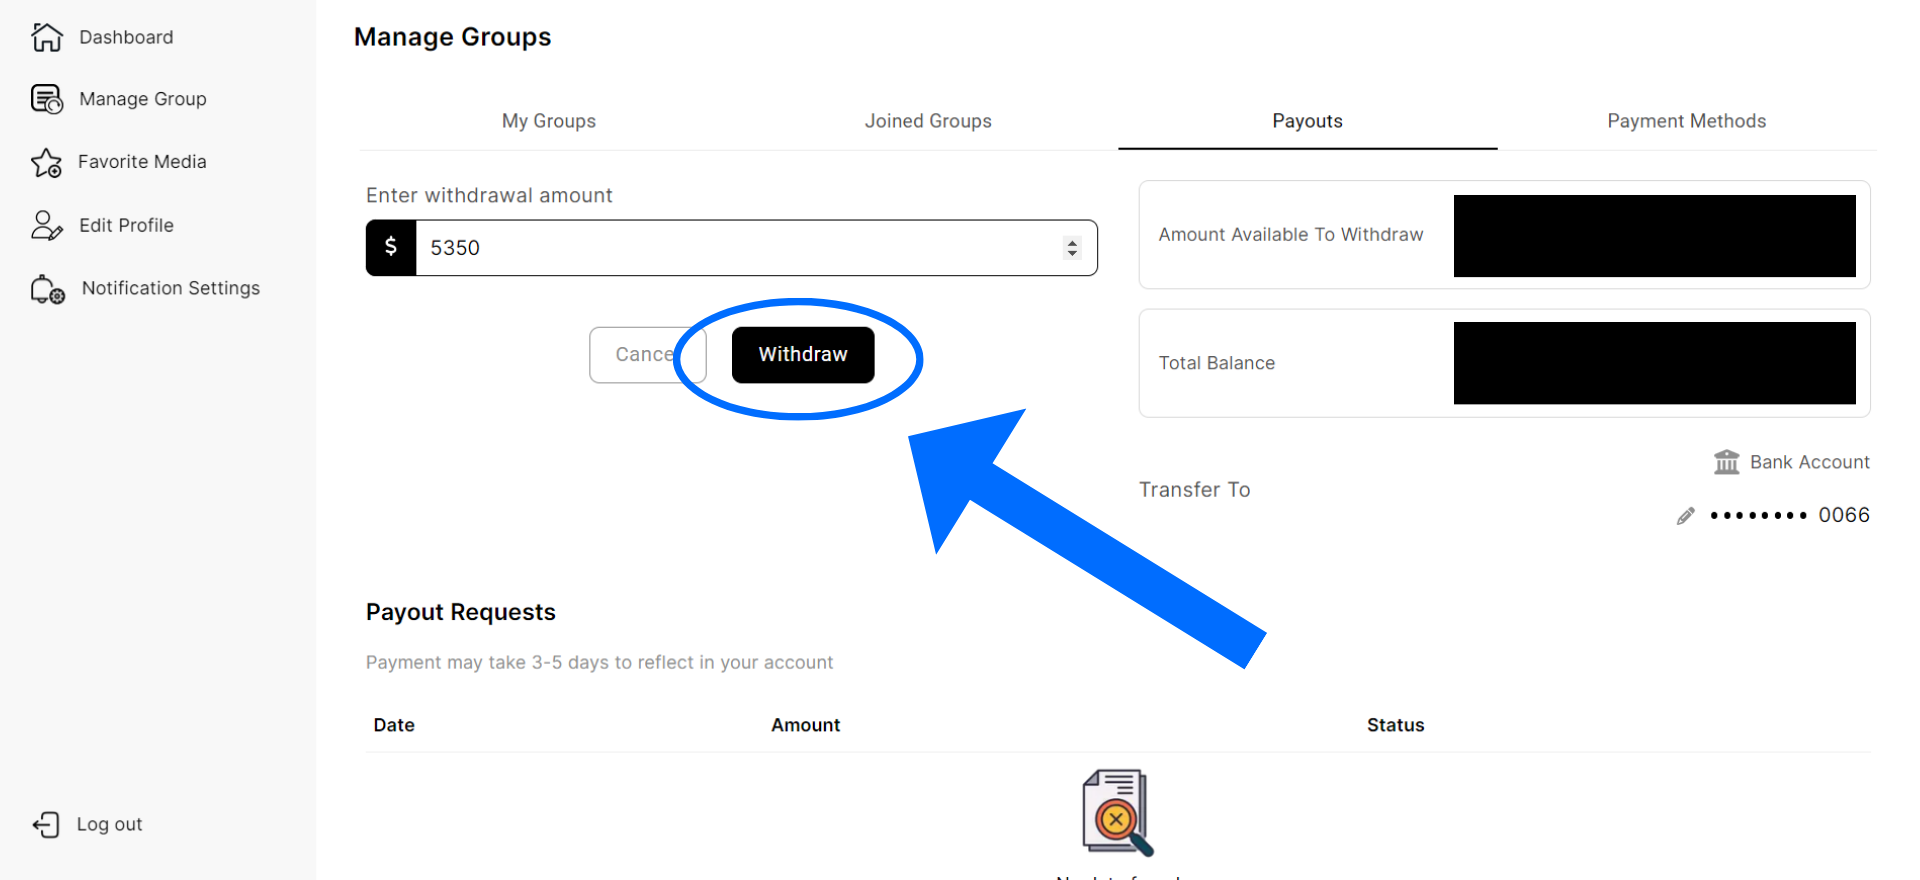
Go to your dashboard, click “Manage Group” on the left menu bar, and then click the “Payouts” tab at the top. From there, you can instantly withdraw as much as you want from your available balance.
1. Click “Manage Group”
2. Click “Payouts”
3. Enter the amount and click “Withdraw”
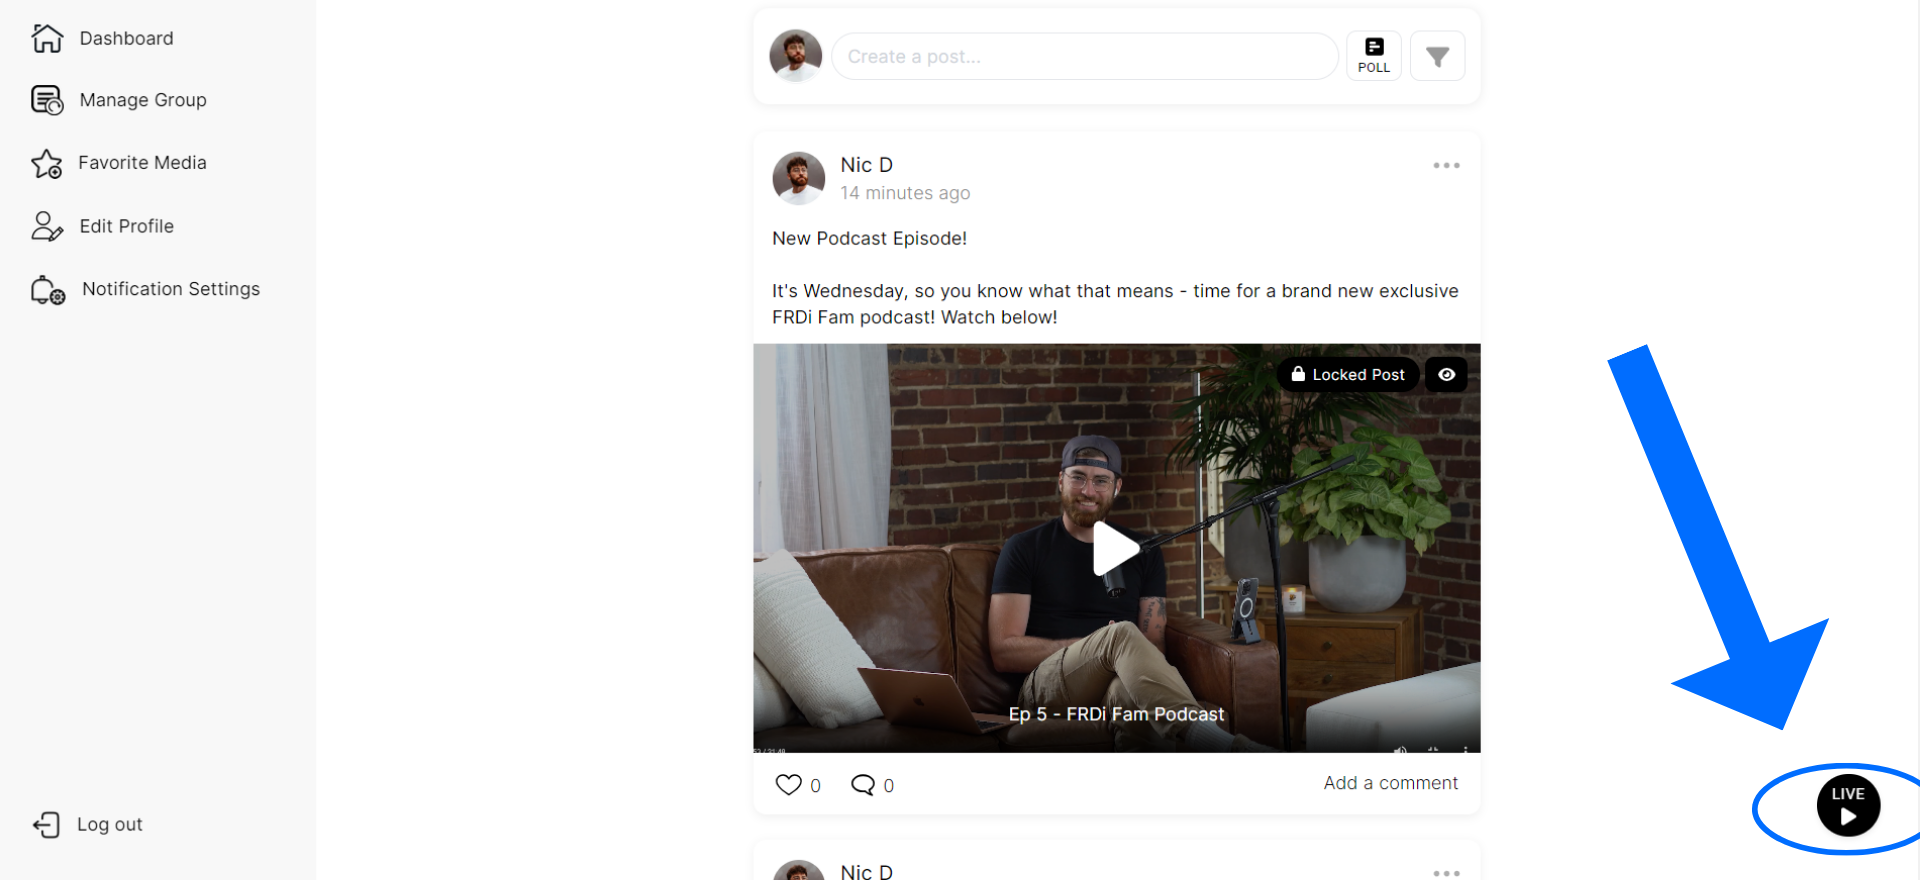
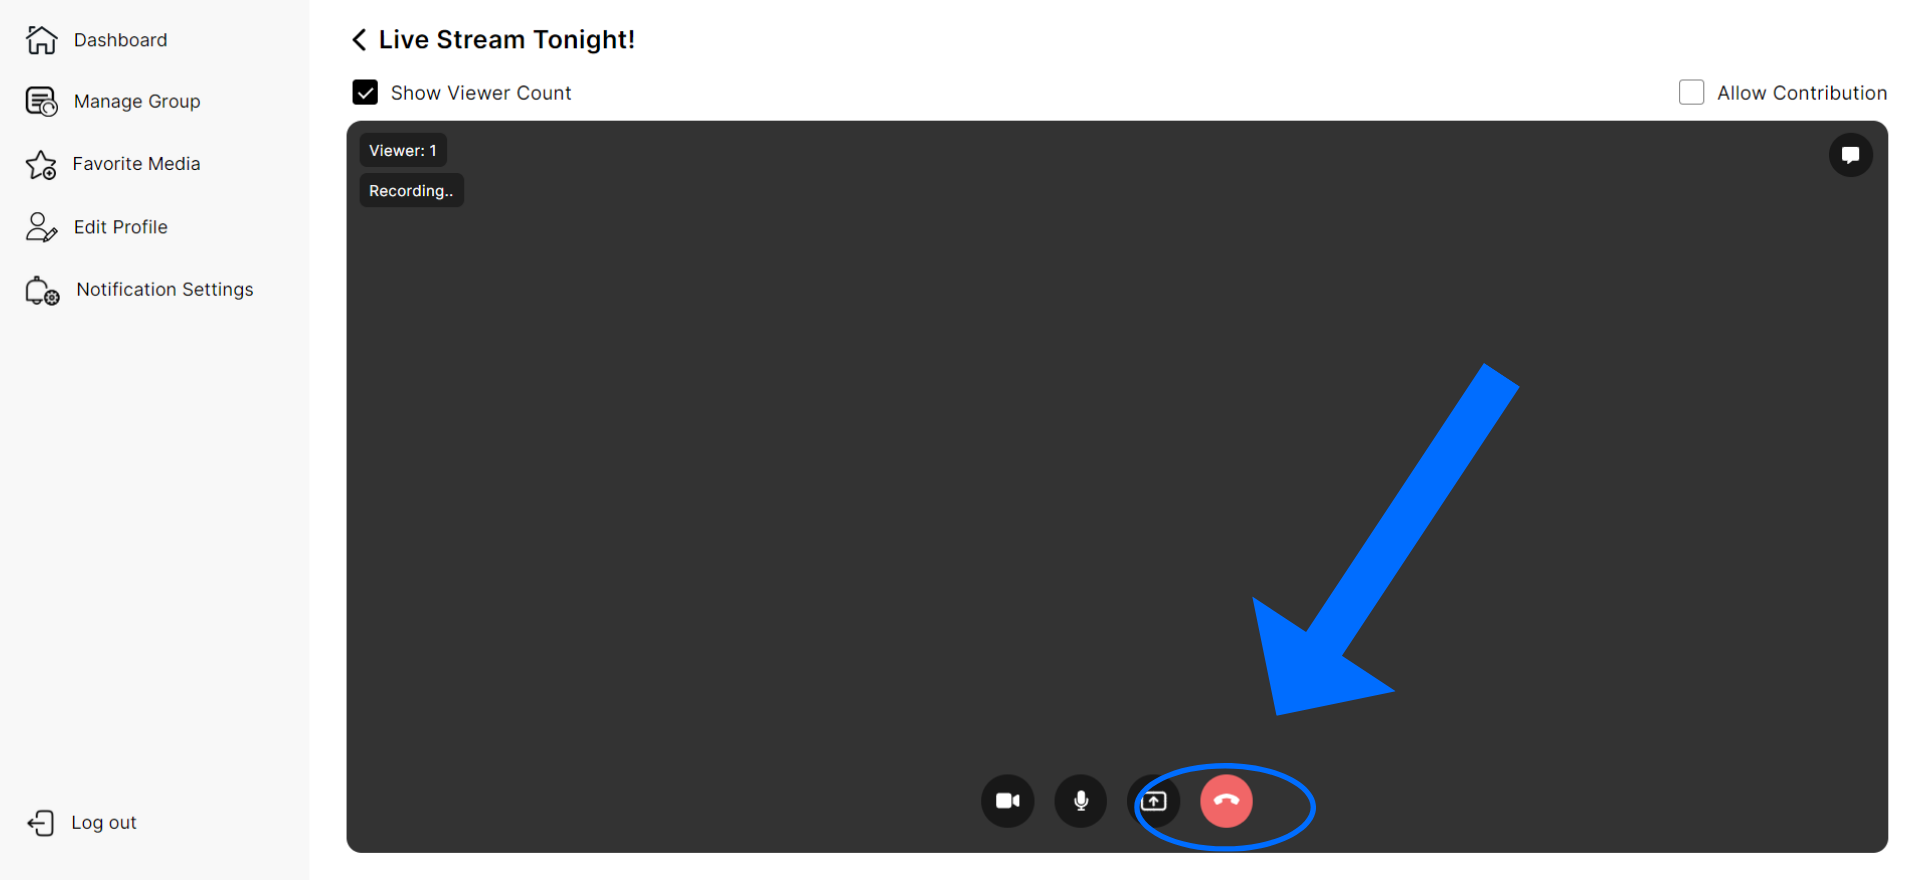
Doing a Live Stream on Grouped has endless possibilities. You can choose who can access the live stream, if you want to record it, if you want to publicly show the view count, and if you want to allow fins to make contributions (tips).
To set up a Live Stream,
- Click the “Live” black circle in the bottom right and fill out the Title, Description, and Cover Photo
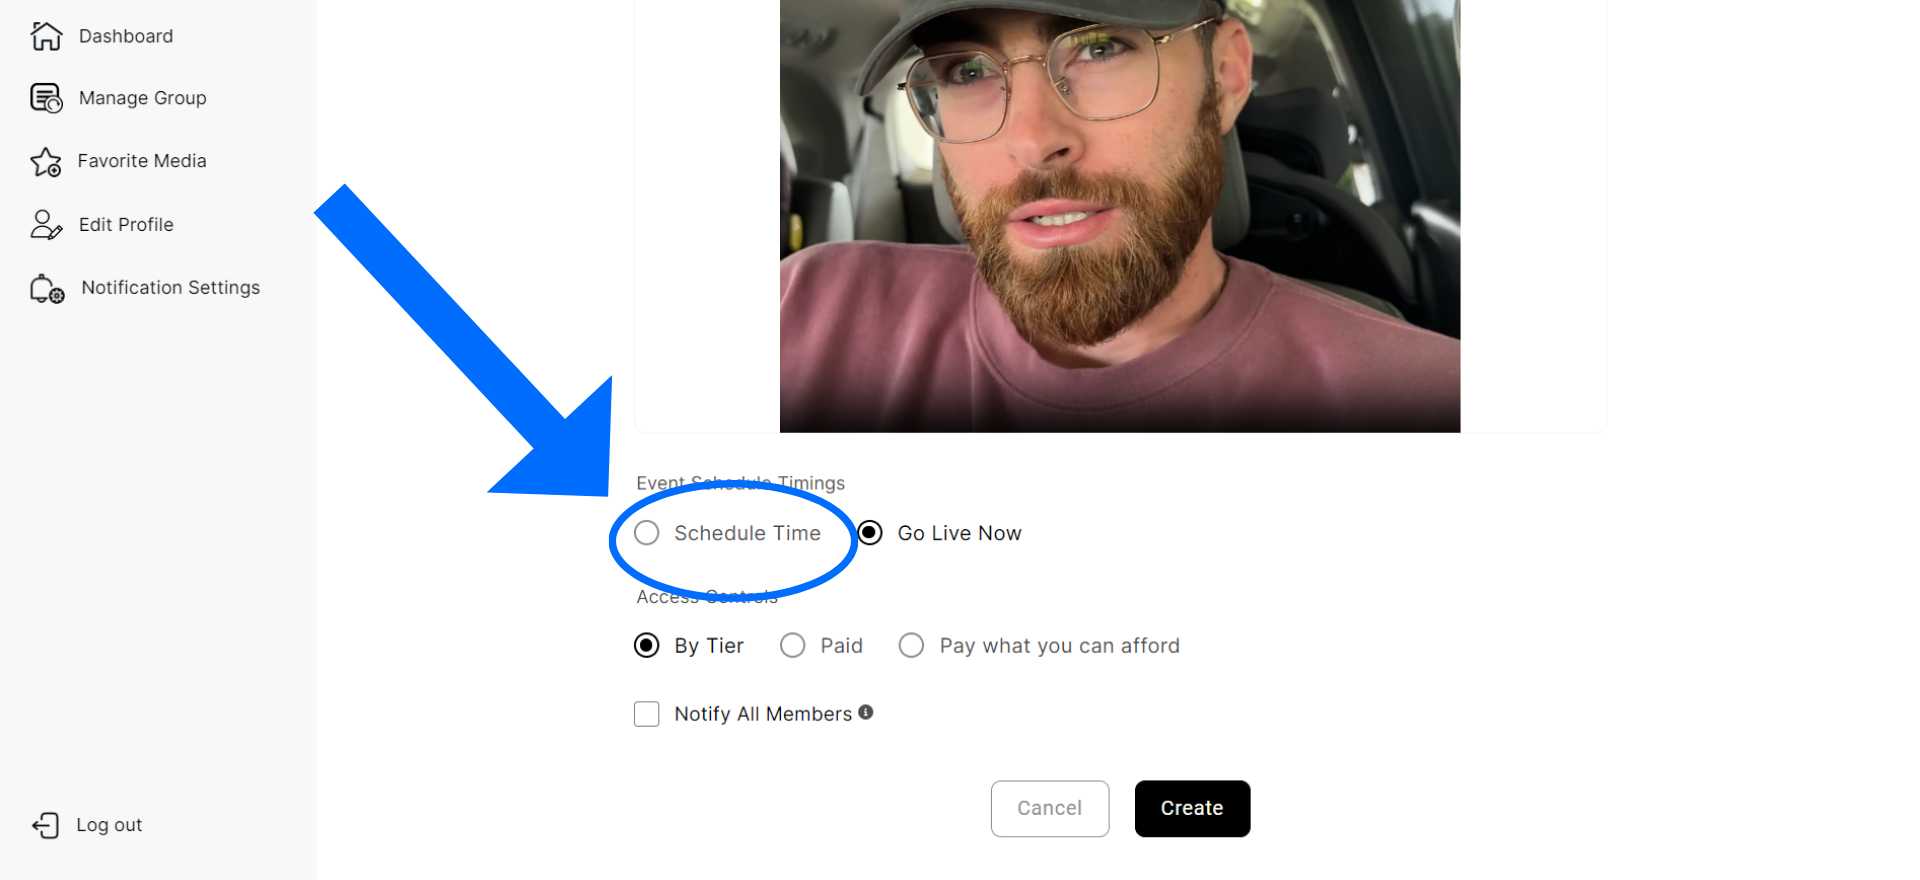
- Choose to go live instantly or schedule it for later
- The “Access Controls” allow you to customize who can see it. If you pick “By Tiers”, you can choose to make it Free for all members or just for certain paid tiers. You can also choose “Paid” which allows you to set a price that ALL members have to pay, or you can choose “Pay What You Want” and it makes all fans pay a minimum to access it.
- Pick whether or not you want to notify fans (send an email) and if you do, then you can click Customize Email to edit the subject and body of the email
- Once you enter the live stream, you can choose whether or not you want to record it so fans who missed it can watch it later.
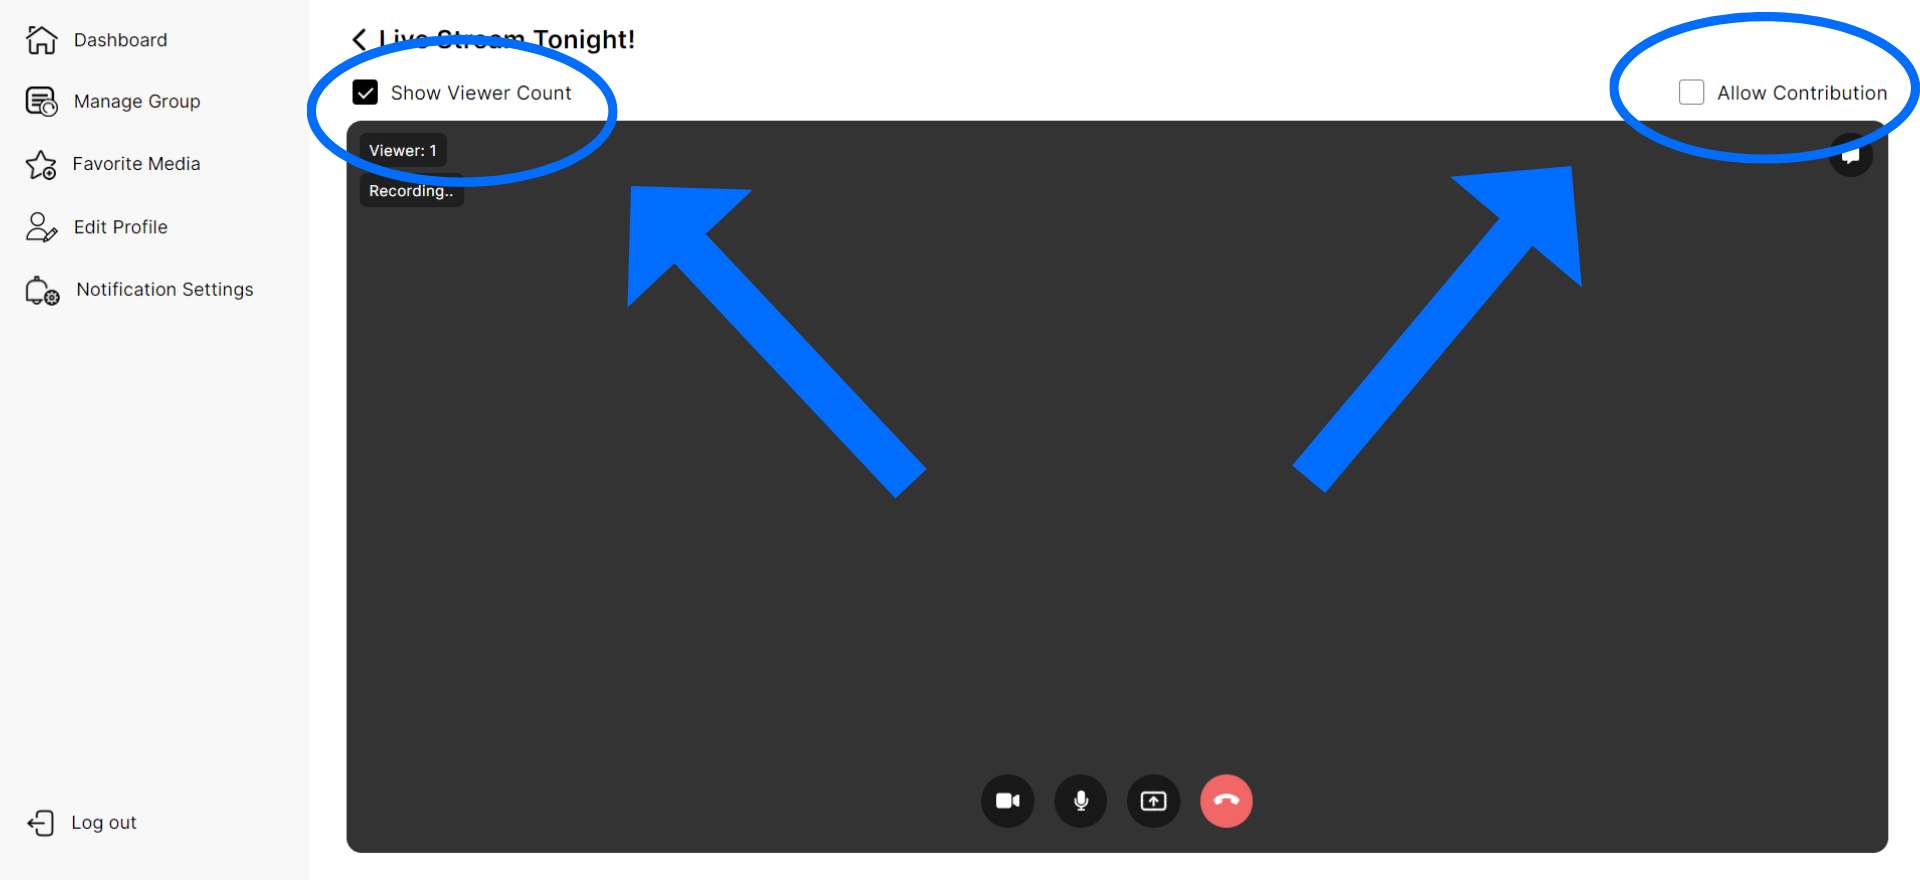
- During the Live Stream, there options at the top to control whether or not fans can see the viewer count or tip you in real time.
1. Click the “Live” black circle
2. Fill out the Title, Description, Cover Photo, and schedule your live stream (or go live now)
3. After you select the date, click on the time to set it (it will automatically be in the time zone you are currently in)

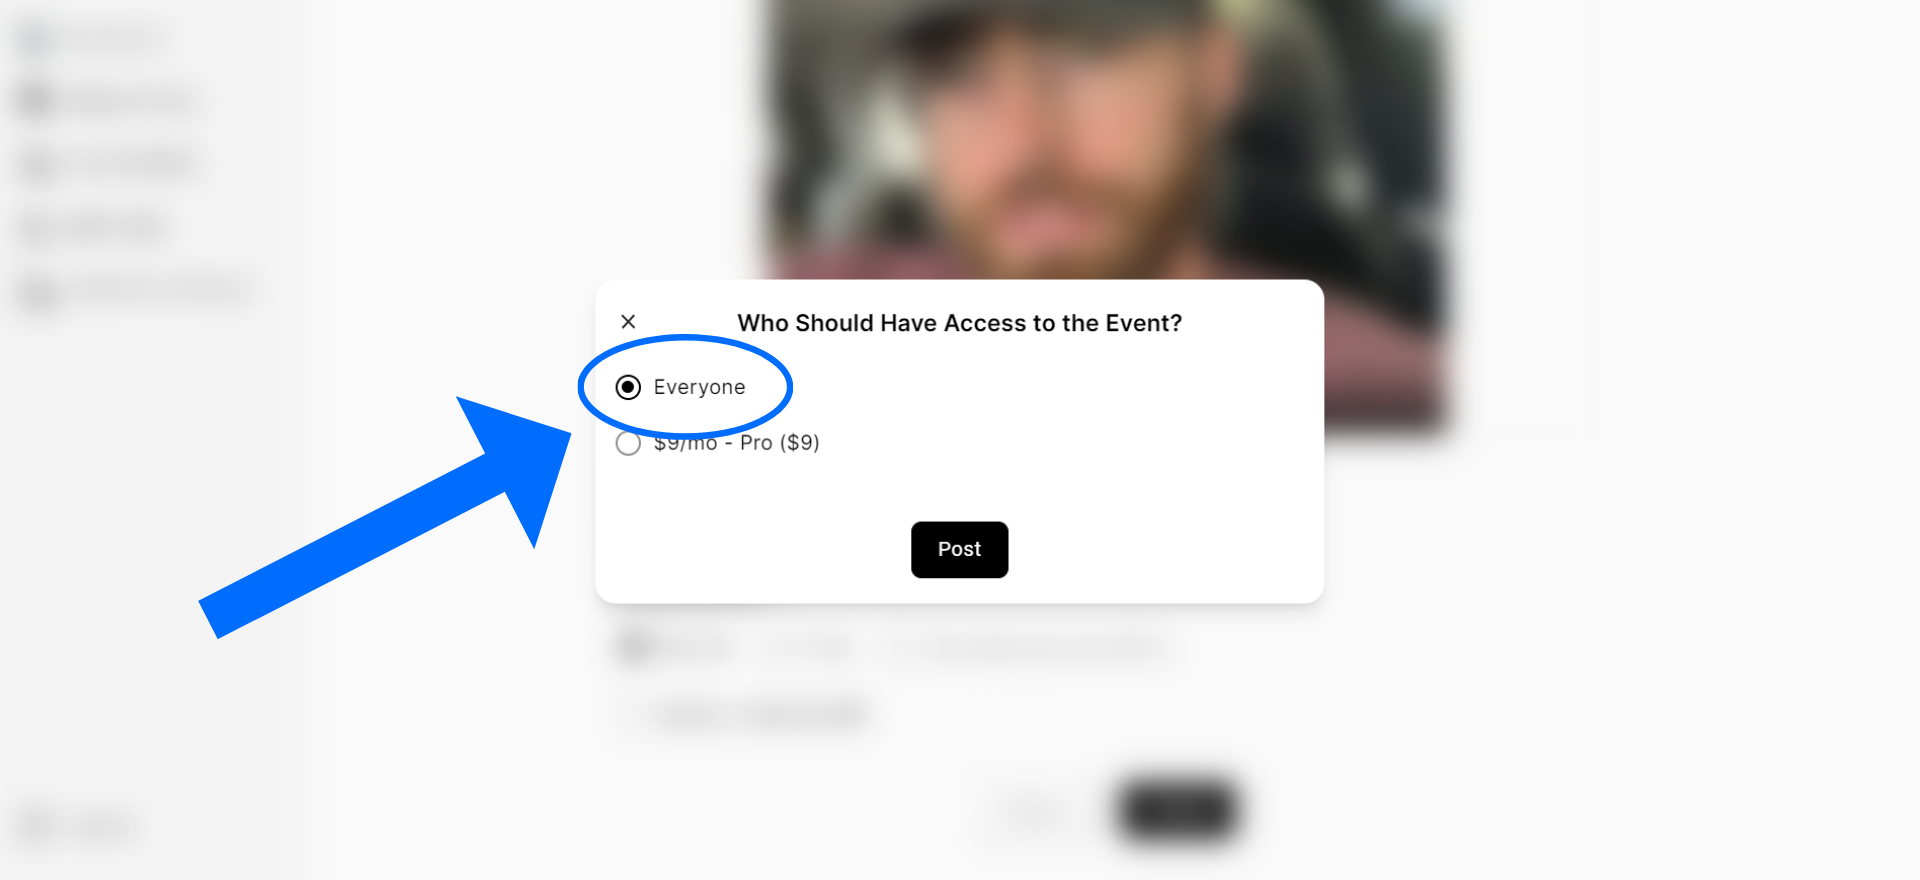
4. Choose who should have access to the live stream (selecting “By Tiers” will prompt you to select a tier when you click “Create”)

5. If you select to notify fans, click “Customize Email” to change the subject/body of the email, click “Create”, and then select the tiers you want to have access
6. When you are ready, click “Join Event” to start the Live Stream
7. Choose whether or not you want to record your live stream
8. After you “allow access” to your microphone and camera, choose if you want fans to see the view count or if you want them to be able to Tip you
9. When you are done, click the Red button to end the live stream
10. If you chose to record, the fans will have a View Replay option on the home feed
You have the option to offer Discount Codes (aka Coupons) for both memberships and media folders.
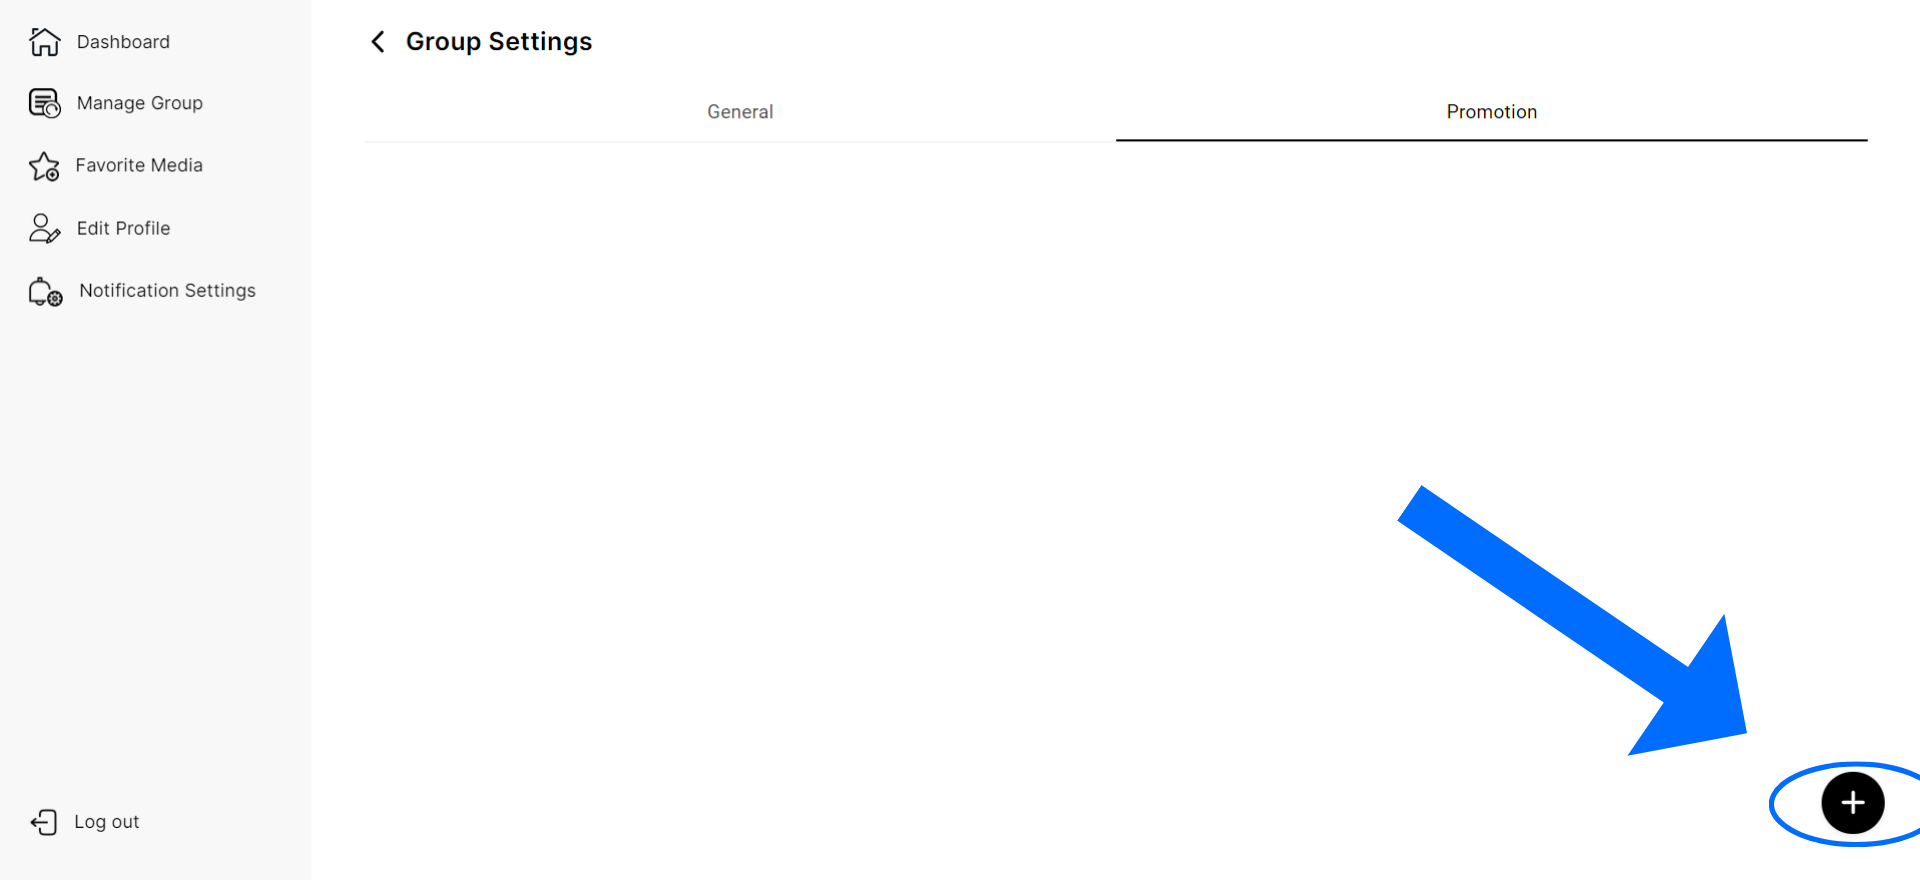
Just click the “Settings” gear, and click the tab in the top right that says “Promotion”. Then click the “+” black circle in the bottom right and select “Coupon” under the section “Promo Type”. You can customize the Coupon to apply to either a subscription, ALL media folders, or just one specific media folder.
***remember, if you offer a Discount Code for a membership/subscription, that fan is locked into that discounted price for life.
1. Click the “Settings” gear
2. Click “Promotion” in the top right
3. Click the “+”
4. Click “Coupon” under the Promo Type
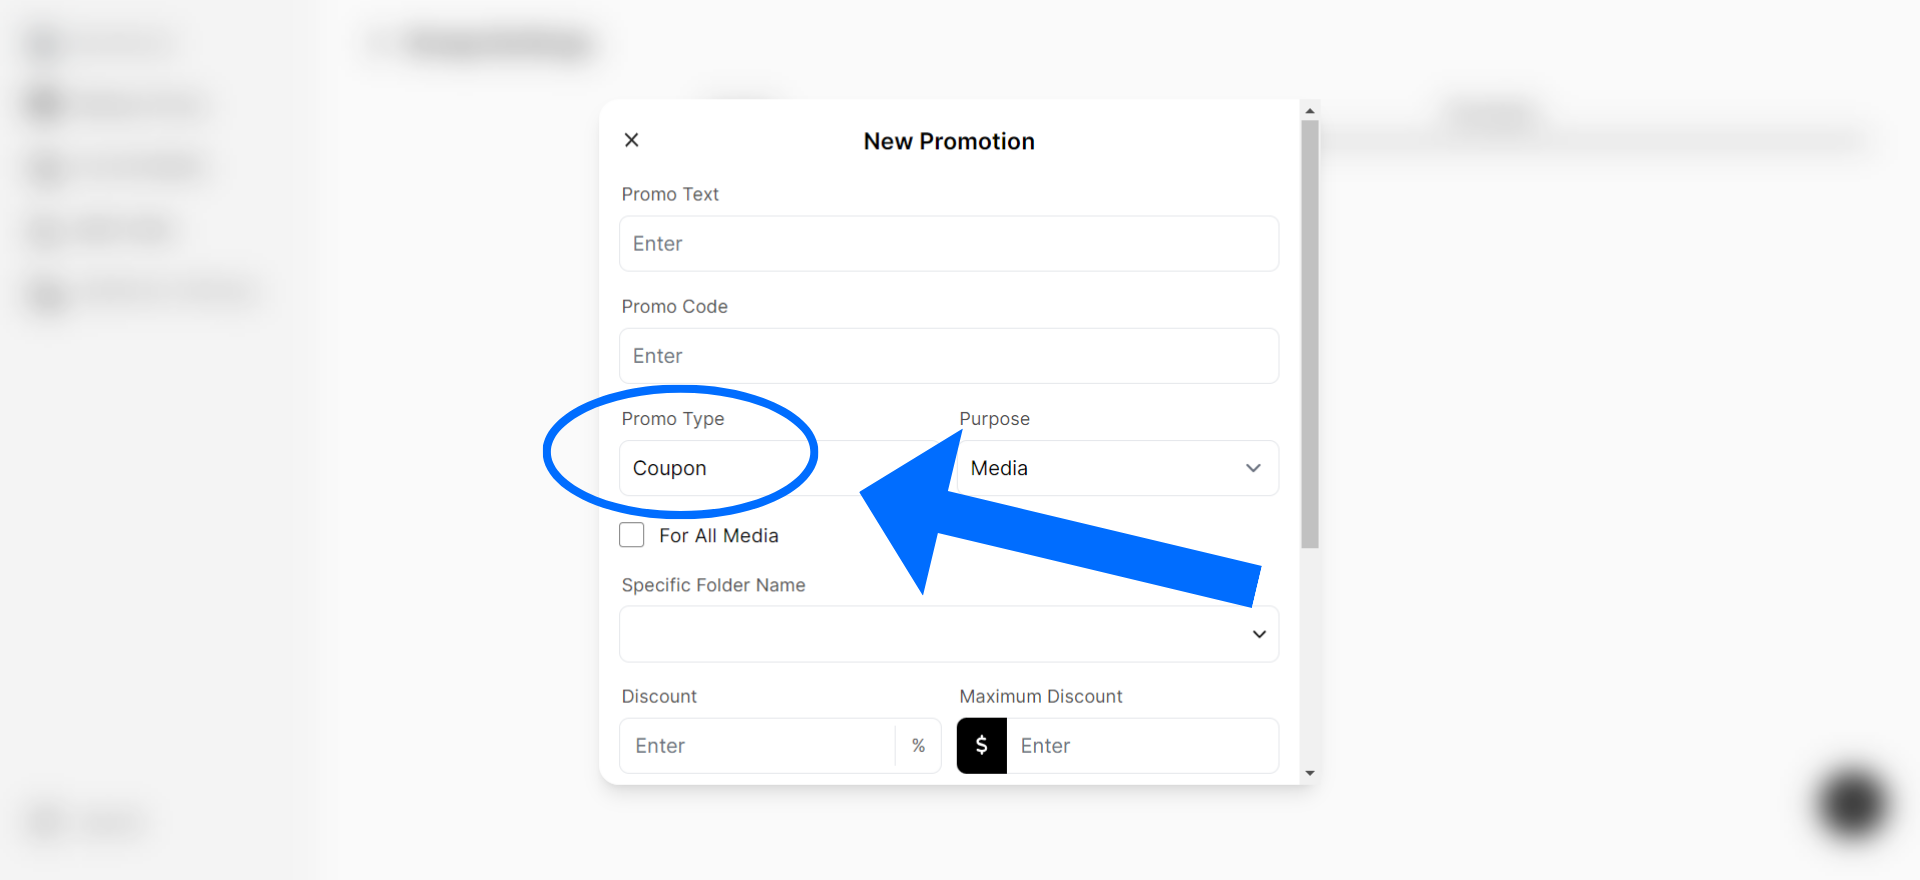
5. Customize however you want by choosing if it’s for a subscription, one media folder, or all media folders. Leave the date range and availability blank if you want them to be unlimited.
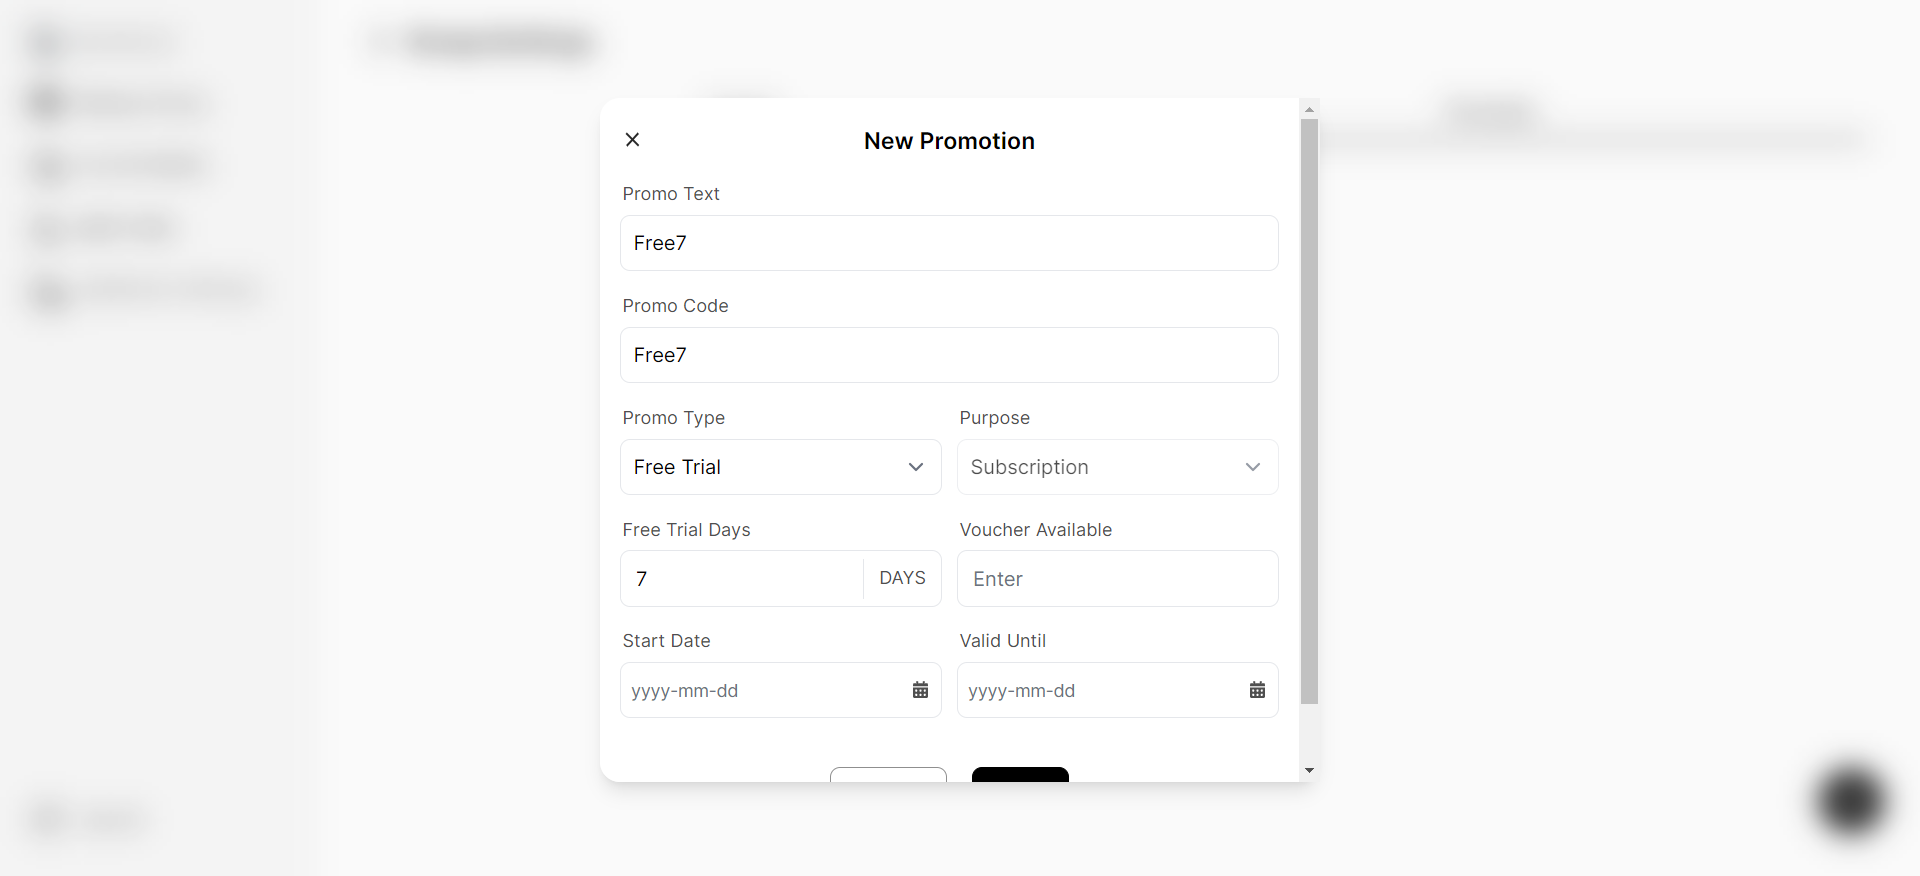
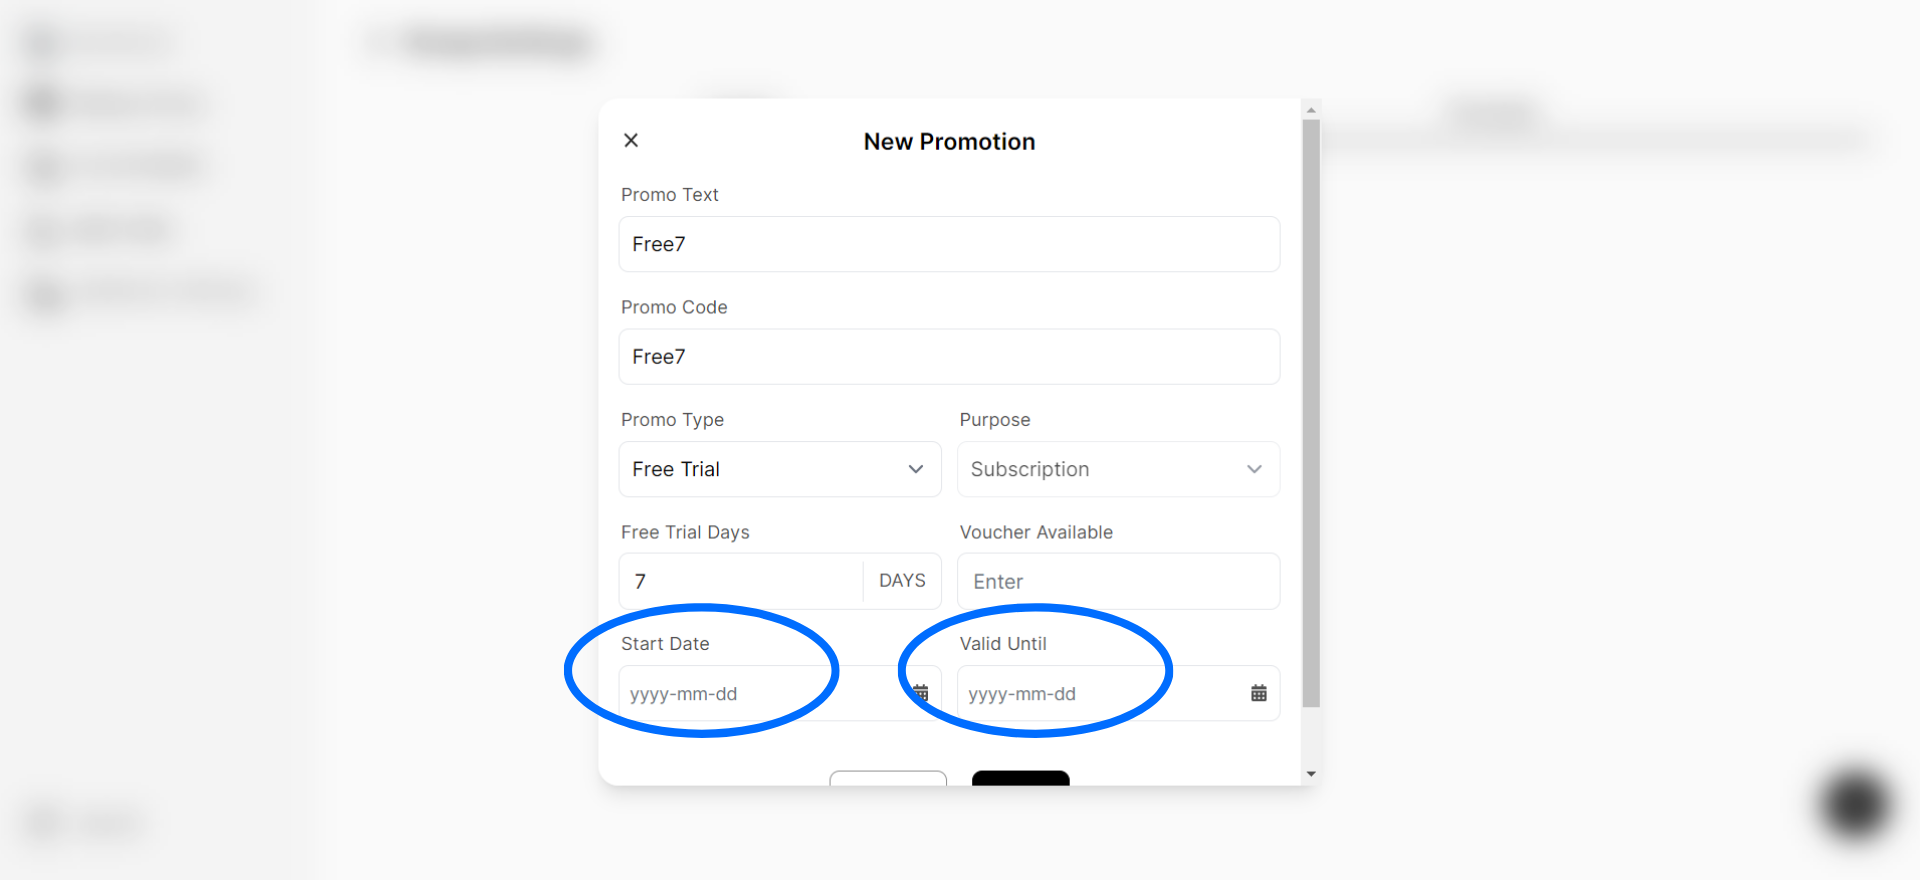
You have the option to offer Free Trials for any subscription (and for any amount of time). Just click the “Settings” gear, and click the tab in the top right that says “Promotion”. Then click the “+” black circle in the bottom right and select “Free Trial” under the section “Promo Type”. You can customize the Free Trial however you want.
1. Click the “Settings” gear
2. Click “Promotion” in the top right
3. Click the “+”
4. Select “Free Trial” under Promo Type
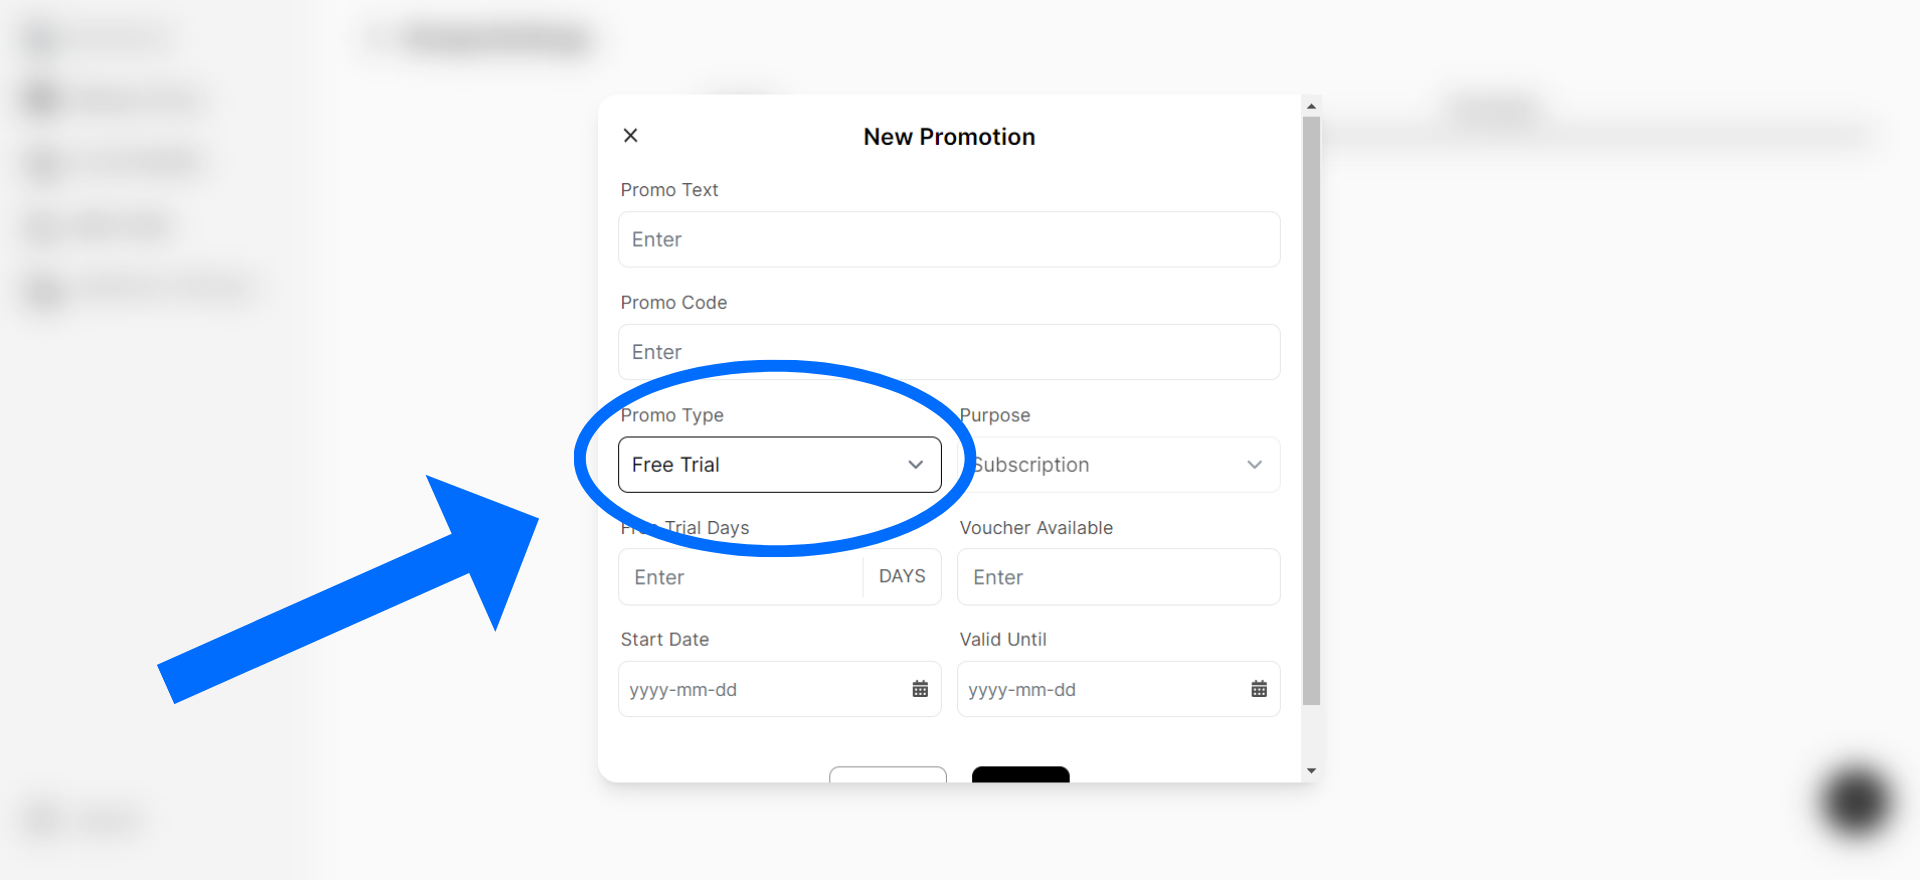
5. Customize however you want (leave “Voucher Available” or “Date Range” blank to make it unlimited)